Mrbarry
-
Posts
345 -
Joined
-
Last visited
-
Days Won
10
Content Type
Profiles
Forums
Events
Store
Community Map
Everything posted by Mrbarry
-
Don ‘t fit the big un. The steel one is a damper and is there to balance the crank.
-
It’s not far from me. I’m also busy 4th and 24th. Not with Kerry however I may add
-
Ok wheel off, couldn’t find anything obvious but gave everything a nip up. It seems very basic and simple so not sure why I was told there was a ‘fix’ for something. anyway, turns out the main 32mm Wheel bearing But had come half a turn loose. Gave that a pull up and dimpled the nut properly. Checked the other side and all is well again. 20 minute drive later I’m happy it will be my ride to work tomorrow
-
Yep that’s the crux of it oil seal on order. off to take the wheel off in a minute. Ive just got in from work.
-
Never ending these kit car problems huh? I had an oil leak last week from the CAS sensor but that was a £2.55 fix that took 5 minutes. This week my rear differential is leaking My wife tried to race me off the lights in a 2L Mk4 MX5 on our way home from my mums, she very very much lost lol. But I heard a noise from the rear and on checking the rear passenger wheel is like a loose tooth. Apparently this is a common Mazda based zero issue.? Im happy enough to bang new oil seals in the diff that’s easy, but without removing the rear wheel I’m unsure of the issue there. I’m told there is a fix for the problem but can’t for the life of me remember who told me, but it was someone on here. Any help appreciated. Just as I thought my car was all sorted too. A bit of remapping has transformed her this week. Now I have mechanical gremlins.
-
2p/L was purely illustrative but yeah. You can find the number of litres sold per year from the web easily and I’m sure it wouldnt be hard to find the number of cars and total duty paid. Might have a google later out of interest.
-
Thought I would add some updates to this. I have put off making any changes but have been messing for a few days now. I downloaded the manual for the K6 ECU, it’s a bit long winded in places but very easy to follow. I’ve learned loads about the ECU and have to say I’m impressed with it on paper. As for start up Enrichment, I looked at their suggested numbers and was sure my start up was too lean, I have added masses of fuel at first, second, third, fifth and tenth cranking cycles, I abandoned the standard 1,2,3,50,100 resolution, who holds the key and cranks for 100 cycles? I was able to map it at 20 degrees C because that was my current load site as the engine was at 19 degrees. I warmed it to 30 and did it again, then 40, 50 and kept adding fuel at each site, results getting better and better. As soon as she fires she runs a dream. The biggest improvement came from increasing the initial injector prime values, these where all extremely low. Now it’s very close to how I want it. I still get the occasional spit from the throttle bodies when starting and that indicates either weak mixture or cross firing of the plugs due to poor timing or HT leads shorting under load. I have new leads and plugs to fit tomorrow and try again. I am confident it’s not a timing issue because she runs sweet once started. I’ll be running the engine in the dark later, hood off, to look for cross firing due to HT lead break down. Then it’s a bit more tweaking to the fuel enrichment until I’m happy. The initial injector prime is going to get more attention first, that’s what gets the engine firing early in the cranking cycles according to the manual. I will add more info once I’ve got there. Might help someone else.
-
It’s time they abolished it. Add two pence per L on fuel and it’s fair. More miles, more fuel, more tax paid. No one can dodge it. No admin costs. No need to check if you have it. No need to SORN. No need to have different bands for gas guzzlers they will use more fuel thus pay more tax. I just don’t see the problem.
-
Agreed Nelmo. It’s still a bad show for £600 worth of gauges tho. But I agree repeatability is the main thing. With my work around I have got it close tho.
-
Thanks that’s great. I have done a couple of hours of googling and couldn’t find the drawing. I think THAT is also very poor. I did manage to find dozens of forums where people had the same problem, or where they read low or just don’t work. I also found from past experience that my fuel gauge was wrongly programmed, at least they agreed I could send it back to have the correct software installed. It seems all of their gauges are the same internally and simply have different software installed, it’s common for them to put the wrong software in. That’s very VERY poor for even a small business let alone a so called reputable one. As for returning the temp gauge to be calibrated, From the forums I found even after they had been recalibrated they still generally read well out.
-
Does anyone have the wiring colours for a Smiths flight water gauge? I’ve searched the web and can’t find them. My water temp has always seemed to get high in traffic so I had a play today. I plugged the laptop in and it seems my ECU and flight gauge are 18-19 degrees different right thru the range. I used a IR temp reading from the water pipe off the water pump (the feed to the senders) and the ECU reads the same as the IR reading to within 1 degree from 38-90 degrees. I have double checked it with a K-type thermocouple at rest and it also agrees with the ECU. Next step was to take resistance readings from the sender but it’s log not linear so I can’t add a simple resistor in series. I did some playing and testing and finally found that if I use a diode in series dropping the voltage by 0.6v across the range and it is now reading within 4 degrees of the ECU from 50-90 degrees. I’m happy with that. But I have been working on the sender and I want to put the diode behind the clocks, the wire colours are totally different hence the need for a diagram.
-
Have you ever taped thread or wool to each of your vents, or the odd one, and watched the air flow at different speeds? I have taped some yellow thread to a few places on the zero and been for a drive. You get some strange results in some places. From the front of the nose cone is really weird how it changes direction on and off. Would love to see how the louvres move air around.
-
Yeah I thought that to be honest. I could have a row or standard louvres or bolt on a plate off eBay for a fiver. But I don’t want that I want something I can look and feel I have done my best, or paid for it at least Nothing wrong with standard louvres on the top of the bonnet but for my taste those would be better on the side. Again that depends on the individual car to be fair.
-
For the ones I want on the side. The others will be additional cost. I don’t much care what it costs if the quality is good tho. I’d rather pay more and be happy with the workmanship. Im sure lots of people could do as good a job, however I also know some people have a very low bar Standard louvres are not so bad lots of people have tooling for those. But the ones on the side are less common and I’m a huge stickler for level, straight and true. If one is out by 1mm I’ll go mental.
-
Located a guy by rockingham raceway who said £80. Fair price I thought.
-
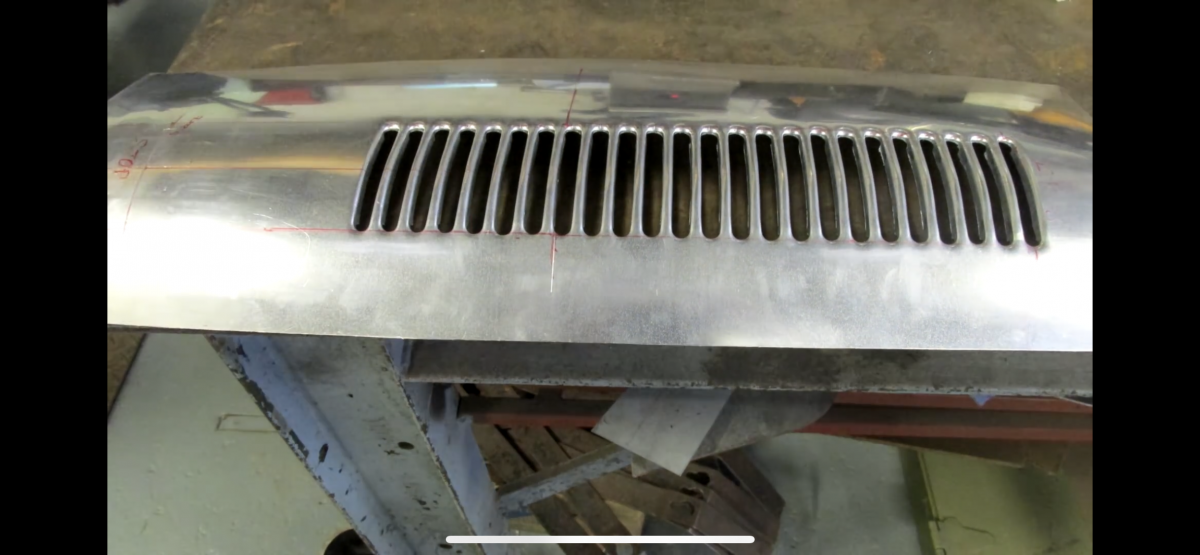
This style vents on the side of the bonnet btw

-
This is how I want the vents punching in. These black stickers are a bit wobbly and not identical sizes etc but they give a good idea of what I want to do. The nose cone will have a large exit vent at the rear and a channeled radiator duct to get hot air away. Will seal the rad to the nose cone obvs.
-
Look good those. I want those style vents on my bonnet top, but the shark gill vents on the drivers side feeding my ITBs via a cowling to make sure I get clean cool air in. Let the noise out too . Plan is to use hollow boot lid rubber on the cowling to seal air tight to the inside of the bonnet and draw external air only. I’m fitting a triple tow of those vents at the front edge of the bonnet and carrying the outer two rows down the full length of the bonnet. The triple rows will have a 9 inch Spal fan Fed via a stat blowing air up out of the engine bay when it’s hot in there.
-
I want some custom louvres punching into my bonnet, first some rear facing ones to cool the engine bay, but more importantly some rolled louvres to let cold air into the ITBs. Has anyone had any done or know of any reputable places, ideally midlands based. I intend making a duct from the rear plate of the sausage filter on the Jenvey ITBs to seal to the side of the hood, holes in the hood will then give a clean cold air feed. I did think of putting the foam sausage filter on the outside but after a test fit I decided it looked like *bleep* and a better solution was needed
-
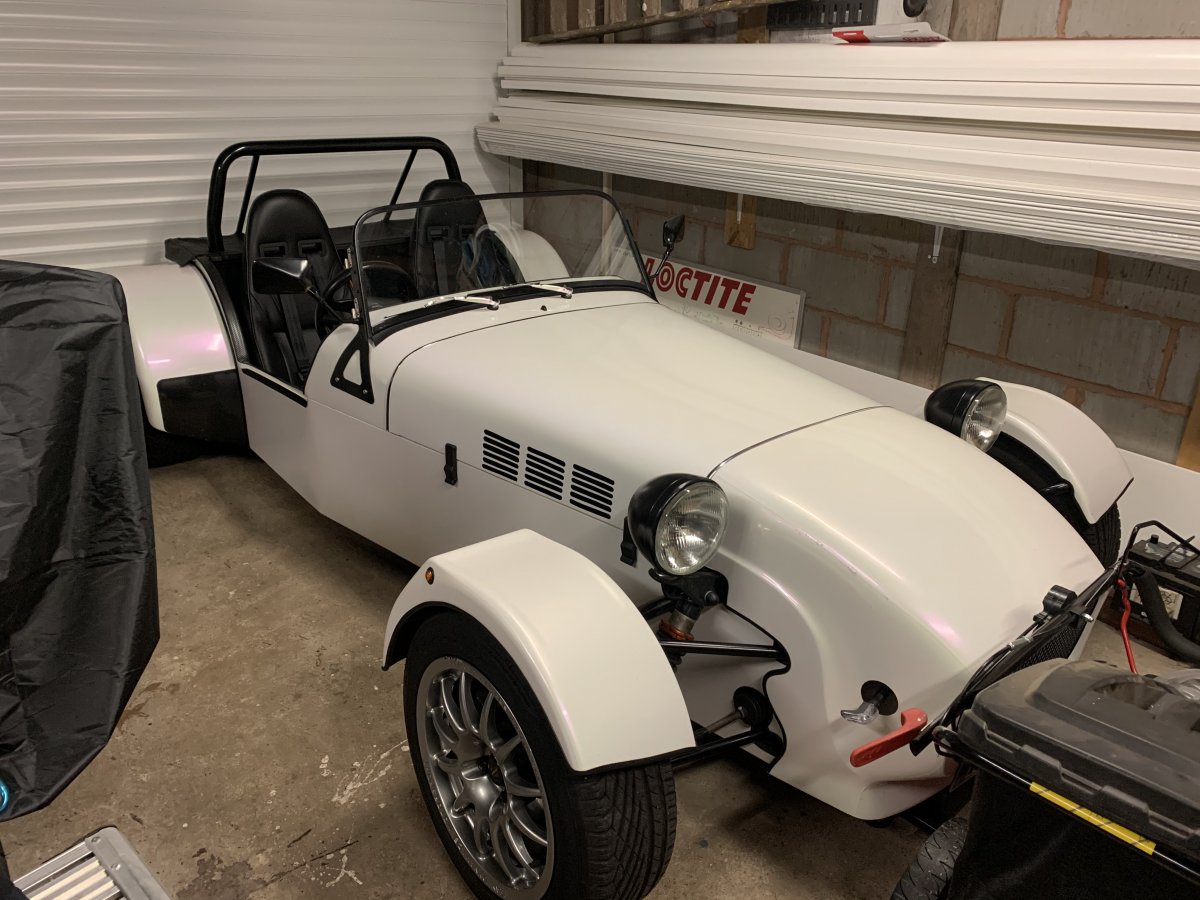
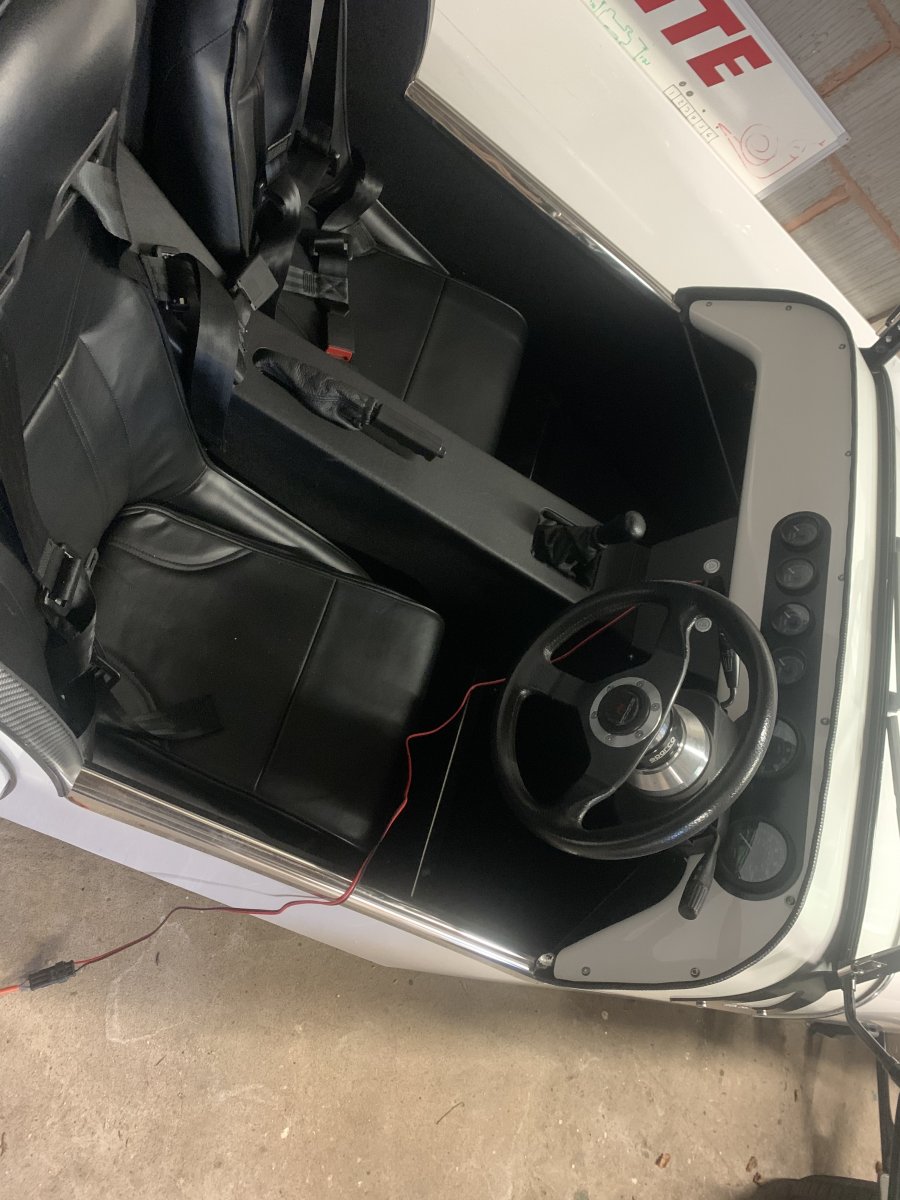
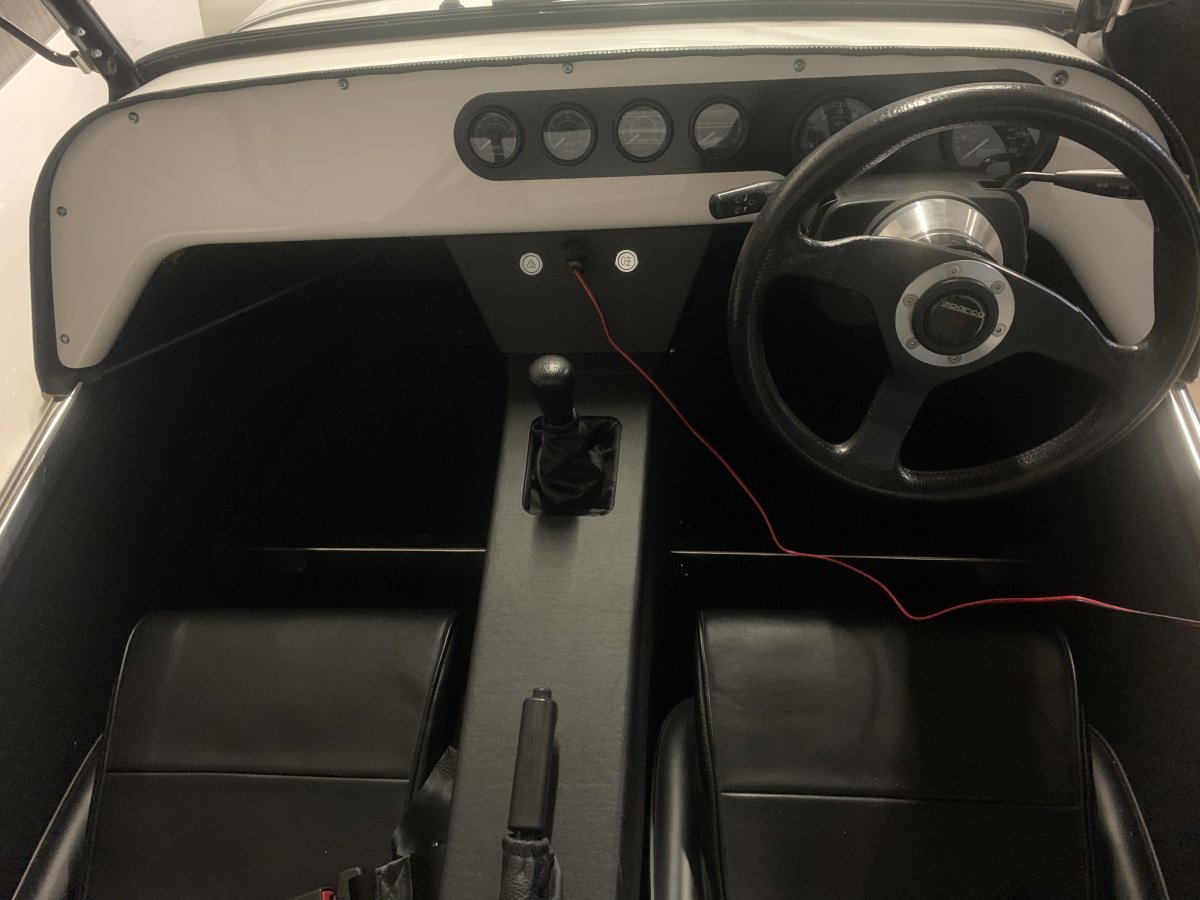
I have done a fair bit of work to the zero lately, added strength to the peddle box surround to make sure the throttle cable doesn’t flex it, fitted a oil catch can, re-routed some wiring and spotted an oil leak whilst I was doing it so fixed that (new CAS seal), adjusted the aux belt so it doesn’t scream on cold start, re trim of the interior and decided to make all new stronger tins whilst I was on, re packed the exhaust, did a compression check and got 160, 163, 161, 161 so very happy with that, re gapped the plugs whilst they was out from 0.75mm to 1mm and cold start is now much better. Next on my list is to fit a header tank and swirl pot for the coolant system on the bulk head. The idea being it will be at the highest point to remove any air bubbles via the swirl pot and push them into a built in header tank. The filler cap will be integrated into the swirl pot to make it easier to access and fill/check. I have a few things I’d like to answer first tho. does anyone have a good diagram of coolant flow for a 1800cc Mazda NA engine? I am undecided weather to leave the heater tails looped together as they are or block them off. In reality when a heater was fitted in the factory car you turn the heater off via a slider knob thus blocking these pipes. This will force more flow thru the front main radiator. With no heater matrix fitted you won’t be removing heat when the water flows thru that pipe but flow thru the main rad still reduces. Thoughts???
-
I have a dilemma at the moment about keeping or selling the zero. I just can’t decide. I’ll cover that in another thread. But for now let’s talk turbos. I have a Mazda based GT zero and have long thought it needs a bit more power . 240bhp would be lovely. I need to plan a way to get the manifold past the triangulation bar in the engine bay. Has anyone else done this yet? Any pictures etc? I am away from the car for the moment and can’t find any pictures of the engine bay as standard, I would appreciate a few pictures of a Mazda engine bay with standard set up from different angles should anyone have any to hand. tia.
-
I’m a spark but at the moment I don’t have time to fart. If you can wait a few weeks I’m happy to help out.
-
You have to make that choice with the master cylinder bore diameter. Larger bore = more per pressure but less peddle travel. Smaller bore = less peddle pressure but more travel. I prefer a smaller diameter and a touch longer travel, I find on a car with no ABS or servo the travel is small anyway because it’s so direct. The brakes in my kit are quite good, I swapped for a smaller diameter master last year and it’s a big improvement on standard. It’s important to line the push rod and master cylinder accurately too, a straight push is much more efficient than if it’s at a bit of an angle because no energy is wasted in angular motion, and less in friction.
-
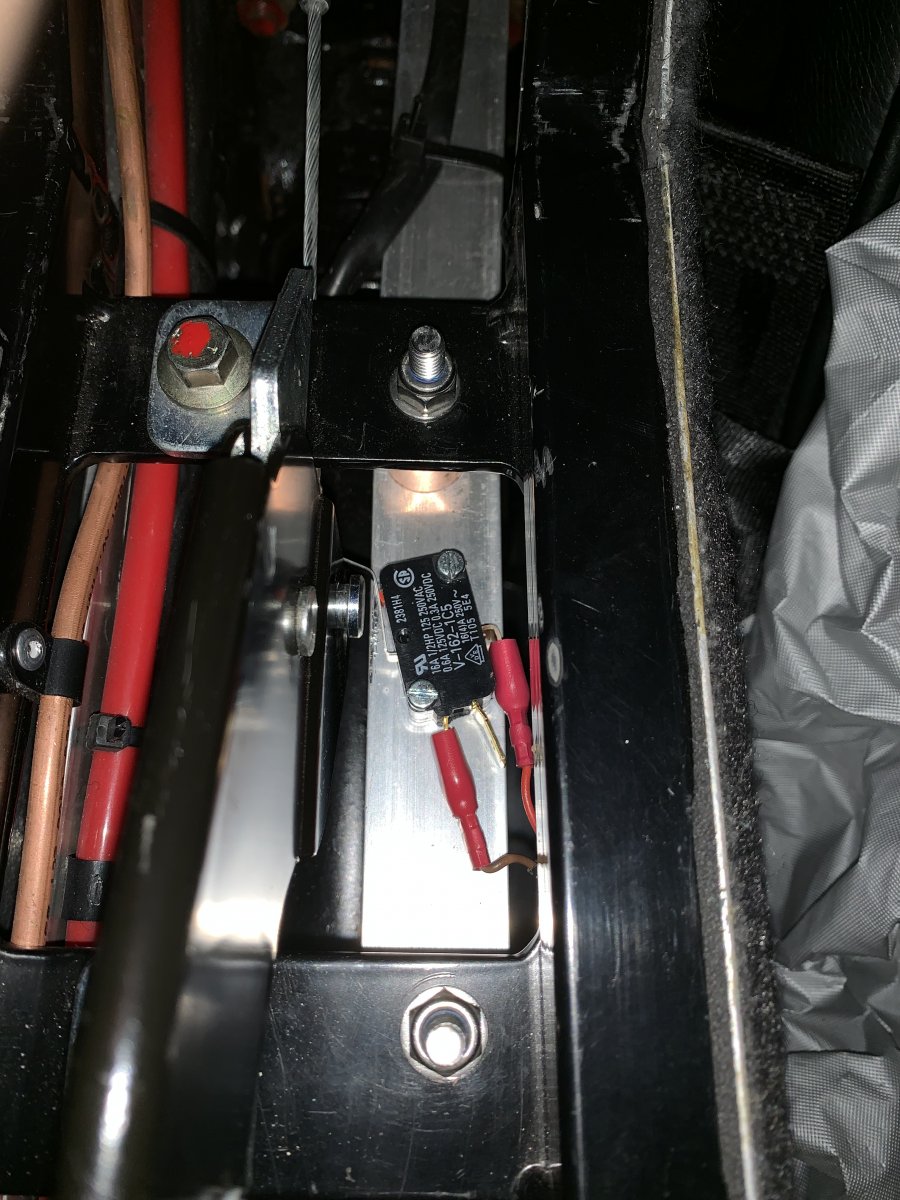
I used one from amazon and paid about £20 including a bear one too. i think it was from a Costa B. I made a new set of alloy covers for the tunnel and dash from 2.4mm thick alloy so it’s far stronger than normal and doesn’t bend when you lean on it. Then put countersunk pins from top and clamped the gators between the covers and a surround underneath. This leaves an extremely neat and tidy finish that is also strong and durable. I also remounted the handbrake switch when I was on, the normal location is terrible at best.
-
I constantly tax mine for one month at a time then sorn for a month or two. I’ve never had any issues. I do the same with my motorbikes.