


Jthorneuk
 RHOCaR Member
-
Posts
62 -
Joined
-
Last visited
-
Days Won
1
Content Type
Profiles
Forums
Events
Store
Community Map
Posts posted by Jthorneuk
-
-
-
Hi All,
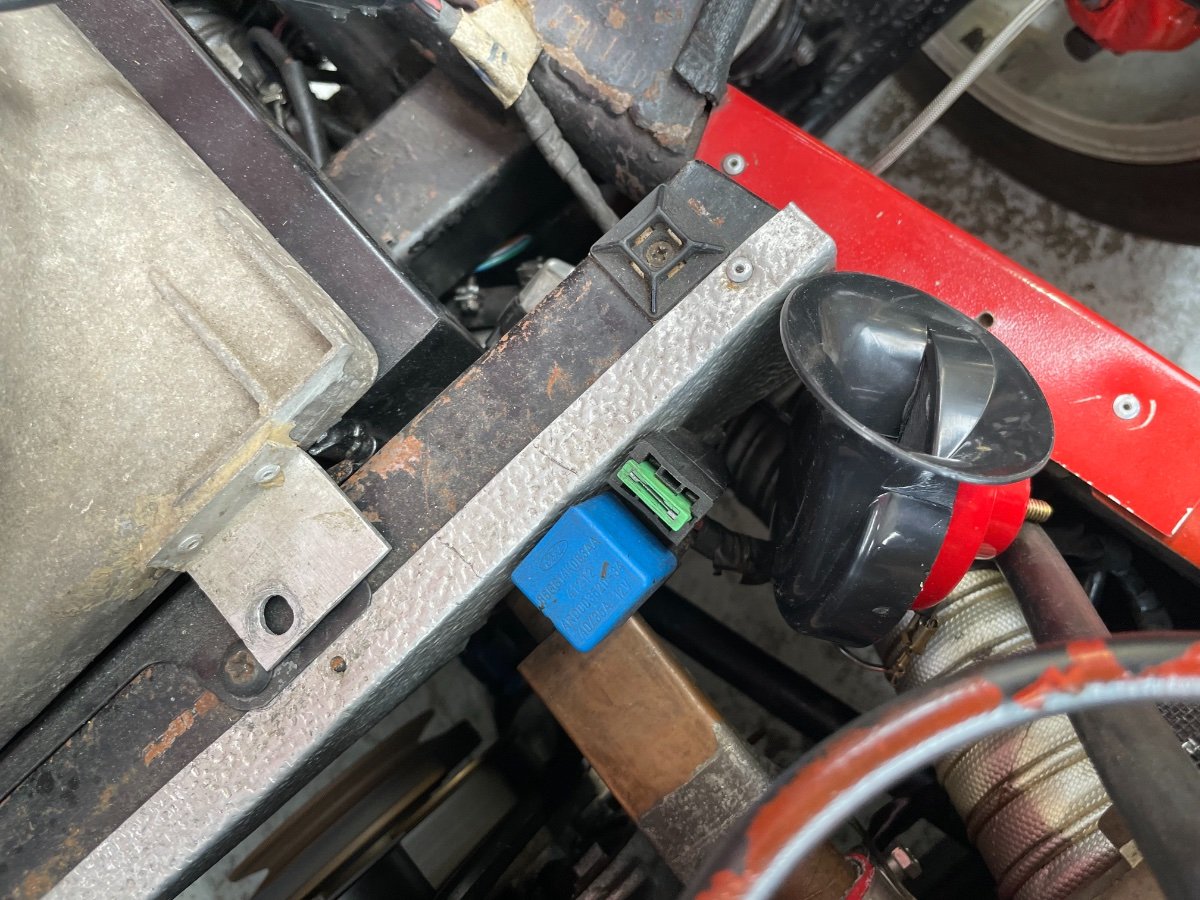
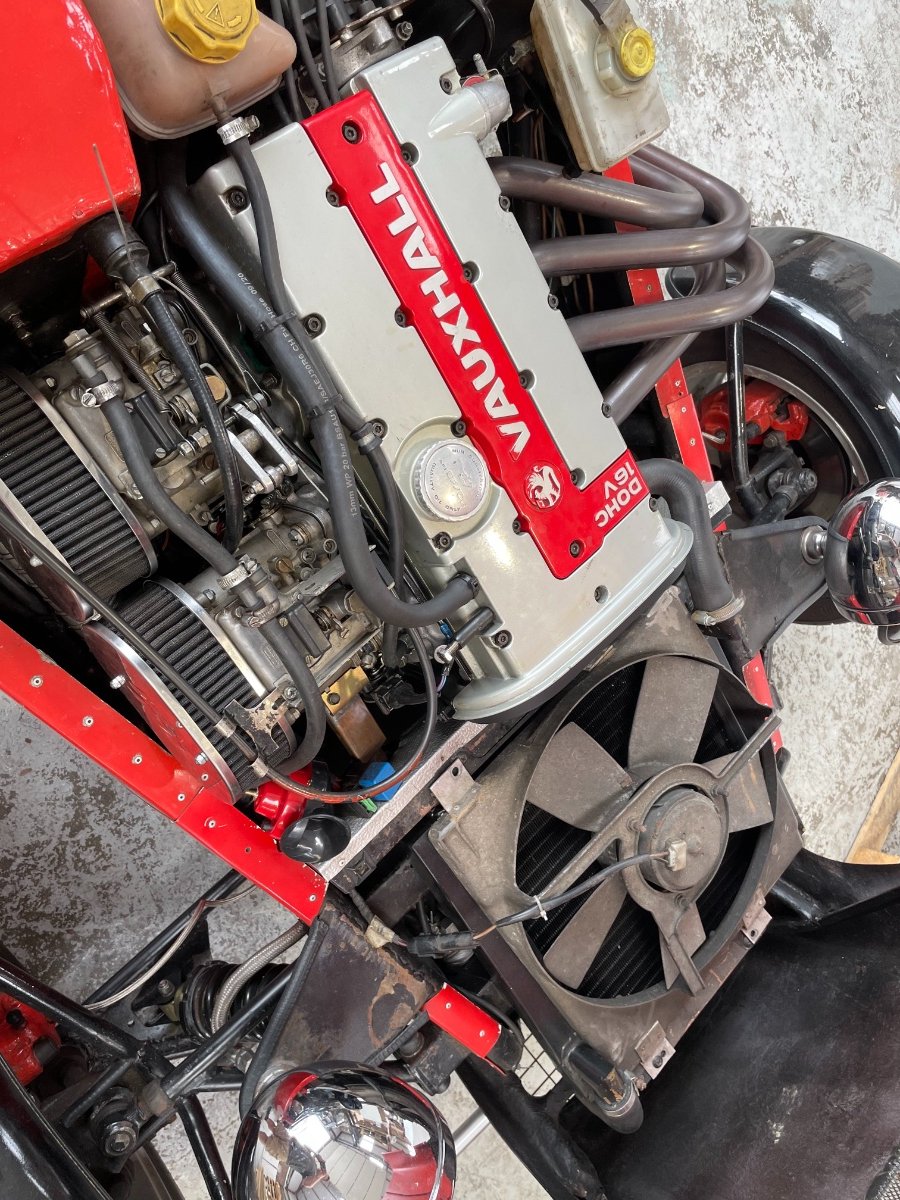
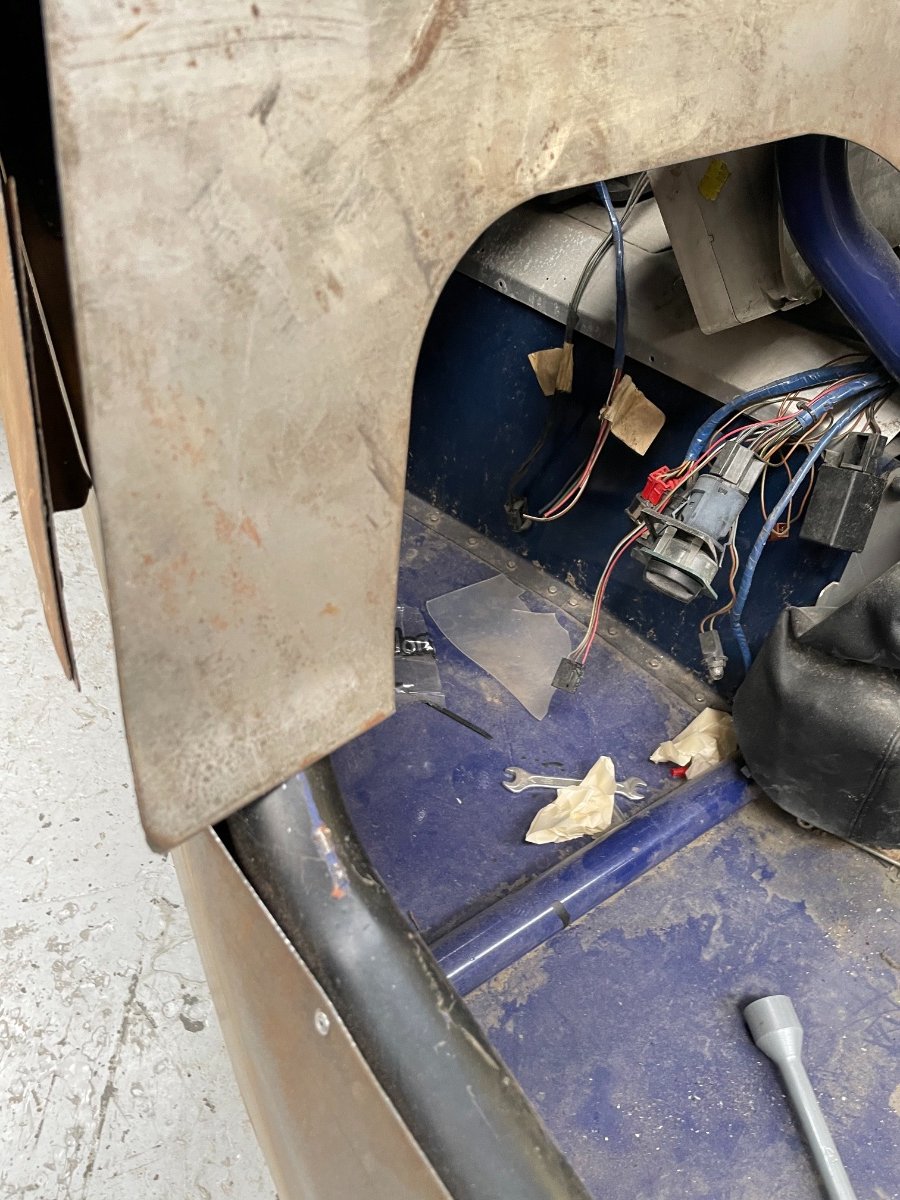
I have a 2.0 DOHC engine from a Calibra in my 2B, The problems started when the fan failed and the temp gage didnt work either so the car boiled over when being setup on a rolling road.
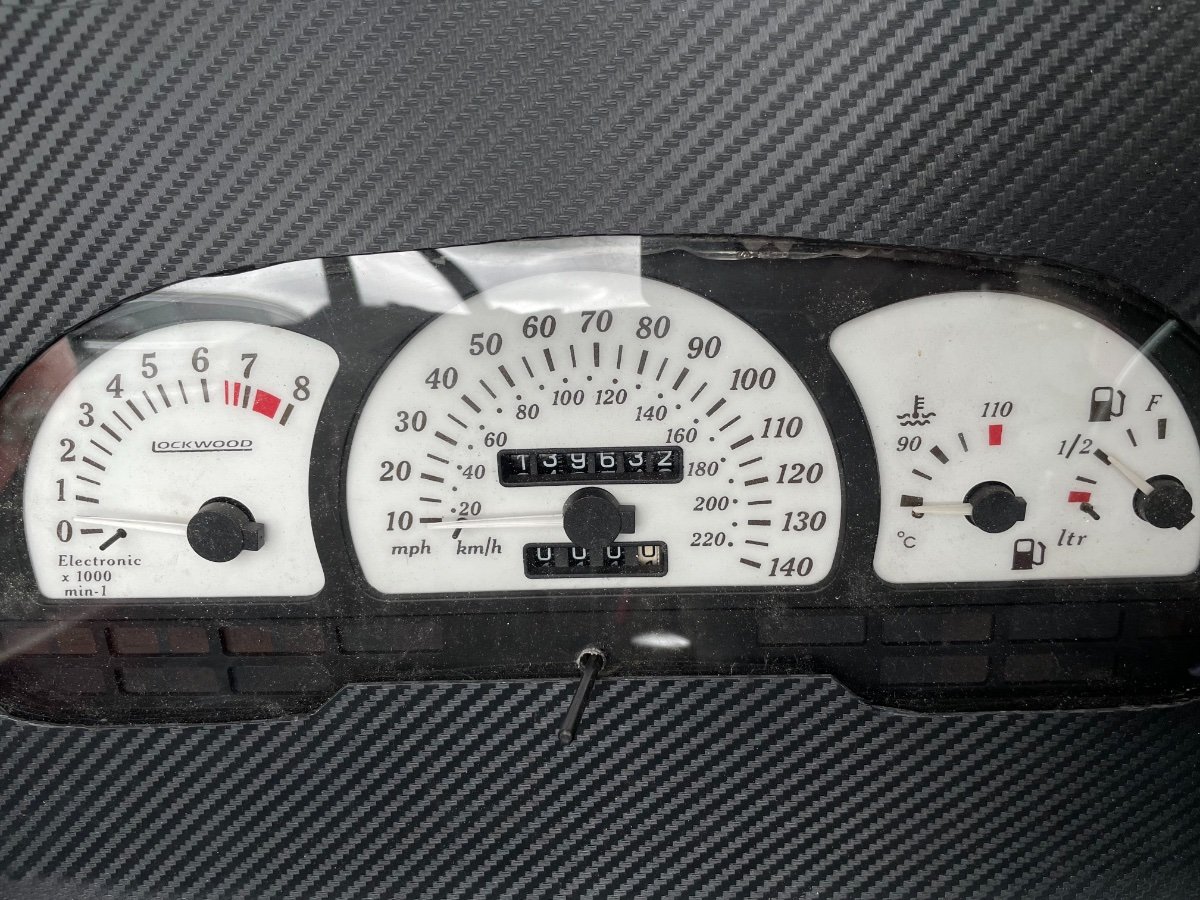
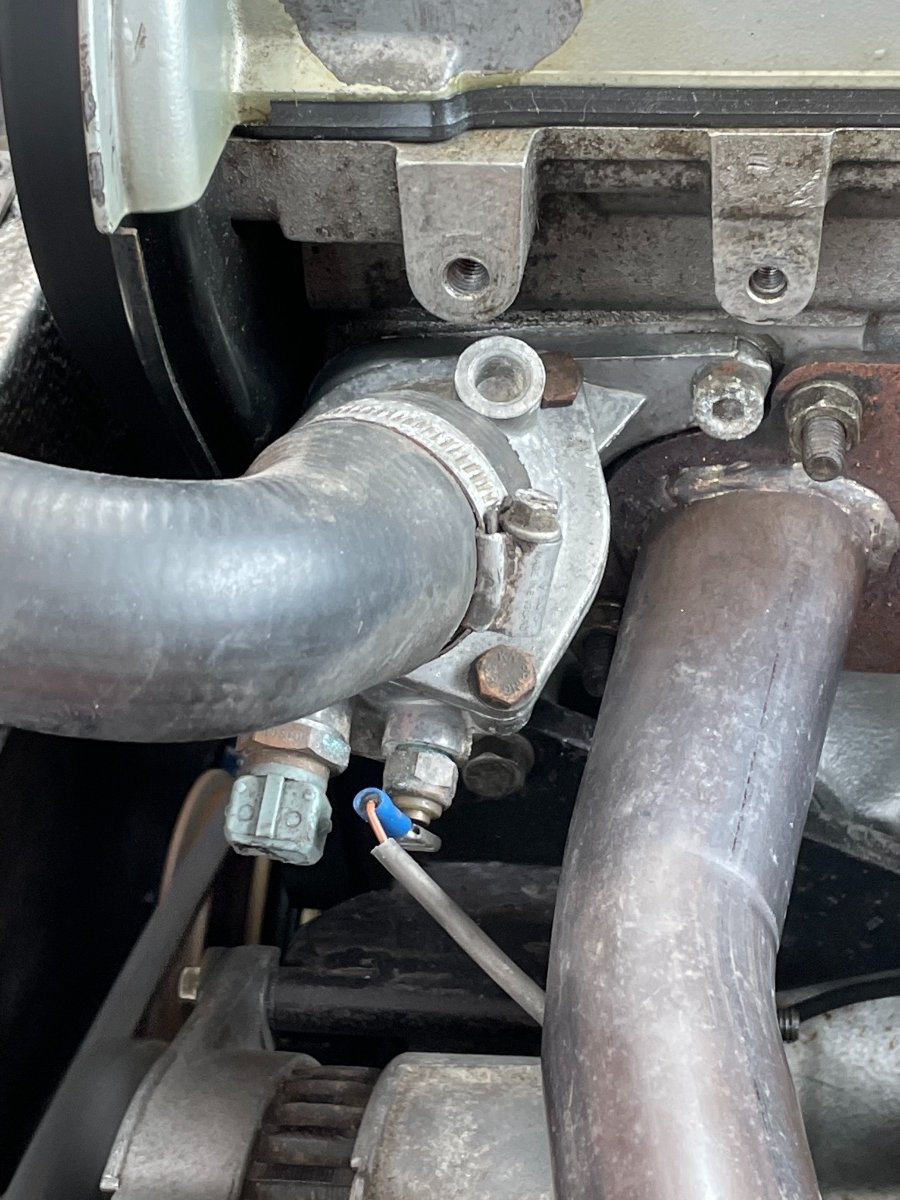
The dials themselves are from a Calibra and the speedo has stopped working as well as the temp gage. I figured its going to be the clocks so I have taken the clocks out and ran a electric screwdriver in the speedo and it moves so I think its the gearbox end thats faulty on that, I have also taken the single sensor wire off the temp sensor thats in the radiator hose and earthed it as this is meant to max out the temp gage but it didnt move, so I think that the gage itself is faulty.
The fan runs off a relay and it used to come on and off, but now it seems to have stopped working, but I cant figure out what would trigger the relay to turn the fan on and off, can it be this single wire that goes back to the dials? that somehow then triggers the relay at a set point? I didnt build the car so im working through somebody else's work. First I thought it was the dials, then the sensor now it could be both lol. I have also got an entire plug missing in the back of the dials but I think that could have been for extras from the original car.
I will attach pics of the setup, if any body has any pointers that would be great, I can get another set of clocks for about £50 if needed but im not sure its that and cant see how that triggers the fan relay.
-
I could mount the Sierra ones for the Iva but they can’t have 4 point harnesses, but there is no place to mount the shoulder seatbelt fixing as the car only has bolt points for the 4 point.
-
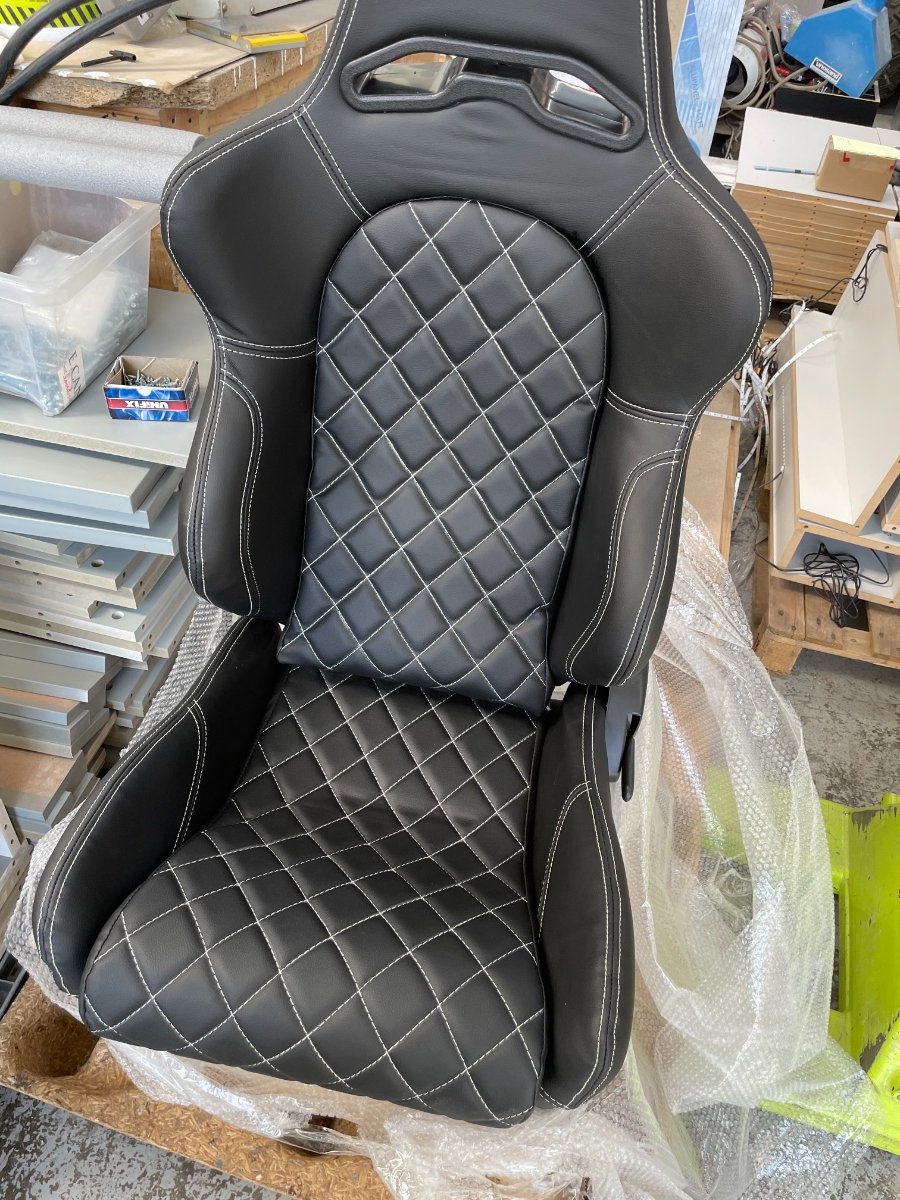
Just got myself some new seats, I plan on using 4 point harnesses. I posted in a Facebook group about them and somebody has commented that you can’t use 4 point harnesses with tilt back seats?
The car only has mountings for 4 point with no place to put a standard seatbelt, the original Sierra seats would have had a tilt back.
I can’t find anything that says about it, only that the tester will shake the seats to see they are mounted firmly and that the 4 point harness can’t fit more than 20’ from when it goes through the holes in the seat.
Has anybody any experience of this?

-
16 minutes ago, Bob Tucker said:
I dont know what section the IVA demands, but if as you say it has to be 19mm radius, doesnt it need to be 38mm diameter?
this is what im not sure about, but surly nobody puts a 38mm diameter round section on the bottom of their dash?
-
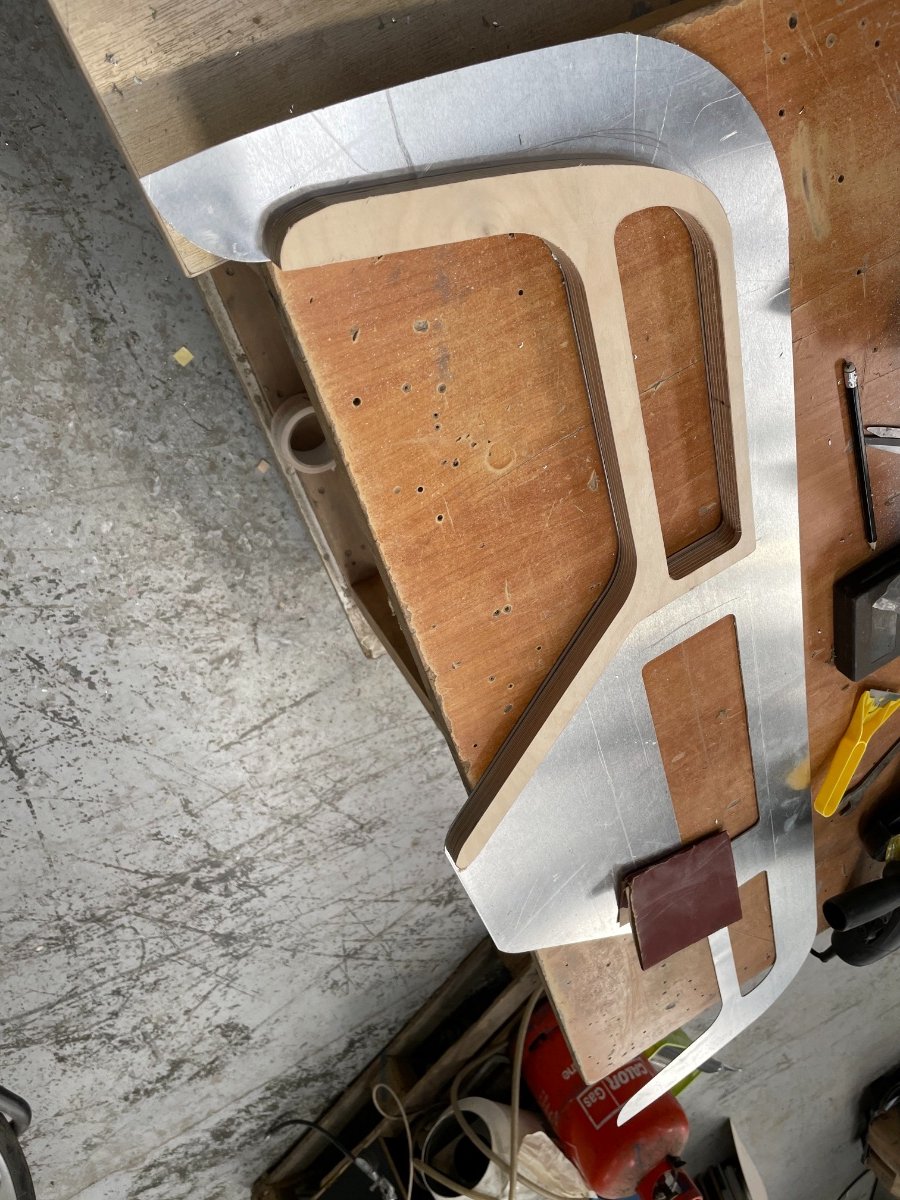
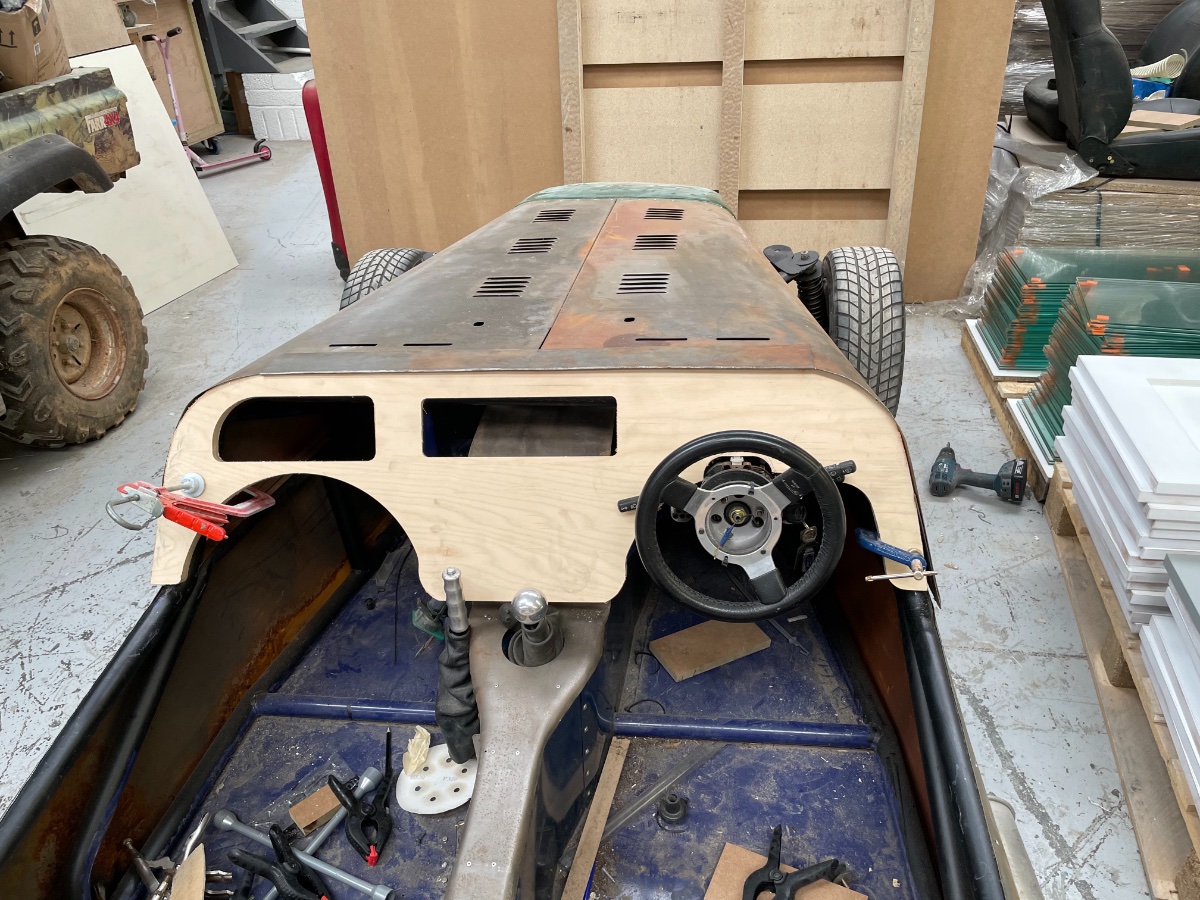
This is where I’m at right now. These wooden parts will be attached to the back making it stiffer but missing the chassis tubes so that it does not sit too far forward. Then a bunch of profiles glued and fixed together will form the thin dual glove boxes that couldn’t be any bigger due to the tube above the dash and having to mount the dash higher to fill the gap where the bonnet wouldn’t fit correctly.
getting there.. slowly lol
-
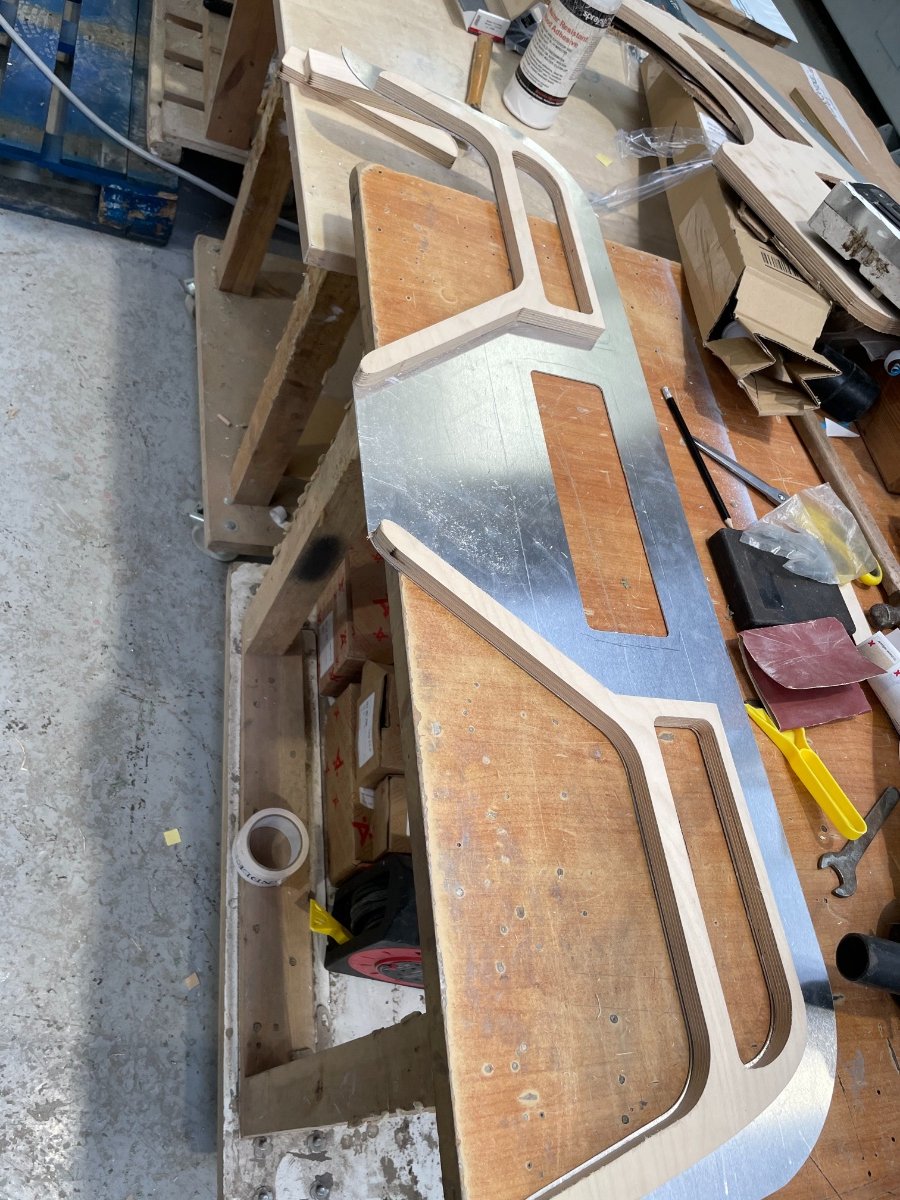
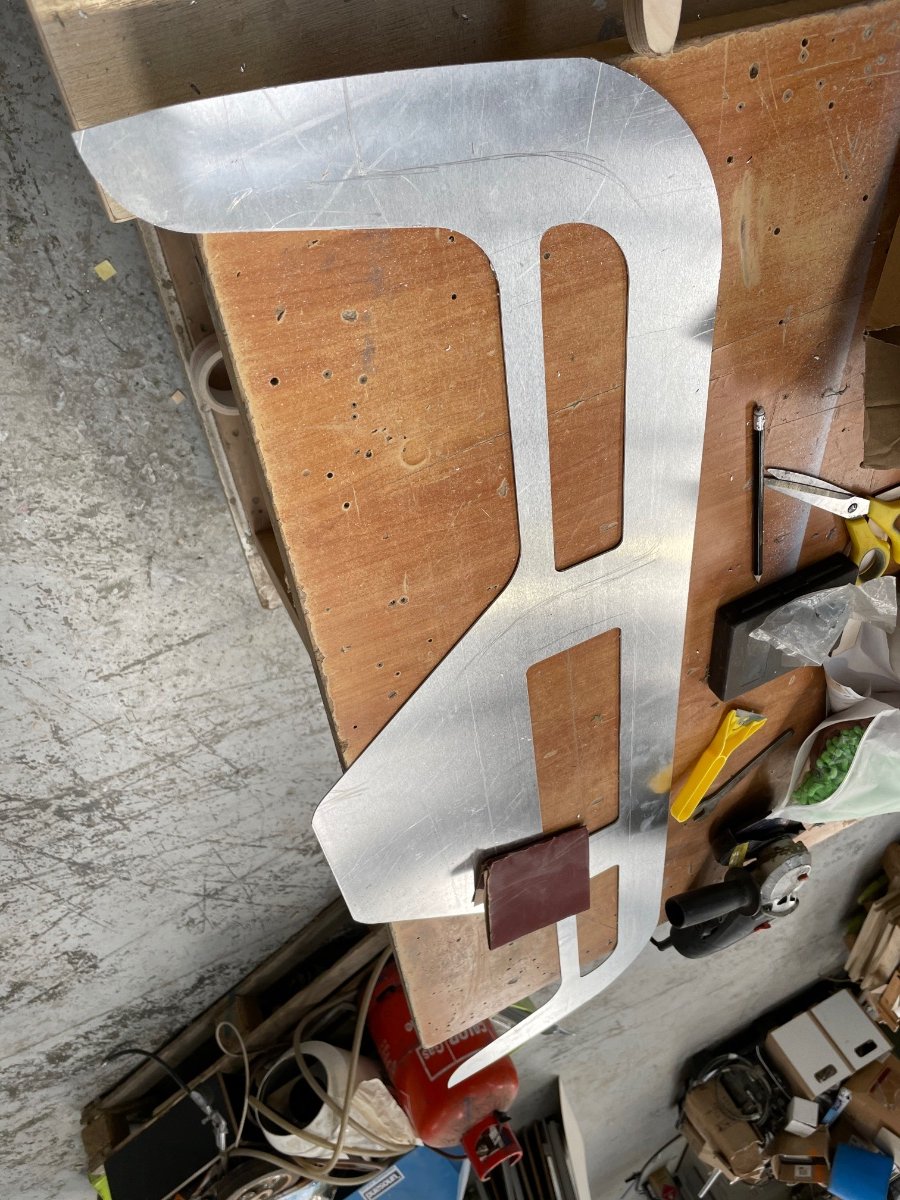
making progress on the dash and have now made it from 4mm alloy machined to shape.... I need to put a radius on the bottom edge as well as build in the two small glove boxes I have made..
My question is.. Im going to machine sections of the dash, ie the bottom edge, again from 18mm ply and then attach that to the back of the 4mm alloy to give the edge a total thickness of 22mm.. but it needs to be a radius of 19mm. So im assuming if i bull nose the bottom edge so that its a profile of a quarter circle... that will be correct?
-
20 minutes ago, agent_zed said:
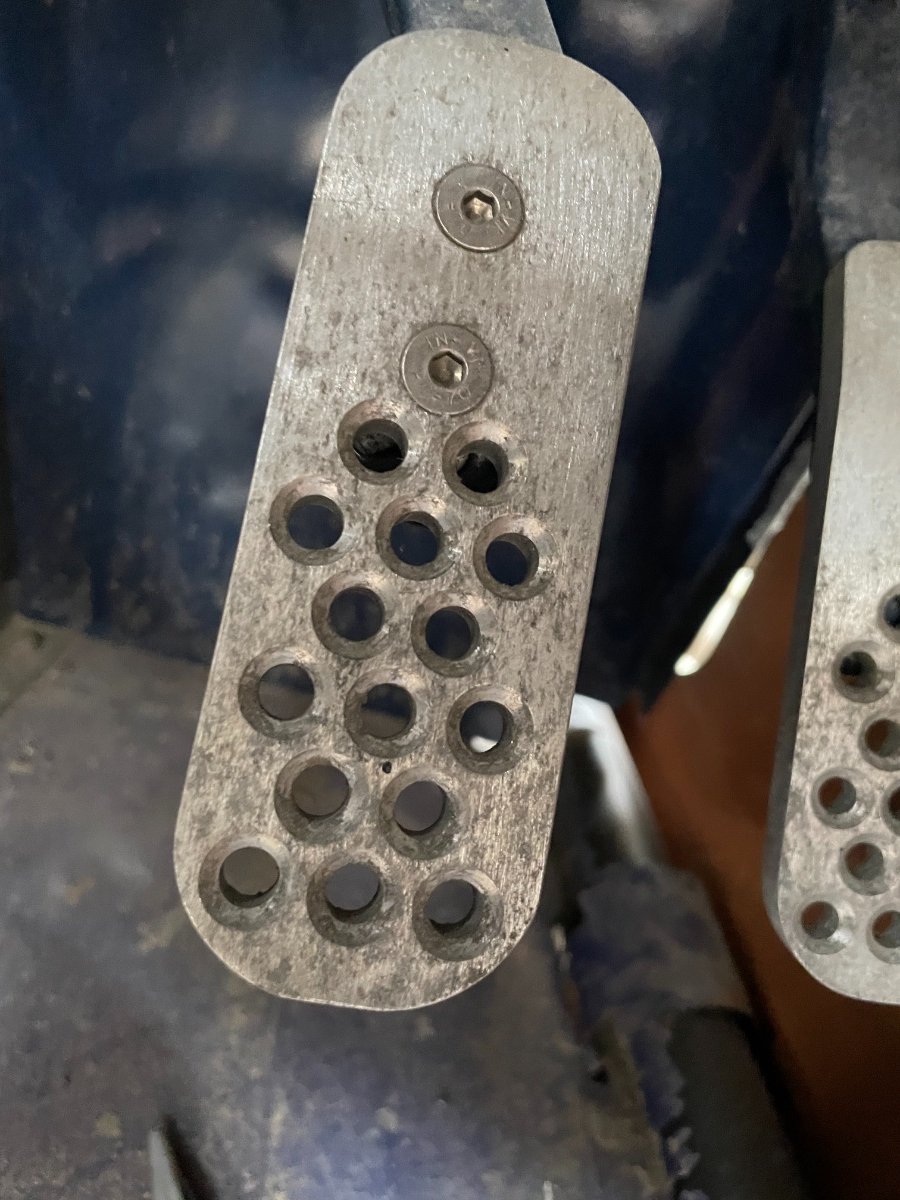
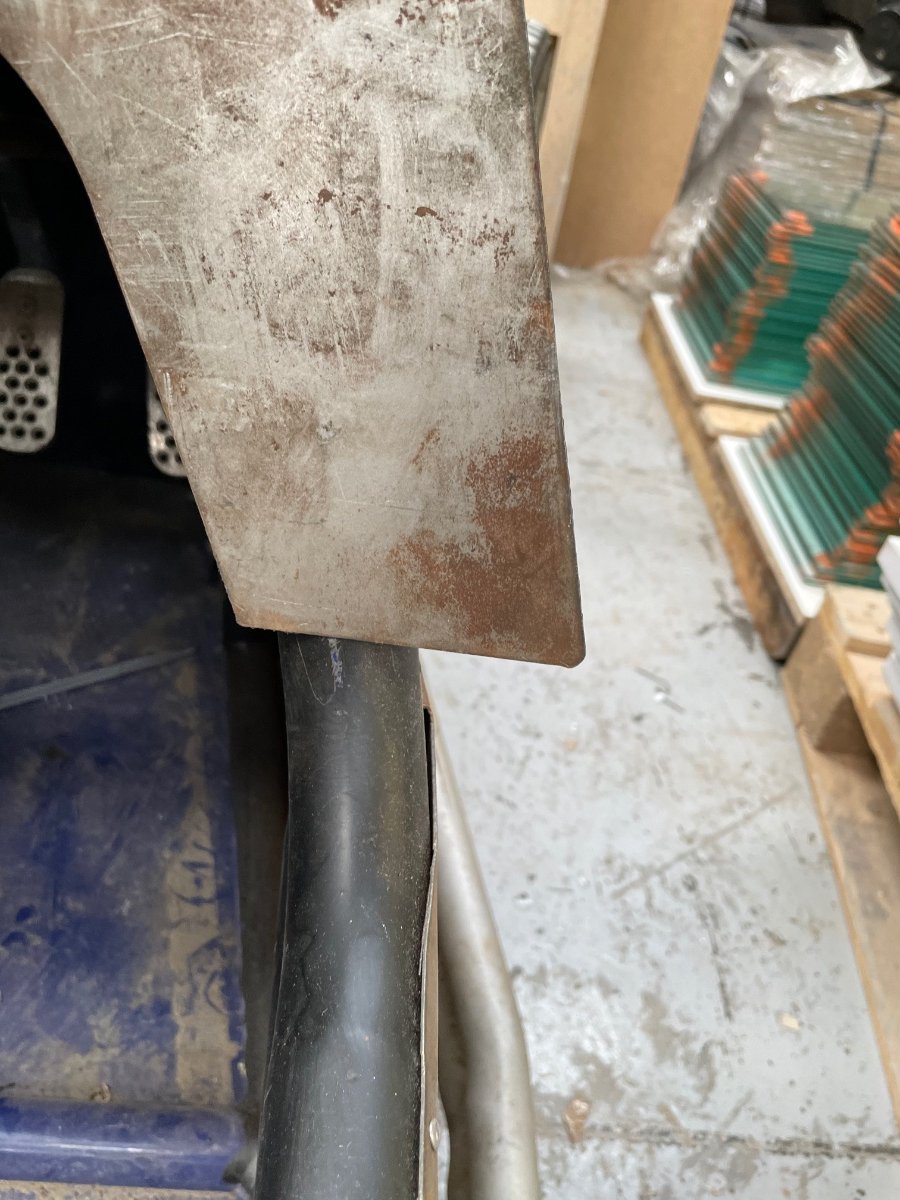
Looking at your pic i noticed something you may need to check for IVA. The covers on the pedals might fail. I have a feeling the brake pedal has to have a non-slip surface and that looks pretty smooth in the picture. would be worth checking the manual to be sure.
Its a bit of a weird one for MOT 1. Brakes - MOT inspection manual: cars and passenger vehicles - Guidance - GOV.UK (www.gov.uk) as
'A brake pedal without a rubber usually has grooves or raised sections to provide grip in wet conditions and should be rejected if it’s worn smooth. However, some vehicles may have been manufactured with a brake pedal which did not incorporate grooves or the fitting of an anti-slip material and these should not be rejected.'
Technically yours were manufactured with rubber covers and has been changed from the sierra setup so they might find fault with it. Might be safer to find a rubber type cover for IVA at least.
Yikes, didn’t even think of that. This is a closeup of the peddle, it does have holes drilled into it but not worth the oak of a fail to chance it. I’ll buy some more with rubber inserts. Or see if I can add rubber bungs into these holes.
-
 1
1
-
-
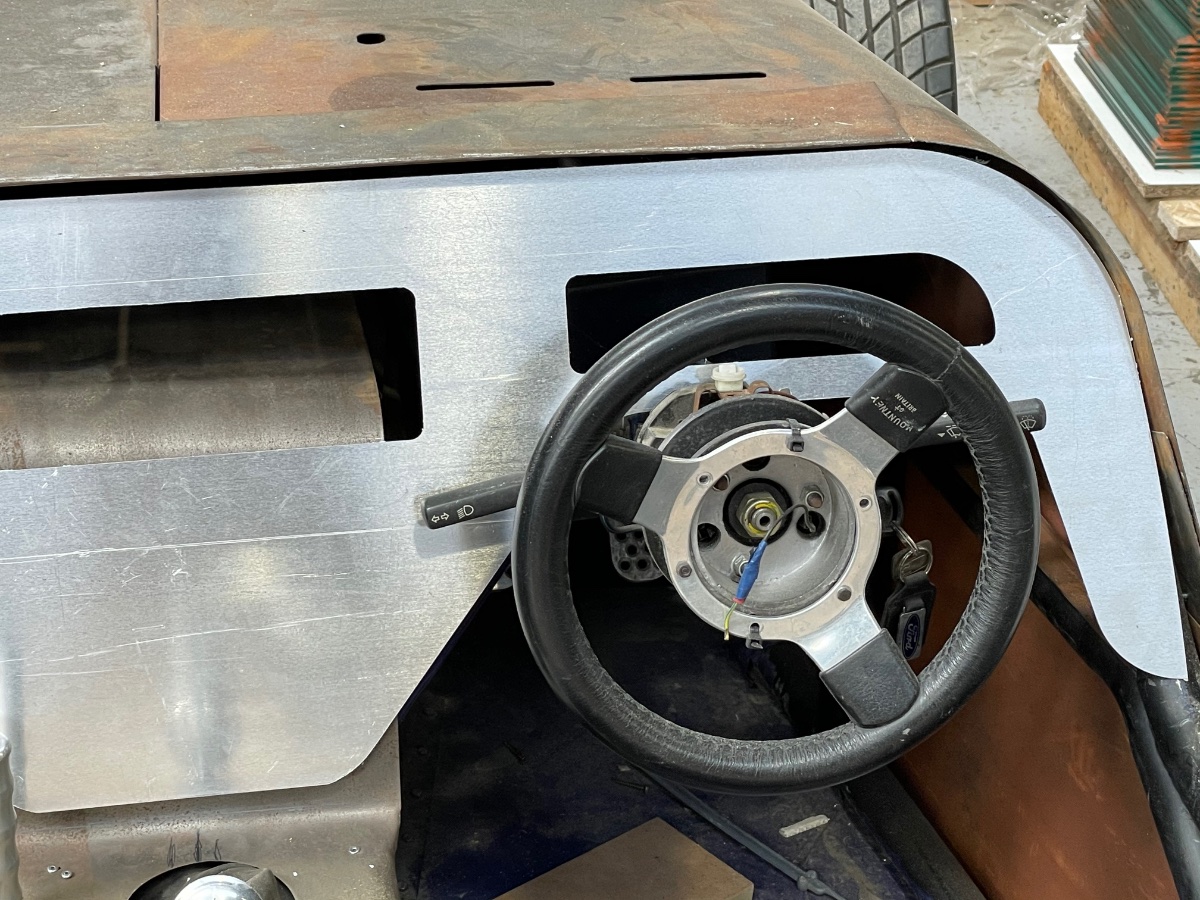
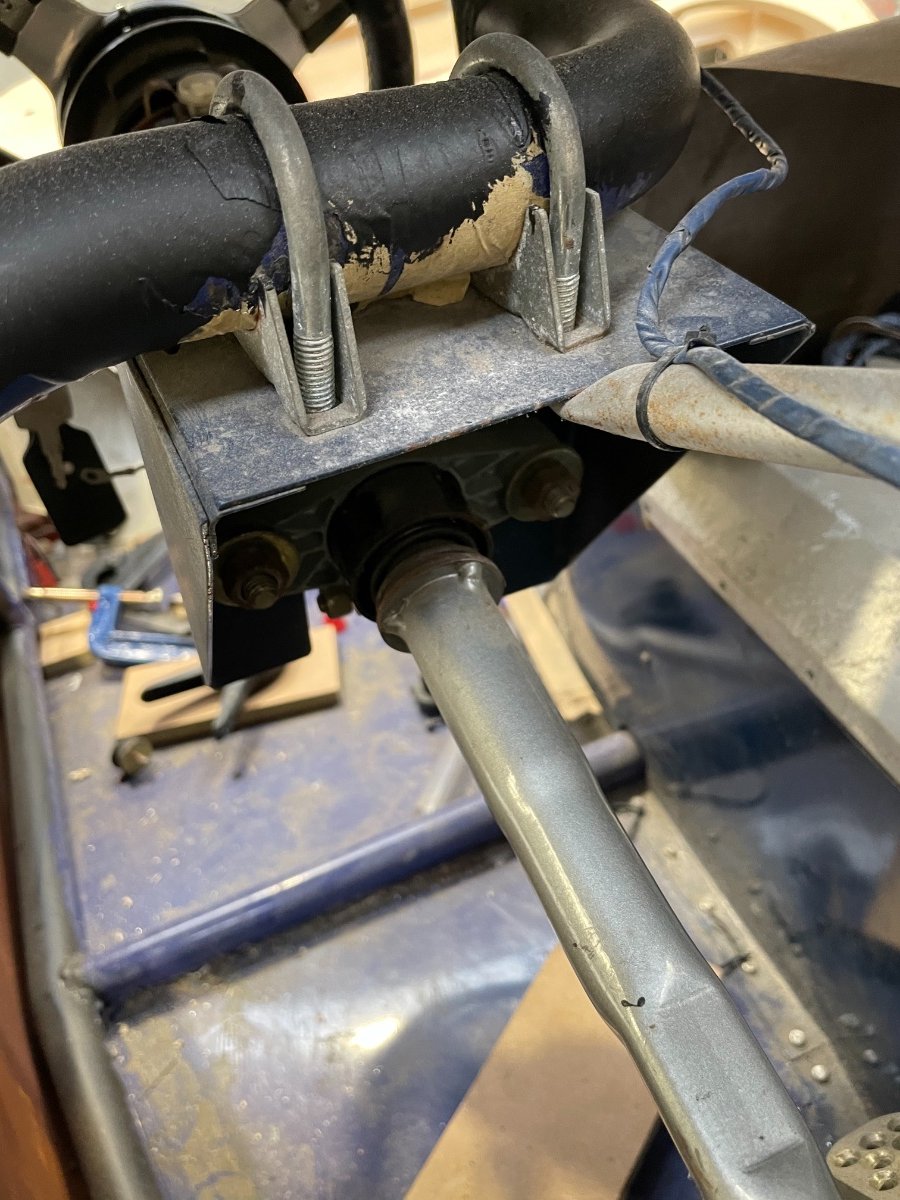
It seems there is some adjustment in the shaft but the bracket makes it impossible to use it. I did think about swinging the wheel on the U slips a bit to lift it up and forward at the same time but there is a strengthening bar also been put from the bracket back which is at its full forward position
going to have another look tomorrow.. I may end up machining out the back of the 18mm in places to let it sit further back on the chassis tubes
-
13 minutes ago, Bob Tucker said:
That's a shame.....someone made a much more professional job of the bracket than RH recommends....LOL
Yea, shame as it could have been an easy fix for the issue
-
I had a look at the column but it seems to be bolted to a bracket and I can’t see how to lengthen the distance between the triangle join and thus bracket
-
5 minutes ago, Bob Tucker said:
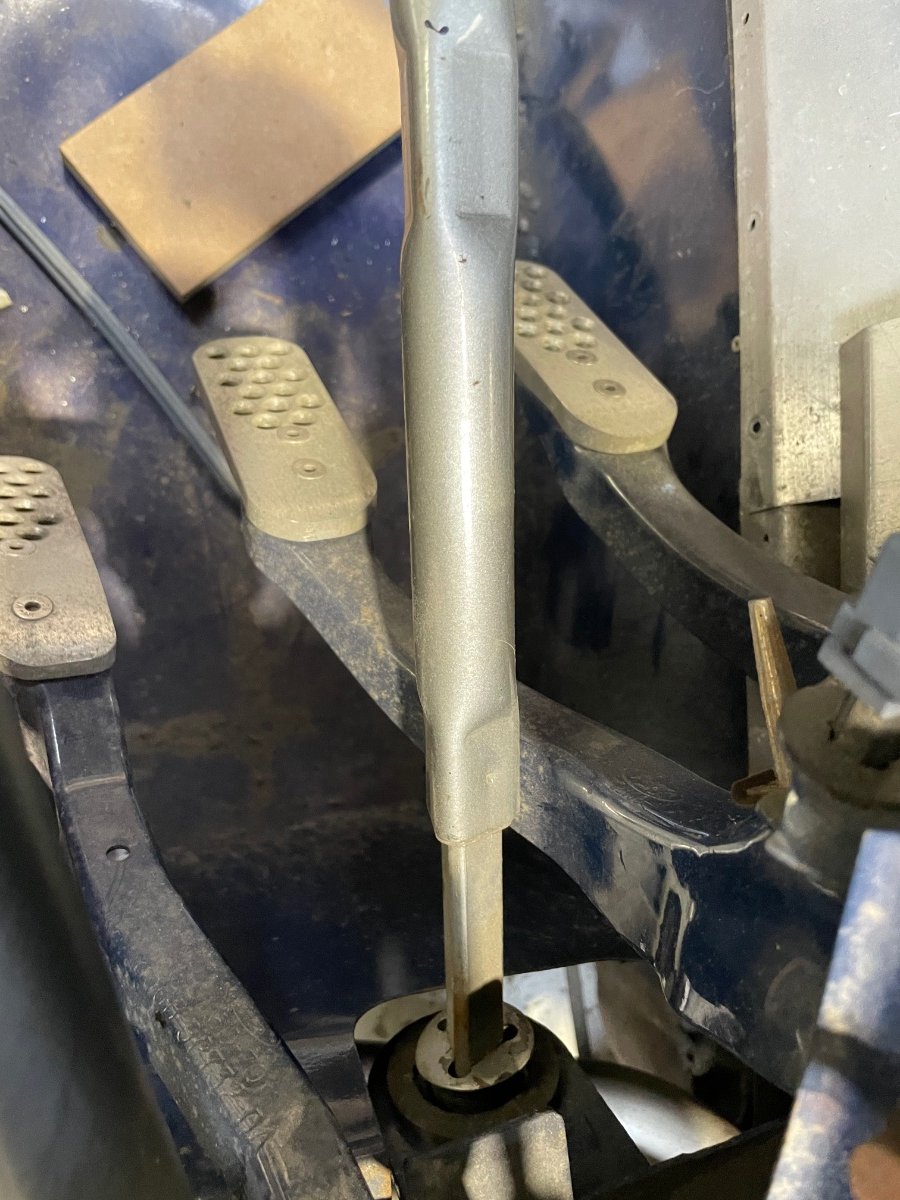
have a look at extending your steering column.
The triangular shaft that fits inside the the upper part of the steering column can be slid out a little way
It is a tight fit though. Certainly enough to clear the 18mm dash, which would be better than 9mm.
I didn’t think this would be possible.. Not with the car now so will try next time. Would be better for sure as the 18mm is a far better option as you say.
-
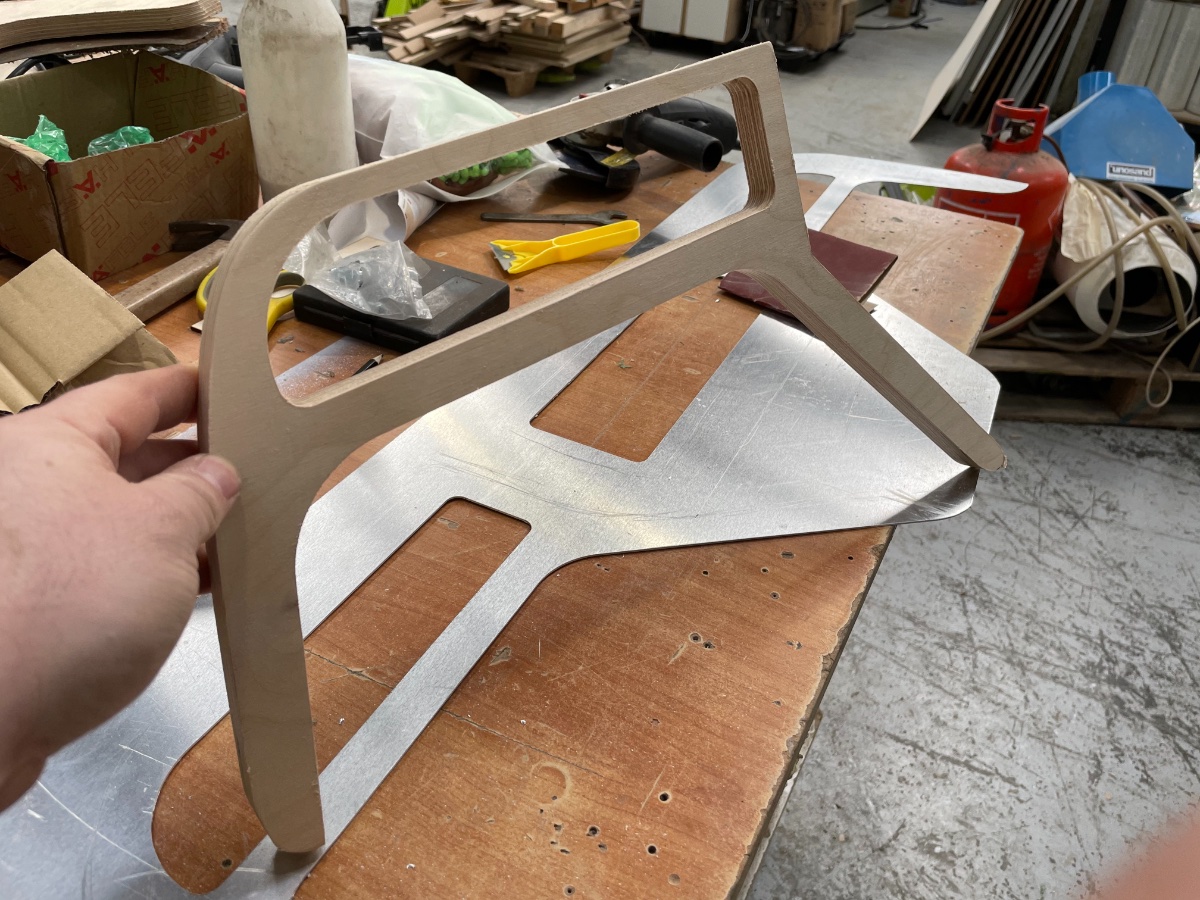
Ok so this morning was filled with fitting the bonnet and hinging it the Robin Hood way..
then creating a new dash as the metal just was not working.
quite pleased with it over all. Need to machine it again from 9mm ply as currently its 18mm and the stalks rub on it when using them. But the shape is ok. Need to cut the middle section off and reattach at an angle so it is tighter against the car in the middle as again it restricts hand space when changing gear. But over all good abs the bonnet closed down nicely over it and will be better when rubber strip is added.
-
3 minutes ago, agent_zed said:
as far as i am aware there is no problem with the material used for IVA as long as it meets the curvatures required (2.5mm radius?). Under my passenger side i have a infill panel so the dash comes down and round and is then flat all the way to the firewall/end of the footwell. I failed SVA first time as there were 2 nuts through the firewall that were visible and 'sharp'! so this panel covered everything so no issues. It's a bit crazy as if you are sliding down into the footwell and killing yourself on 2 m6 nuts then something has gone properly wrong. But them's the rules.
Toggle switches can fail also if they are too sharp and are in the wrong place. I can't remember the exact position but there are certain areas where they are ok e.g behind the steering wheel. Otherwise just make sure you use ones that are correctly radiused or have guards around them.
I think ill go for a wooden version of the metal one first and then look to modify after the IVA is done, seems a better route to go I think.
Watch this space for a lovely picture of the finished thing hopefully later today lol -
27 minutes ago, agent_zed said:
I did the same as Fry61 and have a hardboard dash covered in vinyl. After 13 years its finally needing a refresh as its got damp over the years and is sagging slightly. But nice and easy to replace as not that difficult to cut. I did a large oval shape to use the original sierra clocks rather than individual holes as it was easier than trying to cut vinyl around small holes.
I prefer the idea of hardboard above my legs than a sheet of steel!
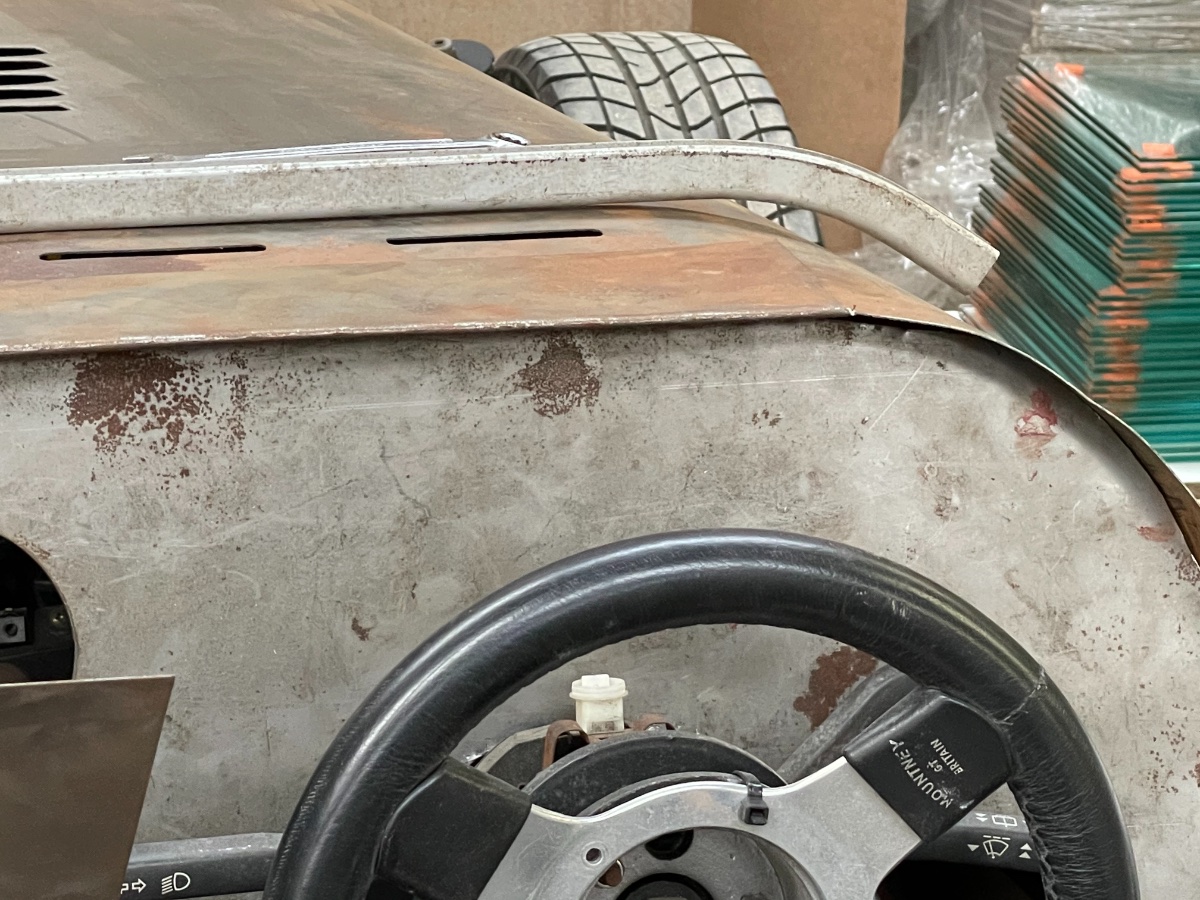
The windscreen lower bar looks worse than it is. There will be a bit of a gap that the rubber fills but it looks worse at the moment as it is longer than it needs to be. You'll lose a large part of the curve when you put the screen together. I'll try and take a pic later this evening if you want.
And there are no issues on an IVA with a wooden dash? My plan is to eventually change the clocks and have nicer ones and different lights to show indication and so on and wooden is a lot easier to do that with, and once its programmed on my cnc i just press the button again to make another one.
I cant decide between a leather look vinyl, wrapping it in some car wrapping vinyl which can be heated and stretched into the holes or going for a polished wooden one but im not sure the polished wood is inkeeping with the look im going for which is more street racer than classic car look.
Also thinking that wood i can make it 18mm thick and then bevel the bottom edge so that it goes through the IVA without a trim on it. The back I can machne out more so that the dials still sit only a few mm from the front face...
Guess what Im doing today lol -
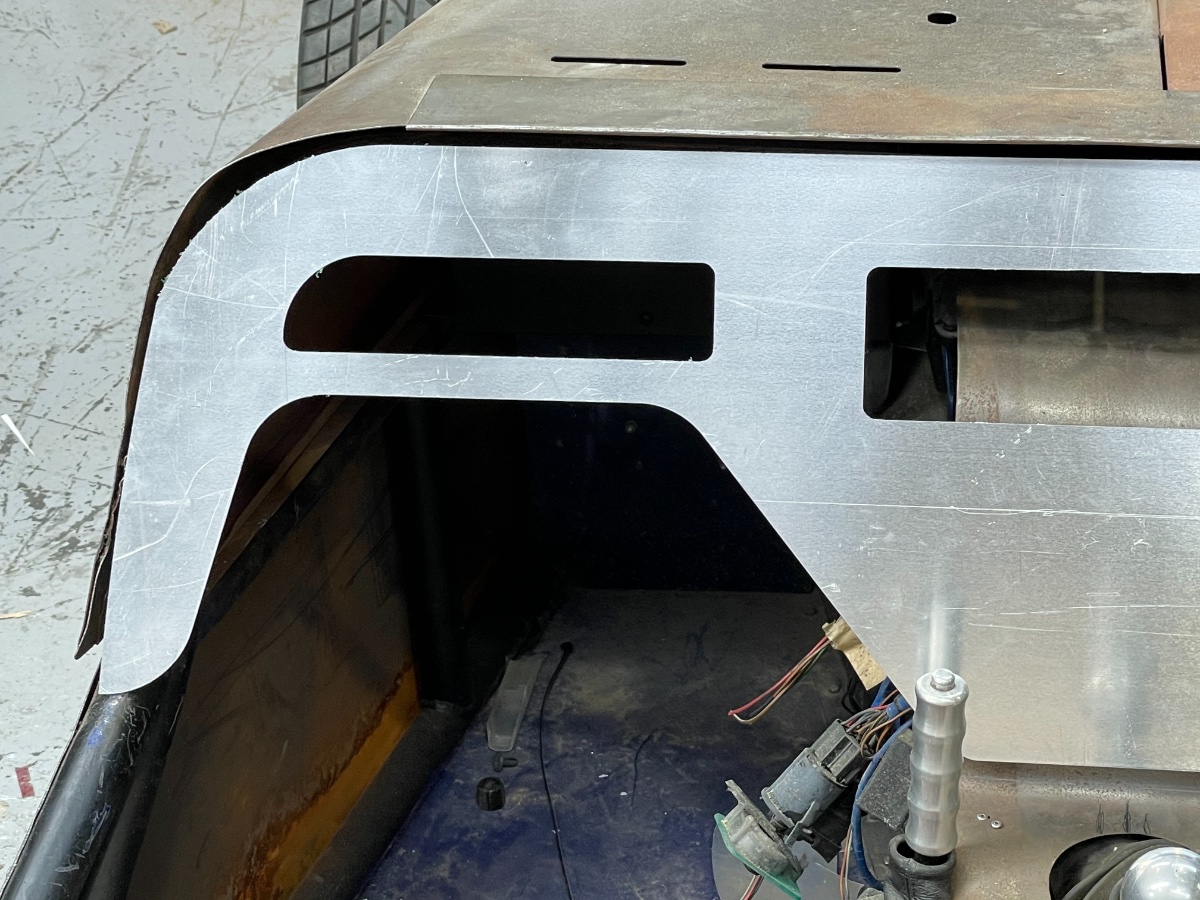
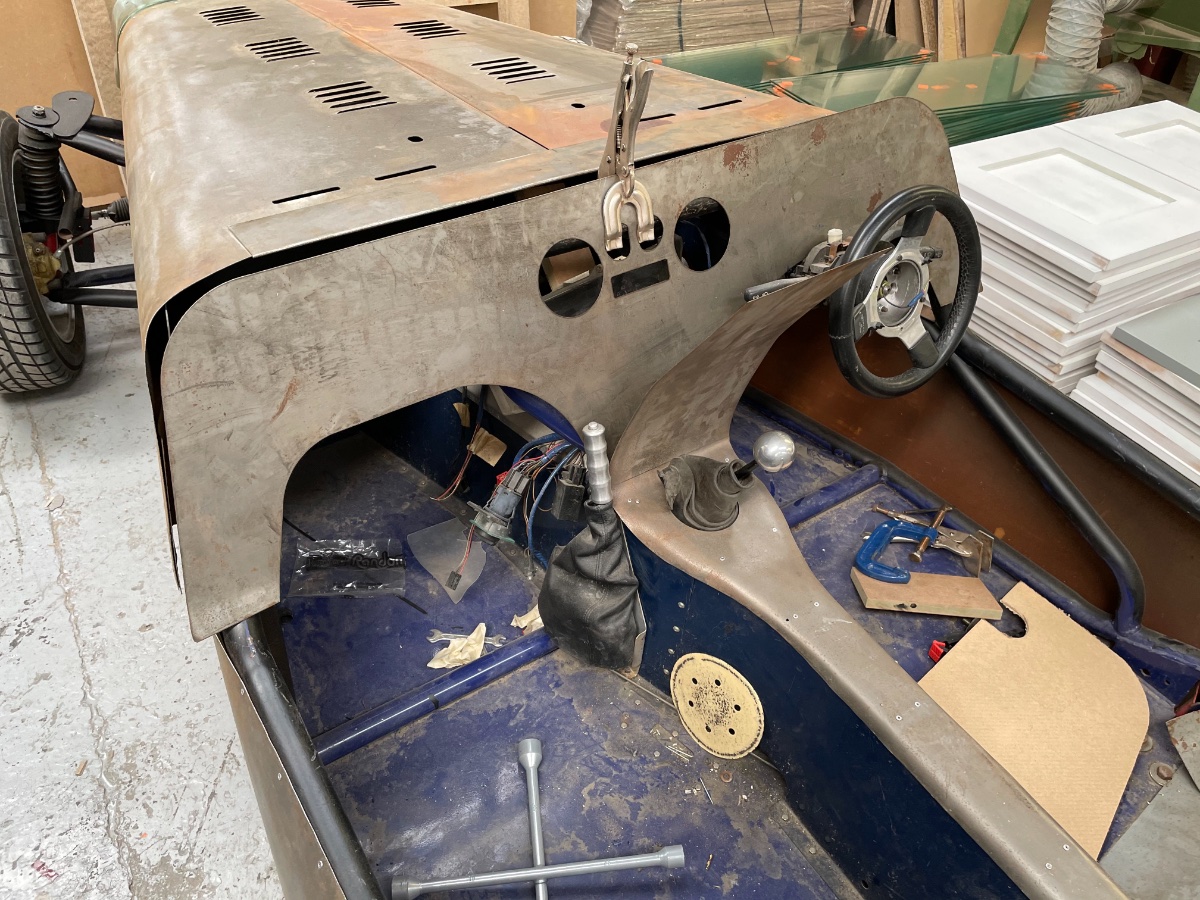
So I decided to just go for it and to trim the dash as needed to fill the gap above.
ive cut away at it and managed to achieve this, the only problem is the upright from next to the gear stick on the drivers side is visible and the clocks are so tight to fit where the holes or them are.
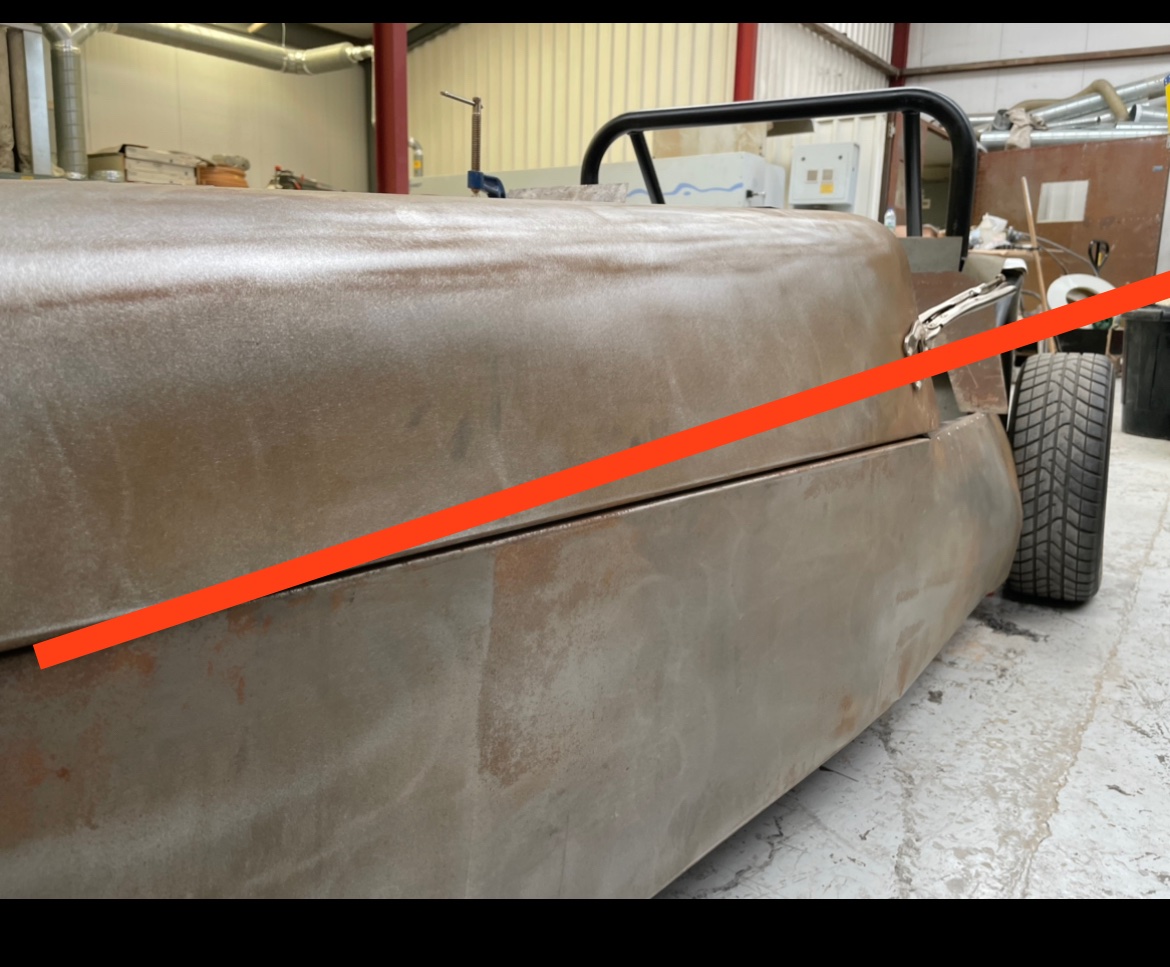
I’ve so tried the bottom of the window screen onto the bonnet where it should be.... the curve of the bonnet does not follow the curve of the window screen... this can’t be right can it? Can rubber really be used to fill that gap? Starting to think I have the wrong bonnet for the car lol....
so plan B... about 4 meters away from the car is my cnc machine which can machine any wood to any shape I wish, so I’m going to make a wooden one lol, I can completely custom it as well as get the shape correct.... hopefully....
-
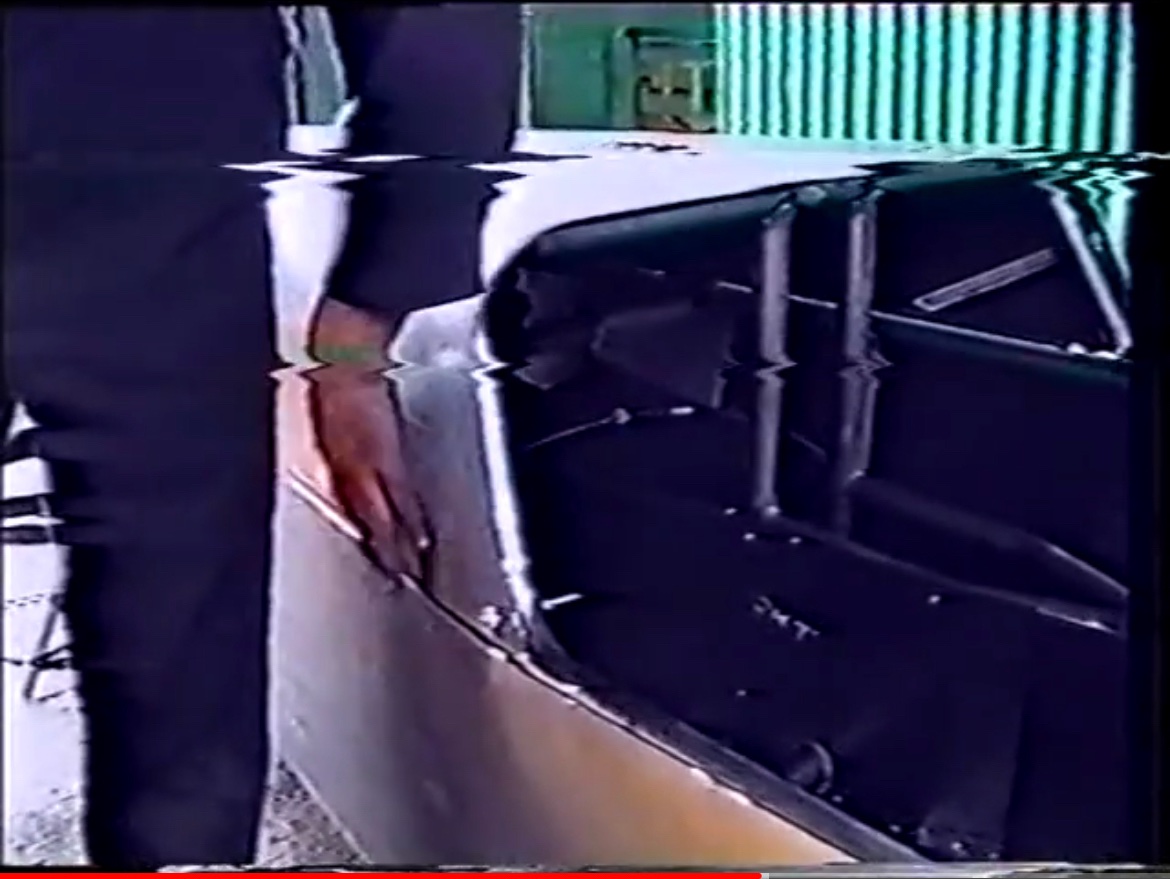
Scrap that... lol... just found the 8 seconds at the end of one of the videos when he fits it and says its oversized and needs trimming lol
-
21 hours ago, nicko said:
The bonnet is not meant to fit to the tube behind the dash, you need to fit the dash to fill the gap. Once everything is fitted in place it is fairly rigid.
Nick
I keep getting a difference of opinion on it.
the build video shows it fitting flush
-
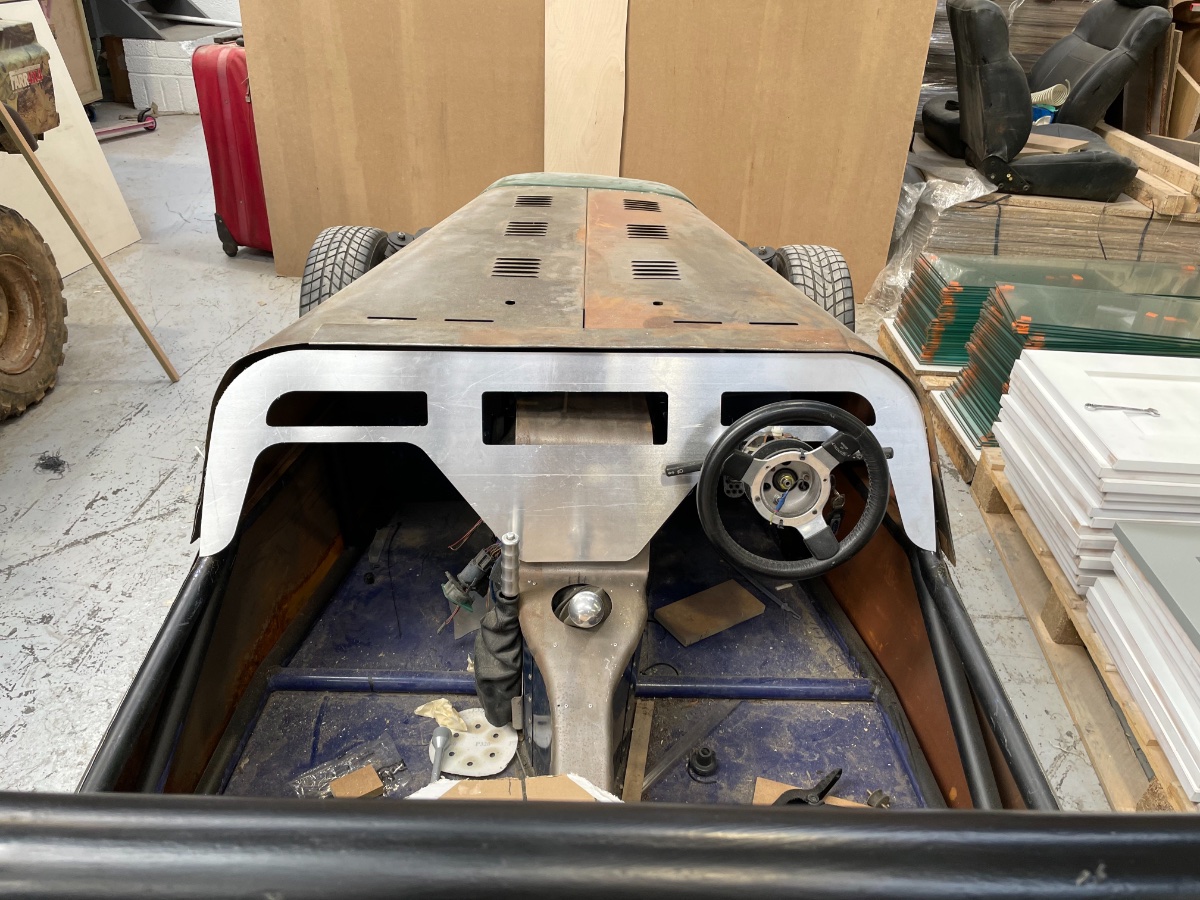
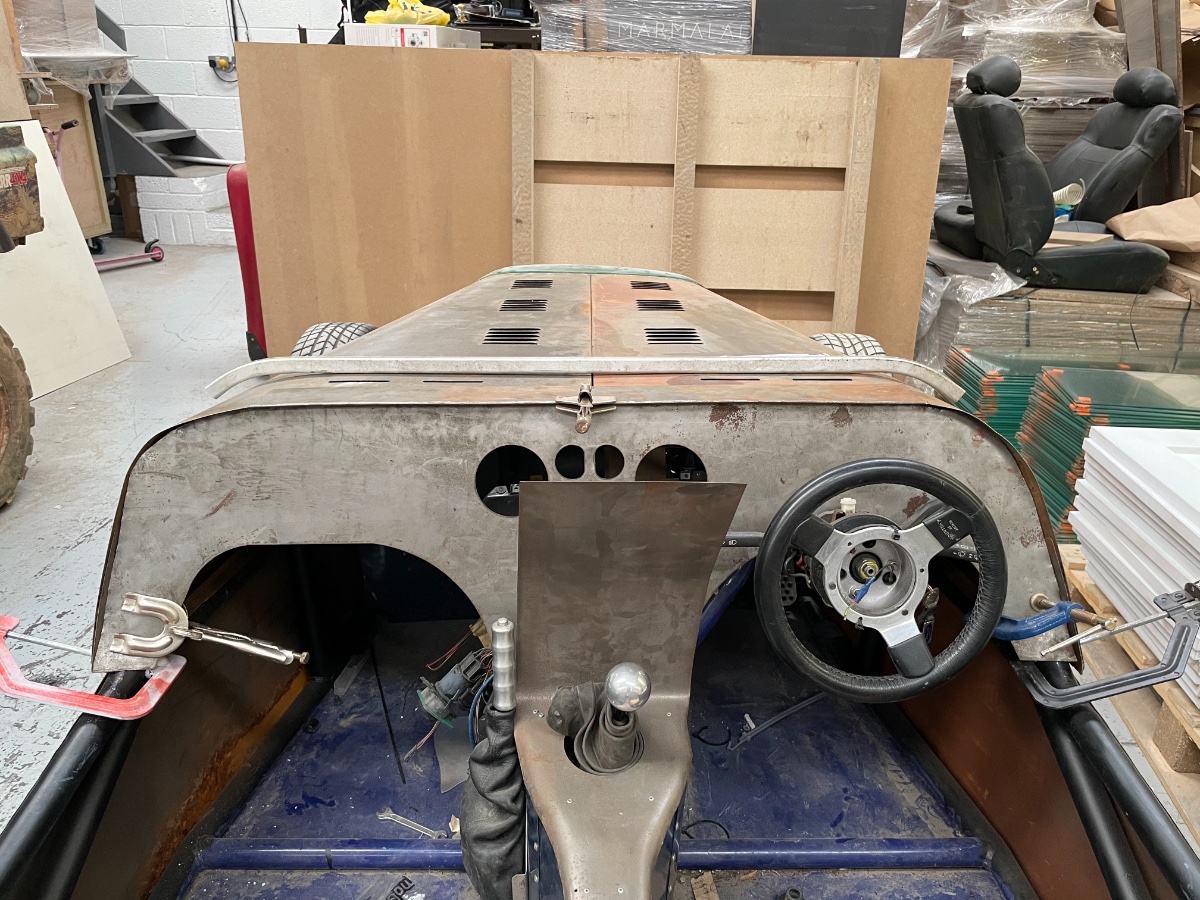
So I decided to move past the issue of the bonnet not touching the dash rail and trial fit the dash where it would need to be in order to fill the gap...
Next thing I have found is that the dash itself is over all about 4" too wide. If it is fitted it overhangs the cockpit by 2" a side. This cant be right? has anybody had to cut down their dash shape so much to make it fit? -
Assuming these would be collection only and no postage? Im near Bristol and at the moment too far to come
-
7 minutes ago, nicko said:
The bonnet is not meant to fit to the tube behind the dash, you need to fit the dash to fill the gap. Once everything is fitted in place it is fairly rigid.
Nick
I keep getting a difference of opinion on it.
the build video shows it fitting flush
-
2 hours ago, nicko said:
When I built mine I cut the dash to fit the chassis then had to extend it to fit the gap to the bonnet. Once it's all fitted together it doesn't look too bad. Remember, you're building a Robin Hood.... If you measure everything it will look wrong!!! Fitting by eye is the way forward.
Nick
The problem I have is to reshape the bonnet would mean cutting the sides of the bonnet that are rolled and fit nicely to the side panels to a new angle. The dash end where the corners are reinforced would need to be 2 inches higher and so I would need to complete reshape it from front to back including all the folds reformed
something like this
-
Spent a good hour today trying to work out what to do lol. The gap isn’t normal as far as I can tell and I don’t want to cut it and fix it if I can help it.
the easiest option seems to be to just fit the dash panel higher up to fill the gap.
going to check the clocks and other things and then do a temp figment and see if it works. Dash as it is won’t clear the steering column so I either cut the arches bigger or I move it up so it seems moving it up could be the best answer to getting back on with the build.
iM also thinking I should fit the window screen so that I can use the bottom Of the frame to help shape the bonnet as well
-
If I can’t get away with it I’m going to try and mount the dash slightly higher, really think rubber trim on the top edge and hopefully that will seal it and pass the Iva as I wonder about the firewall which also won’t be tall enough

Dials/ temp gage, fan and over heating
in Electrics
Posted
The two pin sensor isn’t connected and never has been since I had the car, tbat was my first thought. But the fan used to come on and off.
the single wire goes to the dash and main loom, this I assume is then in the multi plug that goes in the dials, I haven’t traced it fully yet. When I ground the wire nothing happens so it’s either broken or a faulty gage is my assumption.
I have the Haynes manual for the calibra but for instance the fuse box is two universal ones not the original so I’m not sure how much or the wire loom Is original.