Big Jim
-
Posts
3,805 -
Joined
-
Last visited
-
Days Won
8
Content Type
Profiles
Forums
Events
Store
Community Map
Everything posted by Big Jim
-
I looked at getting mine wrapped due to the ultra-thin gelcoat with the black showing through, I took it along to a place that does it, he took one look at the press stud fixing for the hood and said "no-way of getting it right around those" so unless you can easily remove them (if you have them) then it might be a spray job.
-
We all need our own cup, well check out these on Ebay. But go to "See other items" first. You can get them as singles, in 2's, 4's, 6's, if you're buying a set and you'd sooner swap one for a different one that he has, then they'll do that, they've also got those that are "blank" when cold, but show up when warm. EBay https://www.ebay.co.uk/itm/Set-of-6-Retro-Vintage-Oil-Can-Mugs-Gift-Motorcycle-Car-Mechanic-Coffee-Tea-Mug/232417328119?ssPageName=STRK%3AMEBIDX%3AIT&_trksid=p2057872.m2749.l2649
-
Sorry, Christmas has been cancelled.
-
I see only 3 options here. In order of cost. 1) Plenty of sweaters, good sheepskin coat, bank robbers balaclava and wooly hat, surgeons gloves inside thermal gloves, grit you teeth and go for it like a man. or............... 2) Hire a trailer and trailer it back up, (45 per day normally) 3) Pay someone to deliver it for you.
-

Steering Rack In Need Of Replacement?
Big Jim replied to alanh65's topic in Maintenance & Modifications
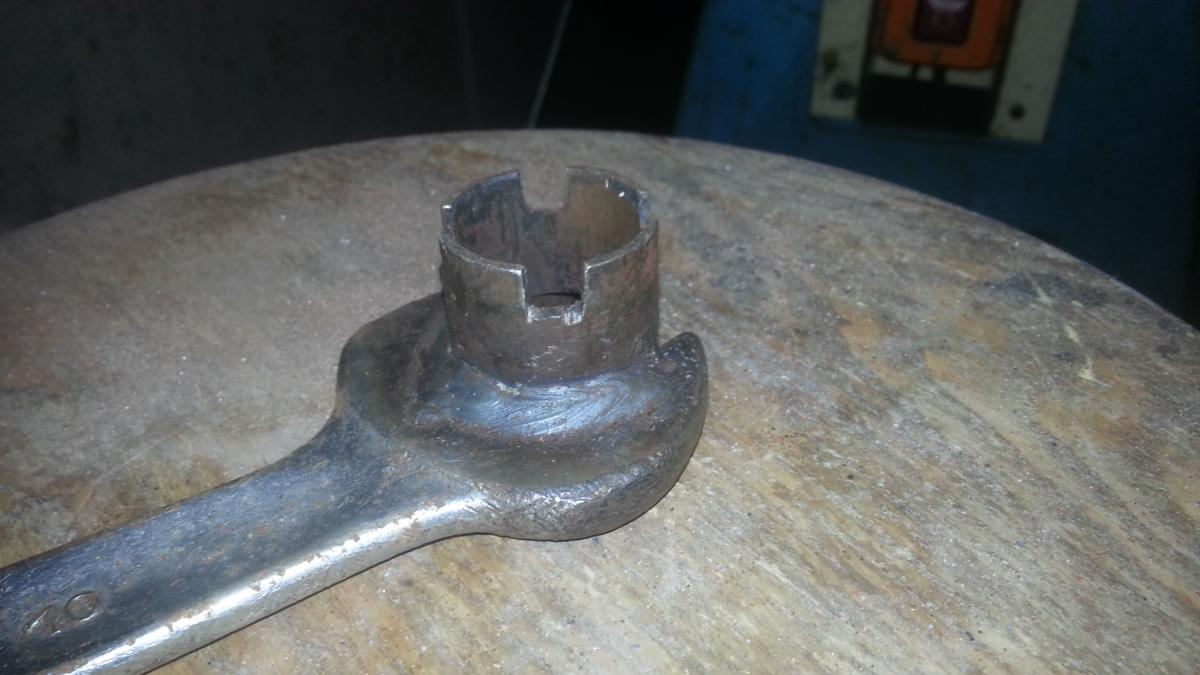
The rack that I have on my series 3 was the original sierra one, I fitted a quick rack internals from Rally design to mine, so this might be the way to go. The rack is adjustable if there is wear, in fact if you do swap the internals, you'll need to adjust it it to get the correct "feel" without play or "notching" To remove / replace the internals, once the rack has been removed from the car, remove the track rods from the shaft. In the back of the rack, in line with the pinion, there is the adjuster that pushes the shaft onto the pinion, so you can either try adjusting this to remove any play (if you're not going to fit new internals) or remove it altogether for now. Next you'll need to remove the pinion shaft, This is held in with a screwed 'collar' that you'll need to make a special spanner for. ( I found a piece of pipe the correct dia, filed it so that there were 'dogs' to fit into the slots in this collar, then welded that you an old spanner. Fit the new internals from Rally Design, grease it all up, adjust the "push on the shaft" and you have a reconditioned quick rack. It does make one heck of a difference. https://www.rallydesign.co.uk/product_info.php?products_id=7326 = Parts are £69.50.
-
The test for the cooling will be next summer. Meanwhile, if you need to know anything before you tackle a particular job, get back to me, I've had to do it all to my car in the past. Tell you missis thanks, I'm doing my best to live up to my tag line.
-
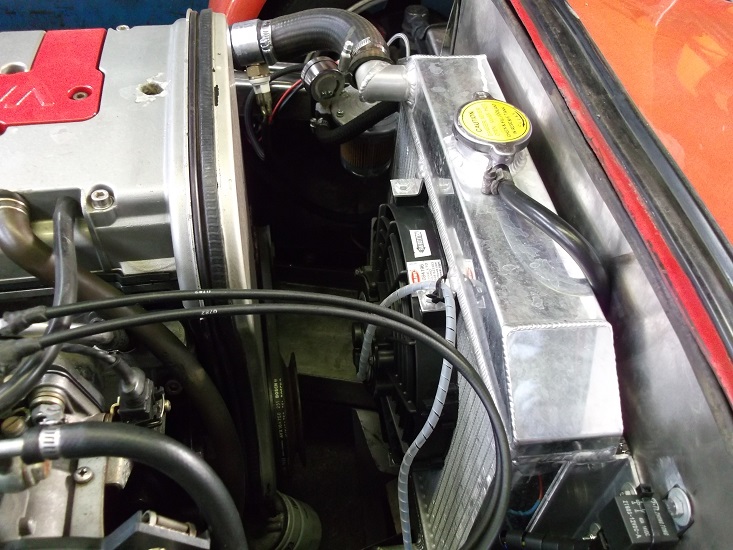
For normal use, providing you are aware of the weaker points that I've pointed out, and you get around to strengthening these up, there's no problem. They've had various engines fitted, mine has a VX redtop in at the moment (I've blown 2 pintos up, so decided to ditch the ships anchor) however, if you intend doing more than normal driving (with a bit of sideways roundabouts etc thrown in) then you might want to look to more strength all round, but then you're getting into 2B world, which is stronger but heavier. All the weak area's can be strengthened by someone who is confident enough to do it, and has the resources. Basically, check every place on the monocoque tub, where part of the drive train / suspension is fitted to, and strengthen if you feel that it needs it. Whilst I'n on, be aware that these cars are prone to overheating unless the radiator / fan / switch system is sorted out. I have a 3 core ally rad fully cowled in, with a Kenlowe fan on an electrical temp sensor in the top hose, with a stat that opens at 82ºC, in normal driving the providing speed over 30mph, the air passing through the rad keeps it cool enough not to require the fan to come on. It also needs a header tank system that works. If yours has the rad supplied with the kit, it will be the Ford single cored Cortina one, which is barely adequate even if the rad is cowled, and you're driving like miss Daisy.
-
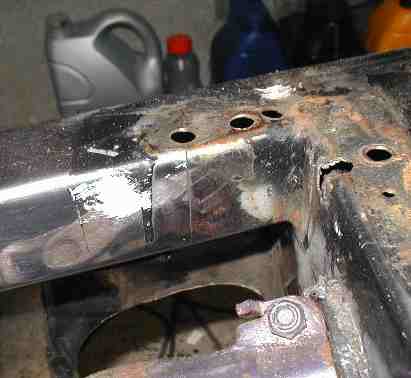
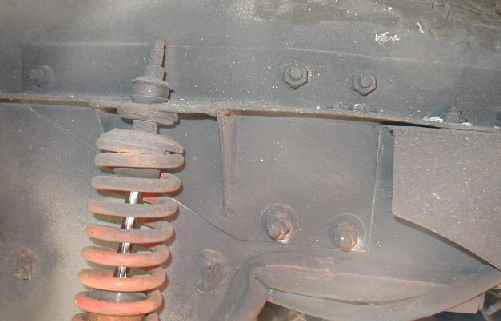
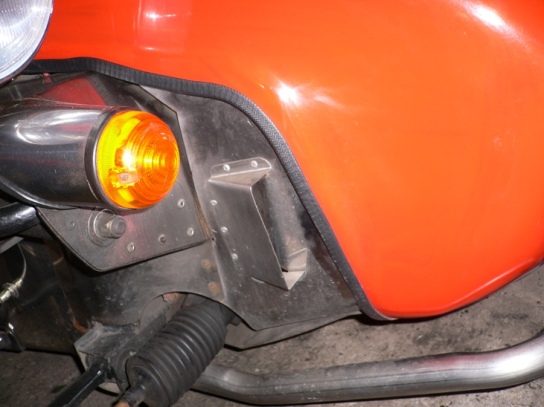
Issues - many: No wipers, no wash, no horn, etc. These easy, I can sort. Horn & wipers are as you say easy to sort, Wipers, go for an early mini system (need to slightly modify) Things that I need help with are: Nearside rear wheel rubbing on inner arch (rear suspension geometry check) Some did depending on offset of wheels, fit a spacer. (the rear sierra subframe is slightly off centre) Rear coilover angle mounts bent (rear suspension geometry check) The "turn over" of the chassis isn't strong enough here, design something to strengthen it up, (see photo) Steering rack arms wrong angle? Again, fairly common, if it's too low you could put packing pieces in. (Note; quick rack internals from Rally Design (If they still have them) are brilliant providing it's the sierra rack. Rollcage mount really s**t (is this normal?) Along with strengthening for the coil overs, build in plating the outer side of the boot where the U bolts come through, (see photo) also I welded"bungs" into the open ends of the roll bar, these bungs had a 12mm threaded hole in the centre of them, then I drilled through the boot floor and finished off with large metal plates bolted up underneath the boot into them. I've also braced up the back mountings with a length of angle underneath the top lip of the boot. Cracks to front frame welds and joint below battery tray (sound familiar?) This is common on the monocoque cars, all 4 vertical corners inside the engine bay, and where the front chassis member joins to the sides. The car you have is a later model Mark 3 or Mark 3A monocoque.. Other issues that need to be checked........................................................ Check seat - floor mountings for floor strength., If it has tie bars (Much better than the standard anti-roll bar) check that where they're bolted to the car it's all been strengthened up. Check fuel tank mountings, in time it will bend the bottom lip of the back panel if that's all that it's held by. I strengthened underneath the front of the chassis (the cross member that front shockers bolt to) also strengthen up each side where the front shocks bolt to at the bottom. See if there is a grease nipple in the top wishbones. You need to somehow FIX the pivot bolt / stud so that it doesn't turn in the chassis, but the wishbone turns on that as it should. If it turns in the chassis, it will wear the chassis holes oval and big, cracks can sometimes be found around here as well, Very important, check that the sump has been shortened. If it has, you'll find that the bottom of the sump will be level with the bottom of the bell hsg, If it's lower to any degree, it needs doing, (See my website for how to) (See photo of shortened sump) There is plenty more that you can do to improve it, but long winded to write down, just keeps you with something to tinker with.
-
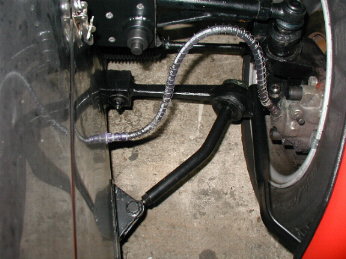
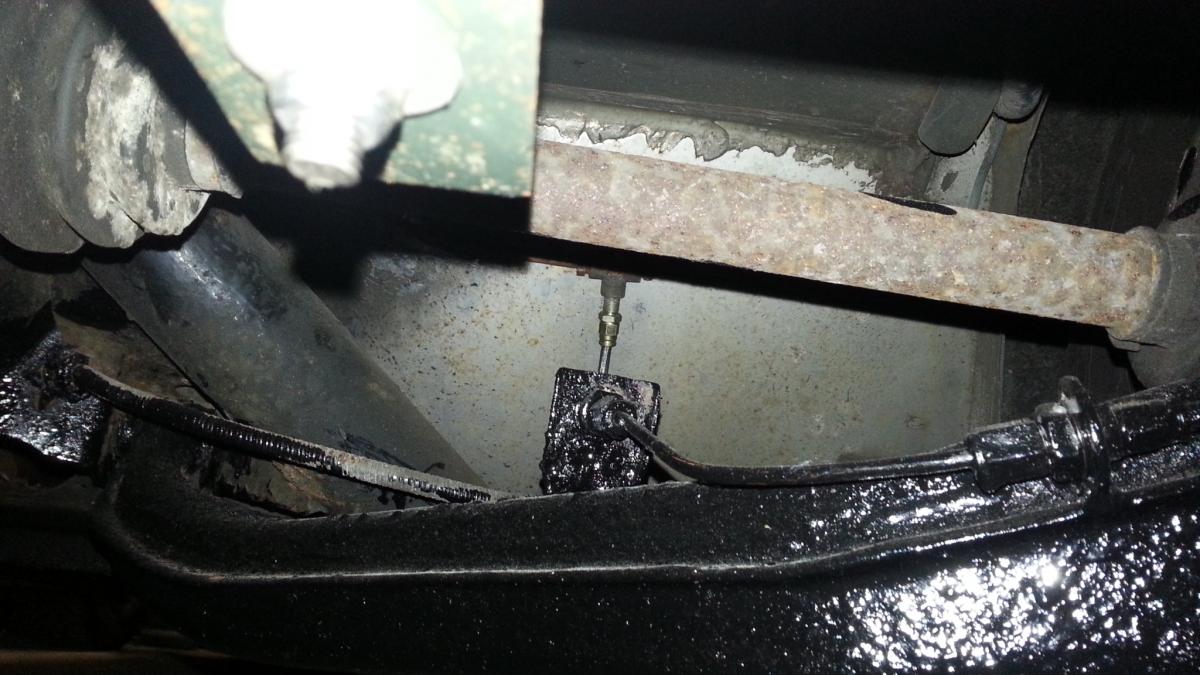
This is my RH rear, there is a flex that comes from the T piece that you can see on the rear bulkhead connecting to the hard pipe at the bracket in the centre of the picture, then the hard pipe continues to a connector fixed into a suitable sized washer that is welded onto the rear wishbone just above the seam, then the flex is connected to this.
-
Wouldn't touch one with your barge-pole! German engineering is all Hype, they're living on long past marketing. Even if they were a good car, I wouldn't touch one because of the stigma that belongs to Audi drivers now.
-
If you want reliability go for a Honda or toyota. I had one of these for 11 years, the best car that I've ever had. 45 - 50 mpg, and will go ok for a diesel. http://www.ebay.co.uk/itm/Honda-Accord-2-2-i-CTDi-138bhp-Sport-/172880024087?hash=item284073d217:g:dHAAAOSwhlZYtyjp
-
Tried to send a message, did get an auto reply saying "Mat-Moo cannot receive new messages" tried it again, unknown if it's sent. Jim
-
I've messaged you Matt
-
Yes, what I mean is that I can no longer get into it to add / delete /edit items. my previous password / entry etc no longer works.
-
I can't get into the NW website since Matt passed it on either.
-
If I remember correctly, the next step up from this was to dump the sierra coil springs and fit coil-over shocks that went to a bracket in the centre of where the sierra spring sits, but then the next step after that was to move the coil-over shockers to just outside the confines of the body tub as the mark 3 & 3A (Mine is a mark 3 with this set-up, spax coil over shocks with 11" 150lb springs I think! it's a long time since I did it) I agree with other comments, get the front end sorted first.
-
Unfortunately this means very little as the early monocoque Robin Hoods got called S7's when they weren't, and not to mention that Richard Steward (RH manufacturer / owner then) liked to play about with suspensions, even on similar 'models' so what we need to know is just what suspension you have underneath it (Photo's are best) you could have the cortina suspension, then we go onto the sierra suspension with large coil springs with a bit of rope inside them to stop them coming out on full release, next in line there are coil-over shockers attached to the rear of the top 'overbend' of the side panel (ie chassis part) these could be with straight shock rods into the 'chassis' or with eyelets and fixed to brackets, until we know just what you have, it's a lottery.
-
Or do what I do. I have a similar set-up, smiths gauge, sierra sender. I bent the arm on the sender so that when it was empty, it read empty, when full though it only reads 3/4 full. i'm not interested about the level when it's full, but i do need to know when it's getting empty. I've had it this way for years now, no problem.
-
No, it would need to come out through the top, and the car would need to be up off the floor enough to allow the engine & box to tilt upwards, yes you will loose the g/box oil via the prop, but if you're taking the box out at all, it needs draining first anyway. On your own, I'd do it one at a time then, engine out then box.
-
Engine & box in one, you need to get it well off the floor. You can however pull out the engine first, then the box, but you still need to get it well up from the floor.
-
One way of doing it. http://nw.rhocar.org/fan%20wiring.htm obviously there are other ways.
-
check out this thread. http://www.rhocar.org/index.php?showtopic=34389
-
There was so many different spring set-ups with the monocoque cars, even amongst the same model, we'd really need to see photographs of what you have to comment.
-
To fix the dipstick tube, take it out completely, clean it up at the part that goes into the engine block, then solder around the outside with plumbers solder, or better still brass brazing, now file it down slowly until it's a knock in fit into the engine. The oil leak around the manifold will more than likely be from the rocker cover gasket, often due to over tightening of the bolts making the cover deform, a new gasket, the cover reshaped flat around the edges , and the correct spreaders underneath each bolt, tightened correctly should sort it.