st3v3nw
-
Posts
521 -
Joined
-
Last visited
-
Days Won
1
Content Type
Profiles
Forums
Events
Store
Community Map
Everything posted by st3v3nw
-
It apperas to be a bit of an anomily that if you put an age related kit on a private plate, then subsequently remove the plate, they issue a numberplate that coincides with the registration year and not the year of the donor as that year isn't recorded on the v5. There are a few people out there that this has happened to.
-
His advert is a near copy and paste of my original advert on raced and rallied and as such his claims of a recent rebuild are probably *bleep*s too
-
He says he bought it from the original builder like that! I was the original builder and didn't sell it to this guy, i sold it to someone from manchester and it went on a H plate
-
it's a 1995 car though. it is a rebuild of a h reg sierra, it was registered in 2009 but that isn't technically the age is it?
-
But it wasn't a new car in 2009 it was a rebuild of a H reg sierra so should never be on an 09 plate. DVLA has all the details for the car on that plate so someone has managed to frig the system
-
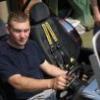
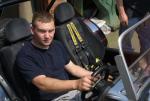
Passed IVA 2 weeks ago and here are a few pics of my finished Haynes. It is using a 1.8 mx5 engine
-
it's on ebay at the moment. I built it from the original kit and sva's it in 2009. It went on an age related 'H' plate. It's now on ebay on an '09' plate. looks dodgy to me, what's going on? http://www.ebay.co.uk/itm/kit-car-robin-hood-2b-with-c20xe-redtop-/282628634361?hash=item41cdfab6f9:g:pUMAAOSwrblZpEtf
-
it has now passed IVA. will add pics soon!
-
You could always swap the parts into the sierra shell that you have and register it in your name, then legally you can take them off that car again to make your kit car with.
-
She loves playing in the car and in my garage. All the parcels that arrive we have to open them together and she'll then inspect all the parts before playing in the box!
-
Turns out both fuel pumps were switched off.
-
Still after the stalks? I have some with plugs and length of loom
-
Loads of time has been spent on the wiring loom, I've used the original mx5 loom but made loads of changes and mods to it. Everything is working so far LED side repeaters. Will need to be removed and repositioned in the front mudguard as they fail the IVA test as they are obscured from the rear by the rear indicator Billet aluminium pedals from OBP with remote adjustment Fog and reverse lights mounted to rear tub along with numberplate light Had these seats made by intatrim in telford. GRP shells with padding in black vinyl. Really comfy and surprisingly light Wilwood Ultralite 4 pots up front, rears are Audi S3 aluminium calipers, light and have a good handbrake function
-
Howdy :wave: Been a long long time since I've updated this thread but a lot of work has gone on since the last update. I've also had a baby and moved house in the mean time. I've re-made my upper front wishbones to the book spec as the originals I made with camber adjusters built in but didn't like how they turned out. Moving out my old garage: New garage: Car in there, temp wheels for moving it and dummy shocks Bought my wheels, pro race 1.2 in satin black. 15" Battery and ecu bay in front passenger footwell
-
Wait till the next kit car show. I tried out Intatrim's range and settled on their Odyssey 2 seats. lovely.
-
The standard chassis just uses the front diff mounts. some people add one at the rear but I've never heard of one breaking.
-
Are you thinking of building one next? they are a great challenge and I find the build more satisfying than a 'kit'.
-
Not updated this in ages, not because I've been doing nothing, just not bothered updating the build thread. Got some body panels temp fitted to check clearances Built a battery bay at the bottom of the passenger footwell. Also houses the ecu. accessed via a hinged panel in the engine bay (not shown) Engine and box have come out to be cleaned up, painted and checked over with new seals etc. This shows the de-oxidising gel removing the rust from the block. Awesome stuff and very very effective Bought myself a zinc plating kit so have been restoring all sorts of parts then wrapping them up ready for final build later on. Here's the plating tank Nuts, bolts etc post plating and yellow/gold passivate Hub carriers were done in clear passivate as were the alternator brackets and bolts Also, stripped and rebuilt the rear prop shafts, and hubs which were all plated and look brand new again.
-
Only problem so far is the alternator is right in the way of the steering shaft. My only real solution is to route the shaft under the alternator. Did think about swapping alternator to other side, but wanted the space round there for a turbo in the future. So fabricated a bracket and mounted a bearing carrier the end result is solid.
-
So got the pedal box finished and painted. It is designed to take a Wilwood m/c for the clutch and the original mx5 brake m/c I reached the big milestone of mounting the engine and gearbox.
-
Not updated in ages because I'm a lazy *bleep*, but here's some pics
-
As much as your statement is true, it bears no real issue which v5 you use. The guy you bought your sierra from might have given it a full overhaul with a different engine and gearbox, replaced the diff, had some play in the steering and replaced the column, then found it easier to replace the hubs than change the bearings, so really, none of the 'original parts' might end up on your kit anyway.
-
Wrinkle paint needs to be cured at 90C for an hour. It was too big for my little garage oven and wouldnt put it in the kitchen one as the fumes are a bit bad! I ended up using my heat gun into the bottom of that big box and using my multimeter with the temp probe to monitor. kept an eye on it and it cured in the hour.
-
Started stripping down the MX5 engine and cleaning and painting the parts. Started with the cam cover VHT wrinkle finish. Baked at 95C for an hour. Ordered the bolts for the suspension so mocked up the rear wishbones and fitted my camber guage to see how it adjusts. quite happy with it.
-
Finally got round to re-starting work on the car after moving house and re-setting up my garage. Made new rear wishbones and top camber adjusters then used my new compressor box to make a mini spray booth. They were then fitted with the bushes and stored away.