


agent_zed
-
Posts
3,008 -
Joined
-
Last visited
-
Days Won
16
Content Type
Profiles
Forums
Events
Store
Community Map
Everything posted by agent_zed
-
on a practical note they don't look as if they have an angled mounting. Have you thought about how you will mount them so the lights are vertical (or thereabouts)?
-
So what you all doing to keep your car maintained
agent_zed replied to a topic in Maintenance & Modifications
I've been doing all those little jobs i've been putting off. My indicator/dip stalk has been really sticky for ages so i finally got round to taking it off and stripping it and cleaning all the contacts and lubricating so it moves a bit easier now. also put the steering boss on a lathe the other day to clean it up as the paint was flaking and faded. annoyingly i've got a cold/flu type thing (really don't know if it is covid or not - probably not) so i am staying away from work at the moment so can't get to the lathe to finish it up. better safe than sorry. If you are really bored you could check all the electrical connections and bulb fittings as they tend to get slightly corroded over time. -
just about to fit a replacement ally overflow bottle. I splashed out on an ebay jobber and to be fair the welds are beautiful. Got replacement light shells as my originals have rusted. Replacement mirrors. respray the nose, bonnet, scuttle, arches... hmm pretty much everything minus the side panels repair/paint some rust on the chassis looking for new seats as the sierra ones are probably too worn now after 26years! Might re-do the dash. Want to experiment with a suede type material and along the tunnel. finish the bike carb manifold i've been making for 1 million years and finally get them fitted. Got a load of house projects to do also though. So will do a spot of plastering and some plumbing repairs i've been putting off. Oh also got to make an end vice and leg vice for my 'english' workbench i recently made. although just tidying the garage will take me til the summer :)
-
A G-wiz ... I'd probably do dumb stuff like sleeper an old volvo estate or my peugeot 3008 mk1 which i know is a very odd choice but i like it and pretty much nobody has done that to my knowledge. Oh also re-do my 2b with all the modifications i've promised myself i'd do over the years.
-
you can just see the tube that goes up over the scuttle area. I don't think anything other than the 2b had this. One of the reasons i like the 2b as (i'm hoping) it gives more protection. It also has the 4 tubes welded to the top bar for the seatbelts like my chassis. I'd be interested to know how they have done the suspension as i've had a thought about doing it myself. One of the main problems i can see is how to bracket the top suspension mount as the centre of the wheel it is not inline with the rollover bar so it wouldn't line up. I'm not sure of the effects of moving the shock mounting point on the wishbone.
-
I made my tank out of stainless and used the original sierra fittings. For the filler hole i used the bit rubber grommit and for the sender i cut around the shaped hole from sierra tank and riveted and araldited it to my tank. The sender then fits exactly as it did in the sierra by turning and locking into place. Just remember to work out where the arm of the sender will sit in the tank and affix the shaped hole in the correct position. I used the RH filler neck but added an extension as my tank was just a bit lower and i wasn't convinced it went intot he tank far enough. I recently drilled a couple of holes near the top though as without these i couldn't fill the tank right to the top as the air couldn't escape from the top 2 inches. It's been like this for 10years without a problem (so far )
-
When i built my 2b i welded the L shaped piece on rather than bolting. It's pretty solid when welded. If you've bashed it pretty hard you might want to also check the lower wishbone balljoint and consider replacing as a matter of course. Due to the design of the suspension this balljoint is taking enormous stress, there is the outside possibility that it could pop out especially if damaged, I have heard that has happened before to someone on here (can't remember who as a long time ago although i think that was due to wear. They are hard to remove though apparently. hope that helps
-
I'd agree with the above drawing. As mentioned though make sure you have the correct length dipstick and tube as they could affect where the max mark is. I shortened my sump and didn't bother adding extra capacity and it's been fine for 10 years. I'm sure i read somewhere that the pinto can take a fair bit over the max line without a problem as the americans tended to overfill, but that could be complete nonsense. At the end of the day as long as the crank isn't hitting the oil and frothing it, keep the oil as high as you can. I can measure mine later if you want for comparison
-
Depends on your setup. It'll be the coil that needs 12v not the distributor as such. My setup has the original electronic ignition which has a small module that I guess would need power and i also have a weber carb that has a fuel cut off solenoid on the carb that needs 12v. If you hve an electric fuel pump that would also need electric. Not sure if my autochoke would cause issues without 12v. I'd try and find the cause of the intermittant fault if i were you.
-
To me ripping it all out because of a few loose connections might be a bit drastic at this stage. If it is all working when you jiggle the wires then it is just a likey a loose connection as mentioned above. If there is a big mess of wires just cut each one to the correct length and either put a new connector on it or resolder the orginal connector back on. once you are happy just re-wrap them all together neatly. This is how i did mine with the original sierra loom. There is still a bit more than is needed under the dash but it is pretty well sorted otherwise as everything fits into the standard ford stuff so the electronic ignition module just plugs in as normal and i don't have to worry about trying to get this or that to work on a different loom etc. You also have the advantage that the haynes manual has a fully colour coded schematic so if you really needed to you could get someone else to work on it. If that then still doesn't work pull it all out and replace with a new loom.
-
it isn't a standard prop as the sierra had a 2 part setup but it is standard ford ends to fit the mt75 (I think this is the box superspecs used) to ford diff. Unless gbs do one you wont find an off the shelf one so you'll have to get one made up. It'll no doubt be better quality than the rhe one anyway.
-
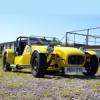
awesome! nice to see it laying waste to a fair few bigger cars. Always nice to see how many people give these cars a look. I've driven down a road in mine behind a ferrari and watched the people on the street giving my car more of a look (I assume it was positive and not because something was hanging off ). I find people tend to let me out of junctions a lot in my 2b. I think people have respect for '7's as it's such a classic shape rather than just assuming it is someone with loads of money in a flashy supercar.
-
the later chassis has a tapered rollbar like this (not my pic). It also has a bigger engine bay than the older chassis, but it doesn't have the hoop up over the scuttle which i like as i think it adds strength in that area (could be completely wrong). be careful you don't have insurance problems if you swap the chassis. It's unlikely they would know but if your car was registered before the later chassis was in production it might cause an issue if they realise. In terms of whether it is better or not. It's pretty much the same in terms of suspension (unless you have the sliding pillar) so not really much need to change unless you want a bigger engine. If it was me i'd just chop about what you have. The sump is always low which needs a lowered sump (if yours isn't chopped) and the bar in front of that (the plough bar) could be cut and bent and rewelded at a higher level. You could also look at changing the mounting points for the front upper suspension moving the mounting down to create better geometry and moving it rearward to get more caster. At the rear you could create your own rear subframe to hold a double wishbone setup. Don't think anyone has done this yet but I've discussed this with others on here with the idea to use the 'build your own sportscar' plans with a bit of modification. For interests sake there was a chassis 'the hood' with a few built that had a full rollcage and double wishbone suspension on the rear. It was a pretty good looking chassis but i'm not sure if anyone has one on the road. hope thats useful
-
yes it is a sliding pillar version. I think the original build videos are on youtube not sure where (can anyone point them out). This will show you how it all goes together and I think mentions what bush is used. I can't quite remember but i think it is probably the same bush used in the macpherson strut but it's been a long time since i watched the video so could be wrong.
-
Was finally getting to work on my 2b today as i've been meaning to drop the diff and replace the seals to fix a leak that mot won't like. Didn't actually see it happen as i was under my car at the time but heard a loud bang/scrapping noise on the road outside my house. I figured a car had lost it's trailer or something. walked out my gate to find a vw passat estate looking low on the back with a bunch of scrape marks on the road. Checked the lady was ok and we walked around the other side to find no only was the wheel off but it was still attached to the hub... brakes and all. The weld had broken all around the hub mount to the trailing arm, looked to have rusted through. She had come down from north wales on the motorway earlier today so was pretty damn lucky to have it happen going up a hill in a 40 zone on a wide road and not at 70mph on a motorway!!! it's got an mot til jan 2020 so must not have been obvious at test time. I guess if you have a 51 reg passat estate i'd check and double check the rear trailing arms?!
-
In addition to brumsters point, make sure your shock hits the bump stops before any other part of the suspension at full droop. On the 2b with wishbones if the shock doesn't engage first the force will be taken by the top balljoint! there is a potential for snapping the balljoint if this happens. Instead try and mount it so the shock hits the bumpstop before the balljoint. Not sure if the series 3 has the same potential as the suspension setup is different but just be aware as you are checking.
-
just for reference takumi is also suggesting 400lb rears.
-
Hi, from what i've picked up on here over the years i think 350-400lb springs are the correct weight for the rear. although that does depend on where your mounting points are. I am assuming it is in the wishbone spring well rather than where the sierra shock mounts. If you go too hard on the springs it'll probably get a bit skittish. what do you have at the moment? are your coilovers adjustable dampers?
-
Forgive me if you have already done/tried these things but have you tried a larger quadrant? the standard yellow is 45mm I think. Then there is a 50 and a 55 from memory. The longer cosworth cable needs even more pull as there is more slack. I modded (bodged) mine by ramming some cable down the gully to pack it out thus increasing the radius to approx 50mm. This still wasn't quite enough when i switched to the cosworth cable and i realised it was because there is a rubber piece on the pedal box end that i assume is to take out some of the shock. It is too squidgy though. I found that an old bush off the front suspension fitted almost perfectly with a light sanding and takes out that extra movement. job done and i can now put it in reverse when it's warm, which was my issue.
-
I mounted mine on the passenger side sticking up against the tunnel side. I modded the sierra handbrake to get it to stand taller/more vertical so i could reach it. Like most things it's probably down to preference as some might find it hard to pull on the tunnel top and others hard to reach on the passenger side.
-
Have a look at derek's pics again. You don't need to cut out the entire piece front to back to remove the prop. Just the bit in the second photo Derek has marked in red, which as he says is just the bare minimum to allow the prop to drop below the diff. I'd just remove the diff flange bolts and see where the prop drops to and remove a bit at a time until the prop clears. This small piece is unlikely to reduce integrity as there should still be a bar across that holds the handbrake cables which you can see in the first pic. Or if you have any oil leaks on the diff use it as a time to remove the diff at the same time then you won't have to cut any of the floor. It's not a huge job. You just need to take off one brake drum and remove the drive shaft on one side. Then you can drop the diff and slide off the other drive shaft. Depending on how the builder mounted the gearbox at the rear that should hopefully be just a case of unbolting the mount and replacing. The mount bolts to the chassis. It's unlikely the builder welded the floor to the chassis but you never know. Whilst you are at it give the UJ's a good greasing.
-
yeah i get a similar problem, although i find that when i am driving and flicking between dip and full sometimes the light just cuts out!!! as the dip disengages but full hasn't engaged. If i woggle the switch it comes back. So i have to be quite careful to push it firmly. The stalk is quite stiff so i'll try the wd40 as well
-
trouble with braided hoses is that you can't tell that the rubber lining is perishing happily underneath the braiding. At least with rubber hoses you can visibly see any damage. Pretty much every production car uses normal rubber (not actual rubber but whatever material it is) hoses, with every car i've worked on having them direct into the caliper only exception i can think of is the rear sierra setup as the rubber hose connects across the swingarm to a solid pipe, but that is because the hub/brake is fixed to the swing arm so doesn't need to move at that point. It's is a bit more exposed on a 7 so i guess there is the potential for more damage than a normal car but i would imagine it is still quite rare and on the flip side you can actually see them easily so you can just have a look every now and then as you walk by. I guess you could put a plastic spiral wrap around it if you were really worried but in 10 years my 2b brake hoses don't have a scratch on them. When was the last time you looked at your tin-tops brake hoses? If a brake hose did fail you should still have braking as it should be a split system. The sierra master cylinder i have is a 3-way but more modern cars have a 4-way split diagonally.
-
I did wonder about this as a concept but not an engine in the rear but a motor! If you had the batteries up front where the engine used to be and mounted an electric motor in the boot it would balance out the weight a bit. You could then lose the prop and gain more space in the cockpit. Not sure whether it would need a gearbox on the motor though. Depending on the setup i wondered if you could add a sprocket to the front of the diff where the prop normally connects and then a chain drive to the motor/gearbox above.
-
Was watching 'fast n loud' the other day and they were breaking in an engine after rebuild and used an additive. It didn't work and they ruined the engine and had to start again using proper oil for breaking in. so don't use an additive and normal oil, go for the proper break in oil just in case you were thinking of trying that route.