Jump to content

Body Work Fitting


Thrashed

Recommended Posts

Hi All.


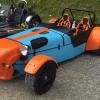
I am after a bit of help with my Zero. What have been peoples experiences fitting the nose cone. How did people line it up, cut out/ shape the sides and secure it to the front of the car.


Thanks for your help in advance, if you have close up photo's that would be great.


Steve


:D

Link to comment
Share on other sites

Guest Larson250

Hi Steve,


I personally got the bottom edge of the nose cone level and fixed a stainless steel hinge along the inside and attached it to the bottom of the chassis.

It was then a baal ache of a job to keep offering it up to the suspension arm and mark out where to cut. Cut a bit and mark and cut, etc.etc.


I then used some of the door seal off the donor, the stuff that is the u shape crimp on with the foam tube type stuff attached. (Are you keeping up)

Glued that on with Siklaflex stuff.


I then cut out the grille section leaving about 15-20mm (I think) around the inner edge, this I then trimmed using the plain U shape stuff (It gets better)


I then stuck my grille behind the whole lot on the inside, and drilled holes for the caterham grille to sit in front of it all.


To secure it at the back end (near the light bracket) I made two angled brackets to fix to the chassis with riv nuts and then drilled for small bolts to go through the nose cone.


I have added two photo's, not the best quality but should give you the idea.


If you understand this you've passed the test now move on!


Best regards,


Dean

post-3326-1260894392_thumb.jpg

post-3326-1260894400_thumb.jpg

Link to comment
Share on other sites

Hi Steve,


I personally got the bottom edge of the nose cone level and fixed a stainless steel hinge along the inside and attached it to the bottom of the chassis.

It was then a baal ache of a job to keep offering it up to the suspension arm and mark out where to cut. Cut a bit and mark and cut, etc.etc.


I then used some of the door seal off the donor, the stuff that is the u shape crimp on with the foam tube type stuff attached. (Are you keeping up)

Glued that on with Siklaflex stuff.


I then cut out the grille section leaving about 15-20mm (I think) around the inner edge, this I then trimmed using the plain U shape stuff (It gets better)


I then stuck my grille behind the whole lot on the inside, and drilled holes for the caterham grille to sit in front of it all.


To secure it at the back end (near the light bracket) I made two angled brackets to fix to the chassis with riv nuts and then drilled for small bolts to go through the nose cone.


I have added two photo's, not the best quality but should give you the idea.


If you understand this you've passed the test now move on!


Best regards,


Dean


Thanks Dean


Clear as mud!! Was kind of what i was thinking. Does this mean you can remove yours? I was thinking that i might be good to have it as a removable item for any future repairs.


Thanks for the help


Steve

Link to comment
Share on other sites

Hi Steve,

I did the same as Dean, I drilled and fitted 5

rivnuts to the bottom crossmember, fitted a 6mm spacer so it was

level with the bottom of the body then sandwiched the nose using another

6mm plate (to spread the force) and fixed to the crossmember

with counter sunk set screws (m5).

Used Ali angle and rivnuts on the top.


John

Link to comment
Share on other sites

Guest Larson250

I can remove it by un-doing the three bolts in the hinge. But I just let it hinge down onto the floor, it still gives you plenty of room.


Sorry forgot to mention mine is also sandwiched.


Dean

Link to comment
Share on other sites

Hi Steve,

I did the same as Dean, I drilled and fitted 5

rivnuts to the bottom crossmember, fitted a 6mm spacer so it was

level with the bottom of the body then sandwiched the nose using another

6mm plate (to spread the force) and fixed to the crossmember

with counter sunk set screws (m5).

Used Ali angle and rivnuts on the top.


John


Thanks John, sounds like everyone does it the same. Like the idea of it being removable, so rivnut sounds good.


Just another question if you don't mind, Where did you get the straps to secure down the petrol tank?


Thanks Steve

Link to comment
Share on other sites

Hi Steve,

For the tank straps I used 2x 30mm (I think) Ali strips

Which I then lined with tank strap rubber basicaly is U channel

from woolies trim, and all the metal that the tank sits on, and rivnuted

the straps to the underside of the rear lower "bumper" and the crossmember

that would be the rear boot floor.

Must remember to earth the tank.

John


If someone can put a picture of a zero chassis on and number

the chassis rails we could do it by numbers!

Might be one in the build manual.

Link to comment
Share on other sites

Thanks John, sounds like everyone does it the same. Like the idea of it being removable, so rivnut sounds good.


Just another question if you don't mind, Where did you get the straps to secure down the petrol tank?


Thanks Steve


Hi Steve, the best way to form a 'Seat' for the fuel tank is as follows.


1; Mark on tank where the chassis rails will be and remove tank to your bench.

2; Stick brown parcel tape to the tank where you marked it.

3; Lightly abrade the chassis rails where the tank will contact and degrease / clean using thinners.

4; Apply a GOOD bead of Sikaflex or similar to the chassis.

5; Place tank on sikaflex and work it down until your happy with how it sits.

6; Ratchet strap or clamp in place and leave to dry.

.......

.......

7; Lift away tank and trim excess Sikaflex away to leave a clean perfectly formed saddle for your tank.

8; Don't use masking tape instead of parcel tape........ *bleep* to blanket springs to mind.


Hope this helps mate. :hi:


Nick.

Link to comment
Share on other sites

hi steve,offer still stands if you want to come and have a look,might give you some ideas.my nose cone is held on by 4 bolts ,2 top, 2 bottom.

jess.

[/quote


hi jess. Thanks will defo pay a visit once work calms down. Thanks again for the offer will be in touch soon

Link to comment
Share on other sites

Join the conversation

You can post now and register later. If you have an account, sign in now to post with your account.

Guest
Reply to this topic...

×   Pasted as rich text.   Paste as plain text instead

  Only 75 emoji are allowed.

×   Your link has been automatically embedded.   Display as a link instead

×   Your previous content has been restored.   Clear editor

×   You cannot paste images directly. Upload or insert images from URL.

Loading...
  • Recently Browsing   0 members

    • No registered users viewing this page.
×
×
  • Create New...