Jthorneuk
 RHOCaR Member
-
Posts
62 -
Joined
-
Last visited
-
Days Won
1
1 Follower

Jthorneuk's Achievements
")
Getting there Builder (3/6)
2
Reputation
-
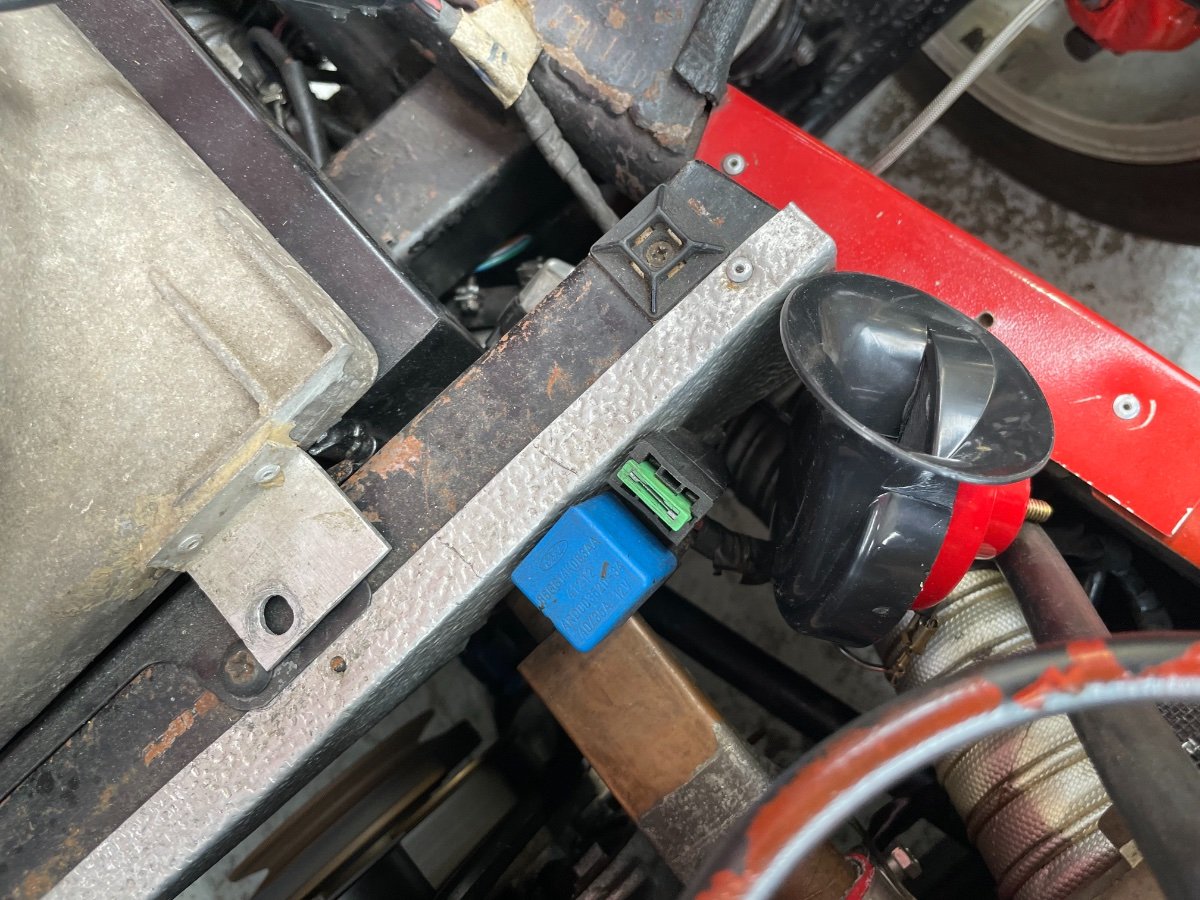
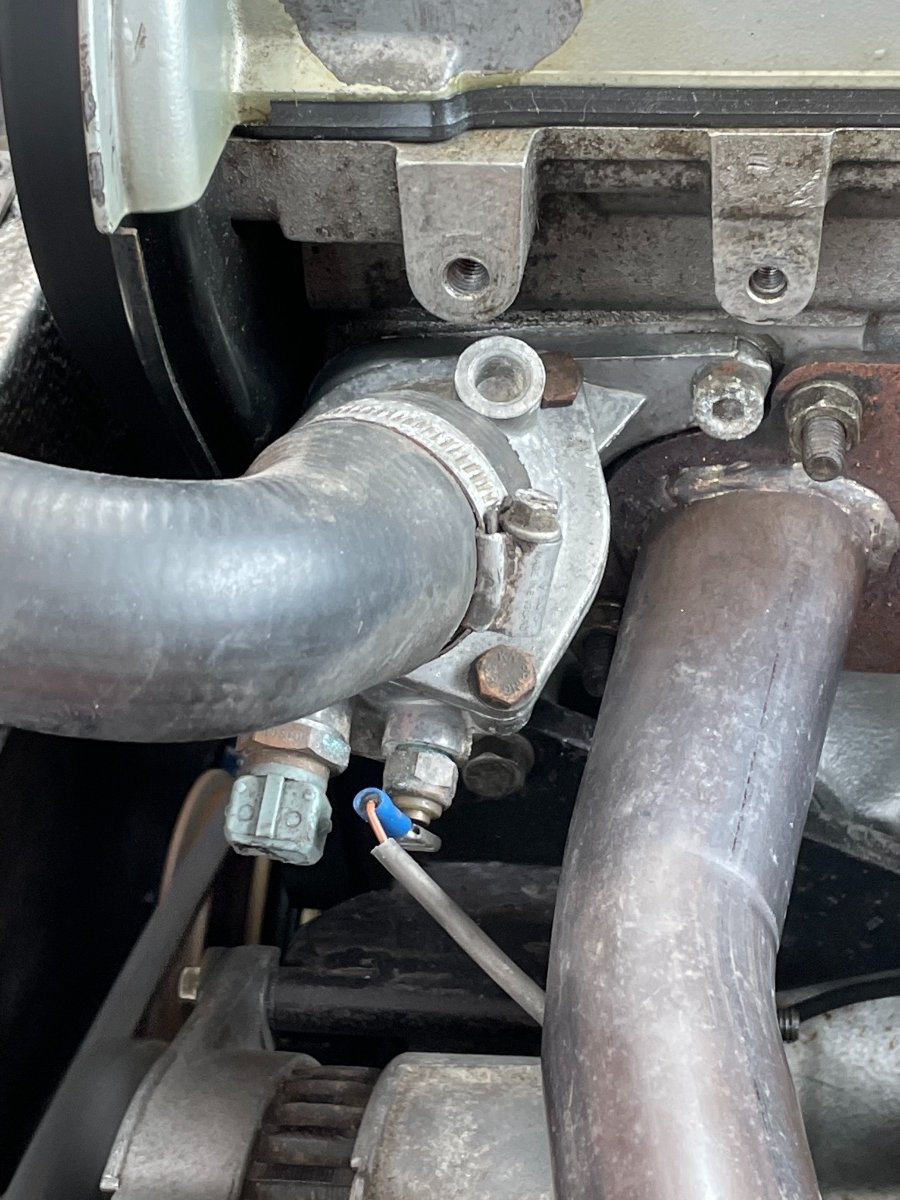
The two pin sensor isn’t connected and never has been since I had the car, tbat was my first thought. But the fan used to come on and off. the single wire goes to the dash and main loom, this I assume is then in the multi plug that goes in the dials, I haven’t traced it fully yet. When I ground the wire nothing happens so it’s either broken or a faulty gage is my assumption. I have the Haynes manual for the calibra but for instance the fuse box is two universal ones not the original so I’m not sure how much or the wire loom Is original.
-

-
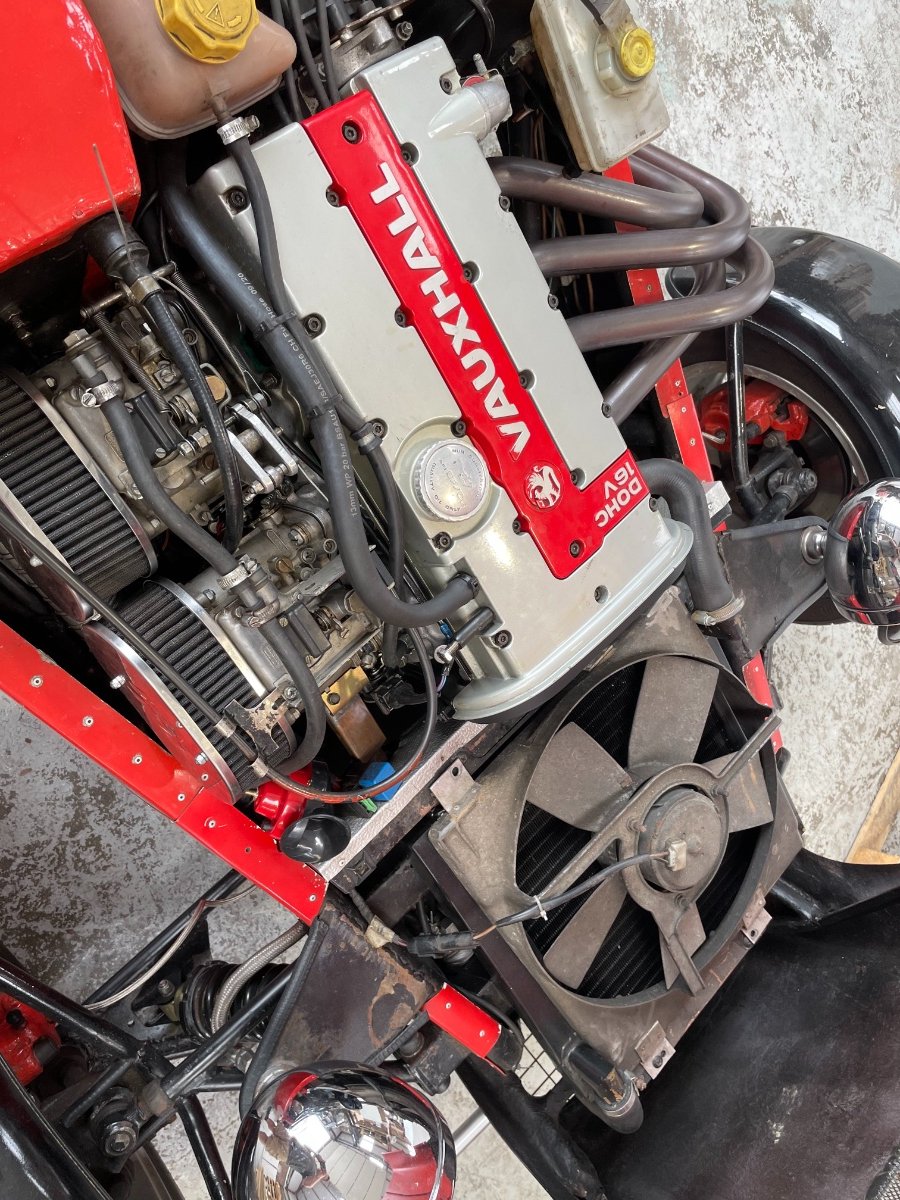
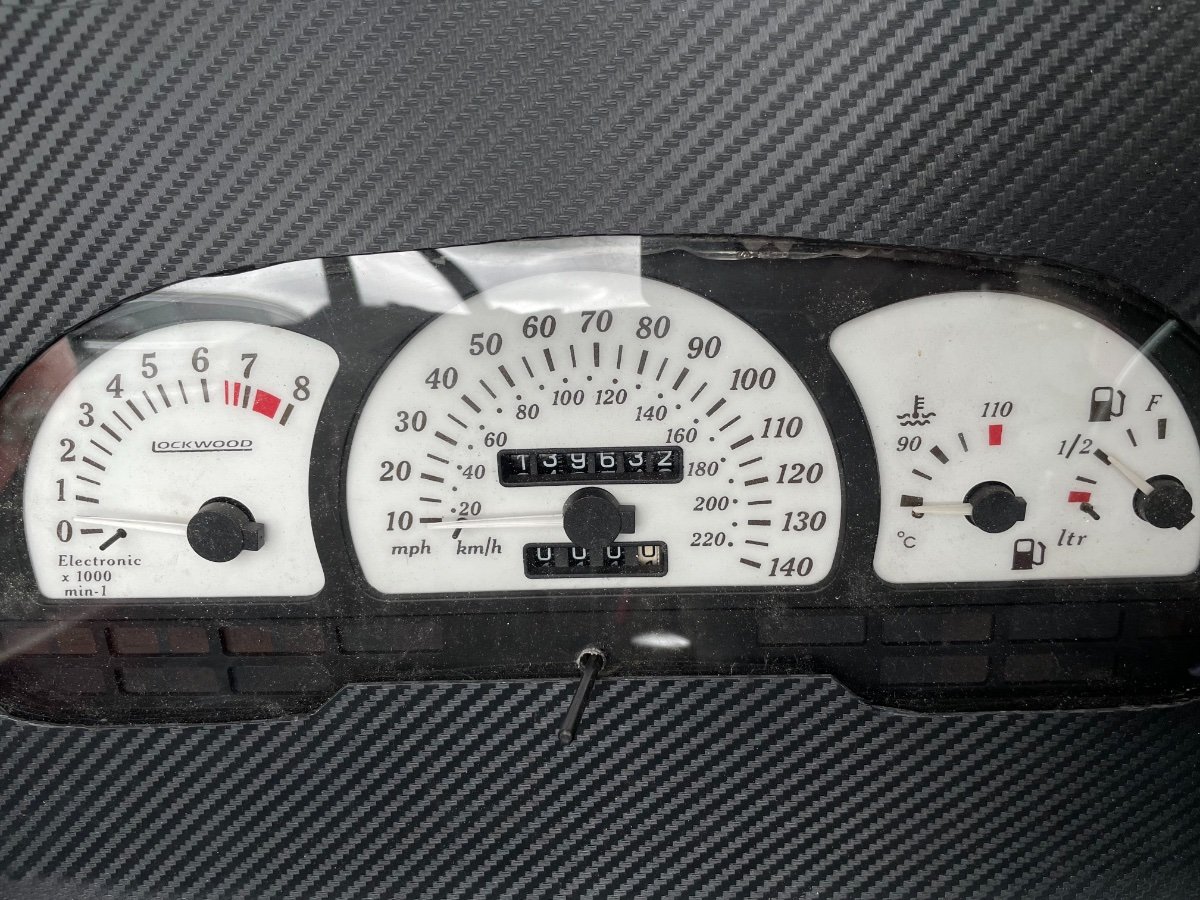
Hi All, I have a 2.0 DOHC engine from a Calibra in my 2B, The problems started when the fan failed and the temp gage didnt work either so the car boiled over when being setup on a rolling road. The dials themselves are from a Calibra and the speedo has stopped working as well as the temp gage. I figured its going to be the clocks so I have taken the clocks out and ran a electric screwdriver in the speedo and it moves so I think its the gearbox end thats faulty on that, I have also taken the single sensor wire off the temp sensor thats in the radiator hose and earthed it as this is meant to max out the temp gage but it didnt move, so I think that the gage itself is faulty. The fan runs off a relay and it used to come on and off, but now it seems to have stopped working, but I cant figure out what would trigger the relay to turn the fan on and off, can it be this single wire that goes back to the dials? that somehow then triggers the relay at a set point? I didnt build the car so im working through somebody else's work. First I thought it was the dials, then the sensor now it could be both lol. I have also got an entire plug missing in the back of the dials but I think that could have been for extras from the original car. I will attach pics of the setup, if any body has any pointers that would be great, I can get another set of clocks for about £50 if needed but im not sure its that and cant see how that triggers the fan relay.
-
I could mount the Sierra ones for the Iva but they can’t have 4 point harnesses, but there is no place to mount the shoulder seatbelt fixing as the car only has bolt points for the 4 point.
-
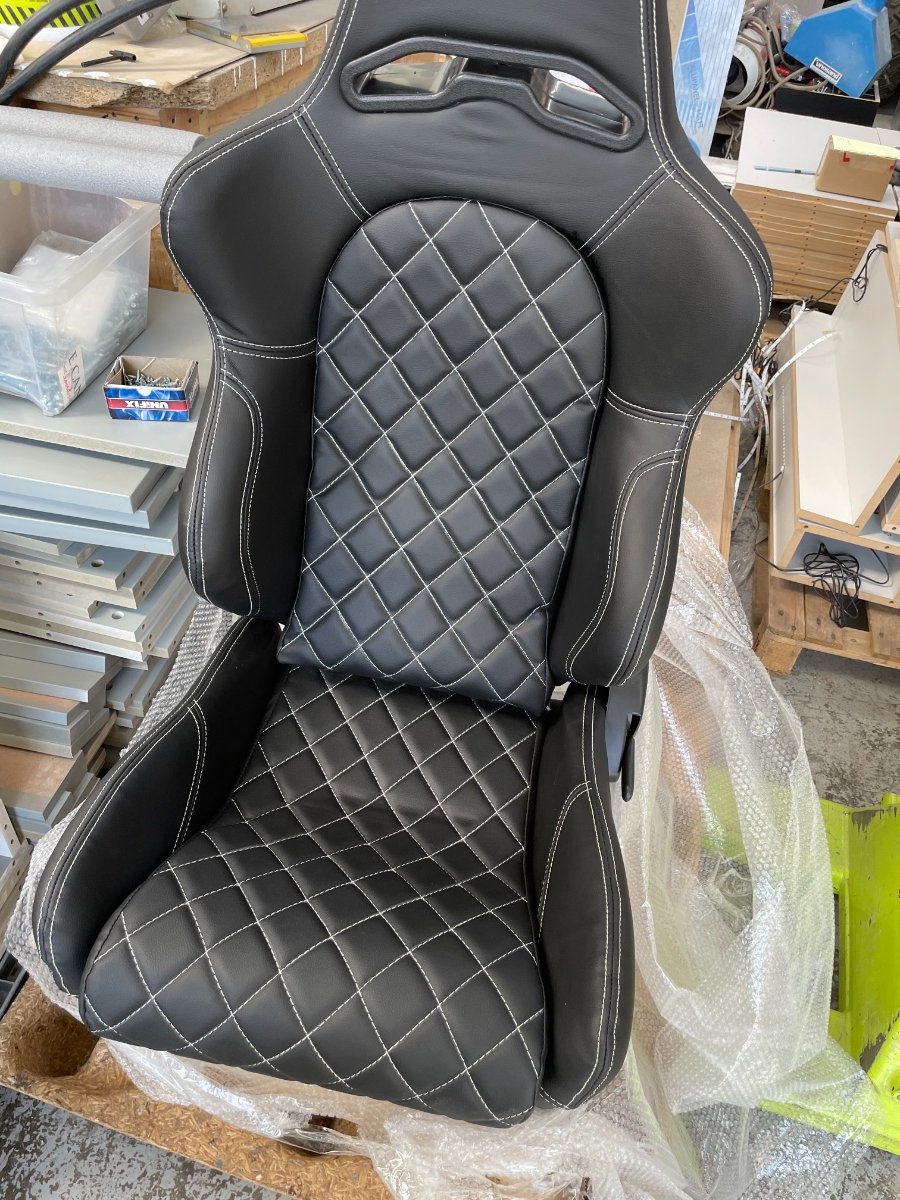
Just got myself some new seats, I plan on using 4 point harnesses. I posted in a Facebook group about them and somebody has commented that you can’t use 4 point harnesses with tilt back seats? The car only has mountings for 4 point with no place to put a standard seatbelt, the original Sierra seats would have had a tilt back. I can’t find anything that says about it, only that the tester will shake the seats to see they are mounted firmly and that the 4 point harness can’t fit more than 20’ from when it goes through the holes in the seat. Has anybody any experience of this?
-
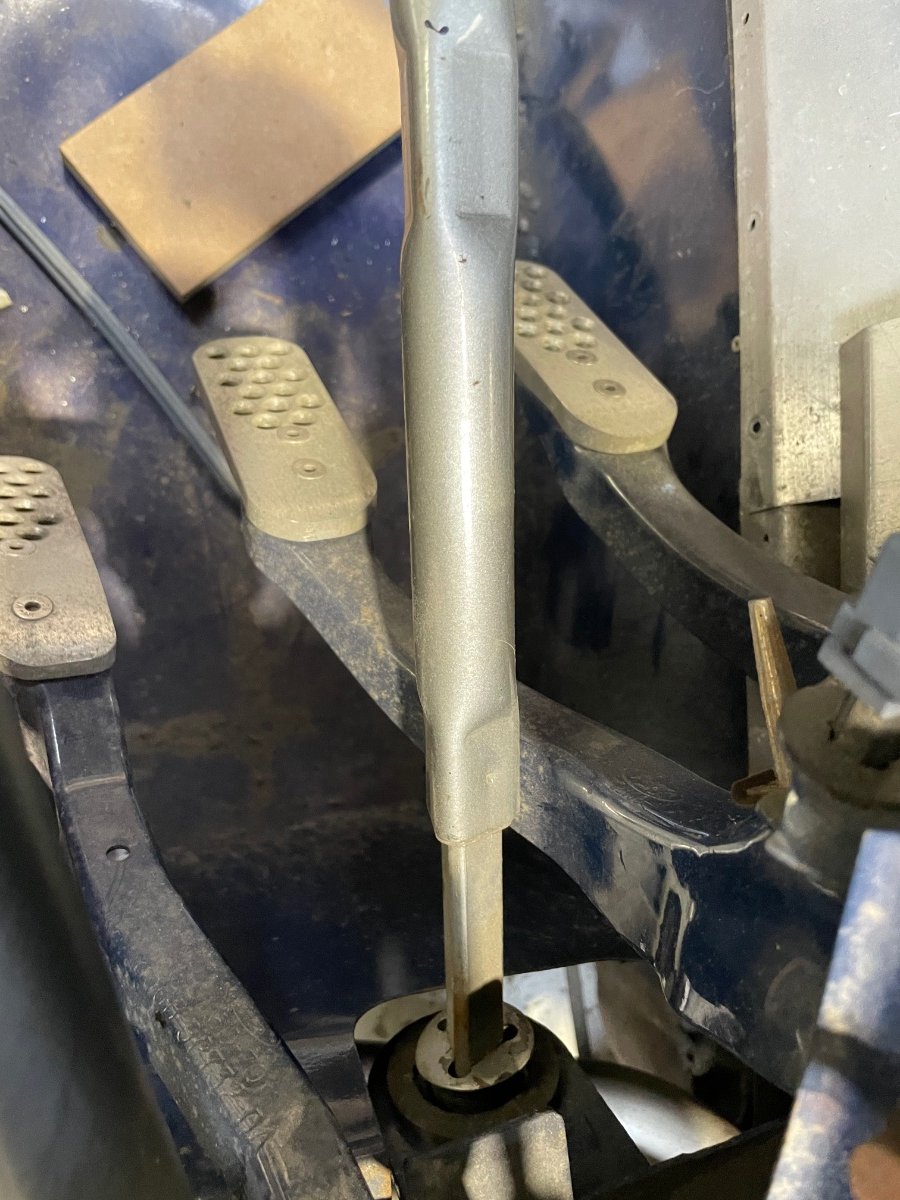
this is what im not sure about, but surly nobody puts a 38mm diameter round section on the bottom of their dash?
-
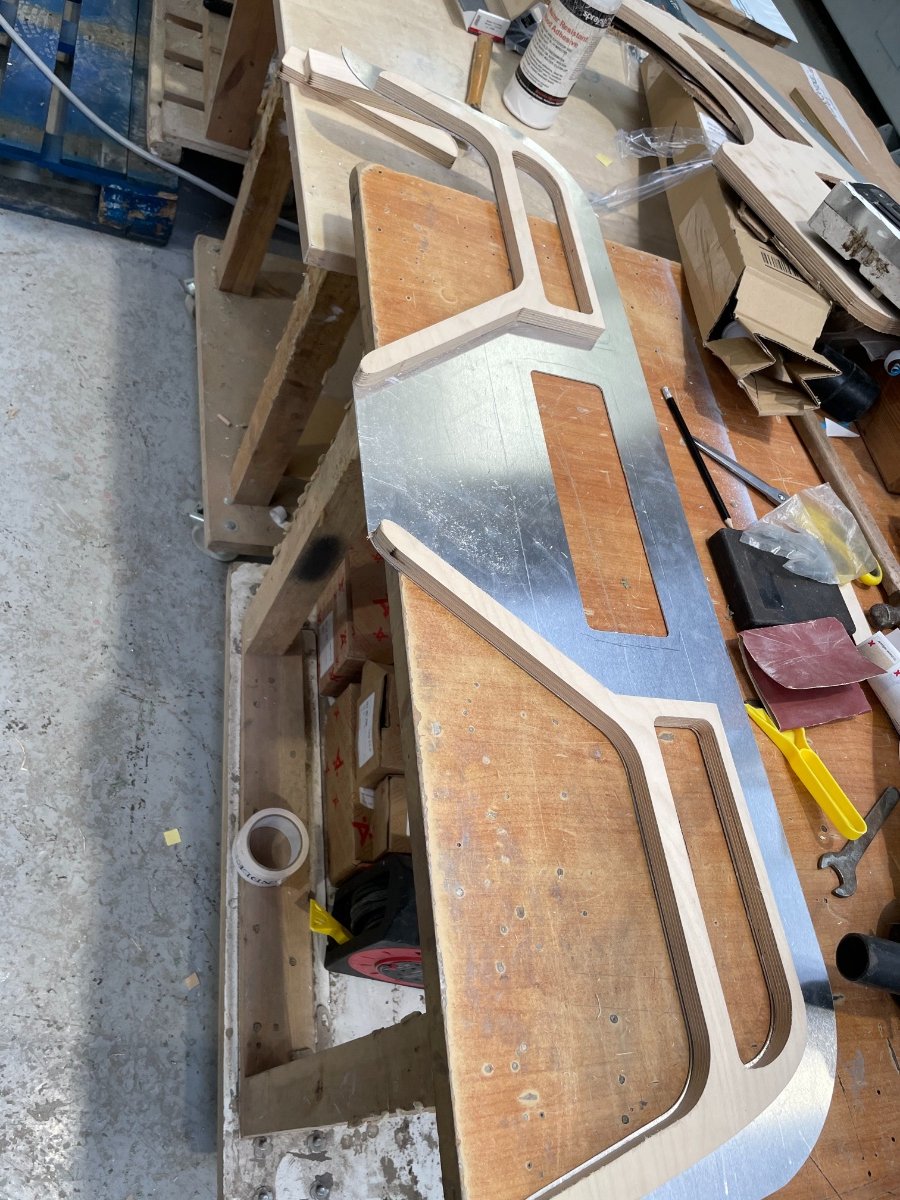
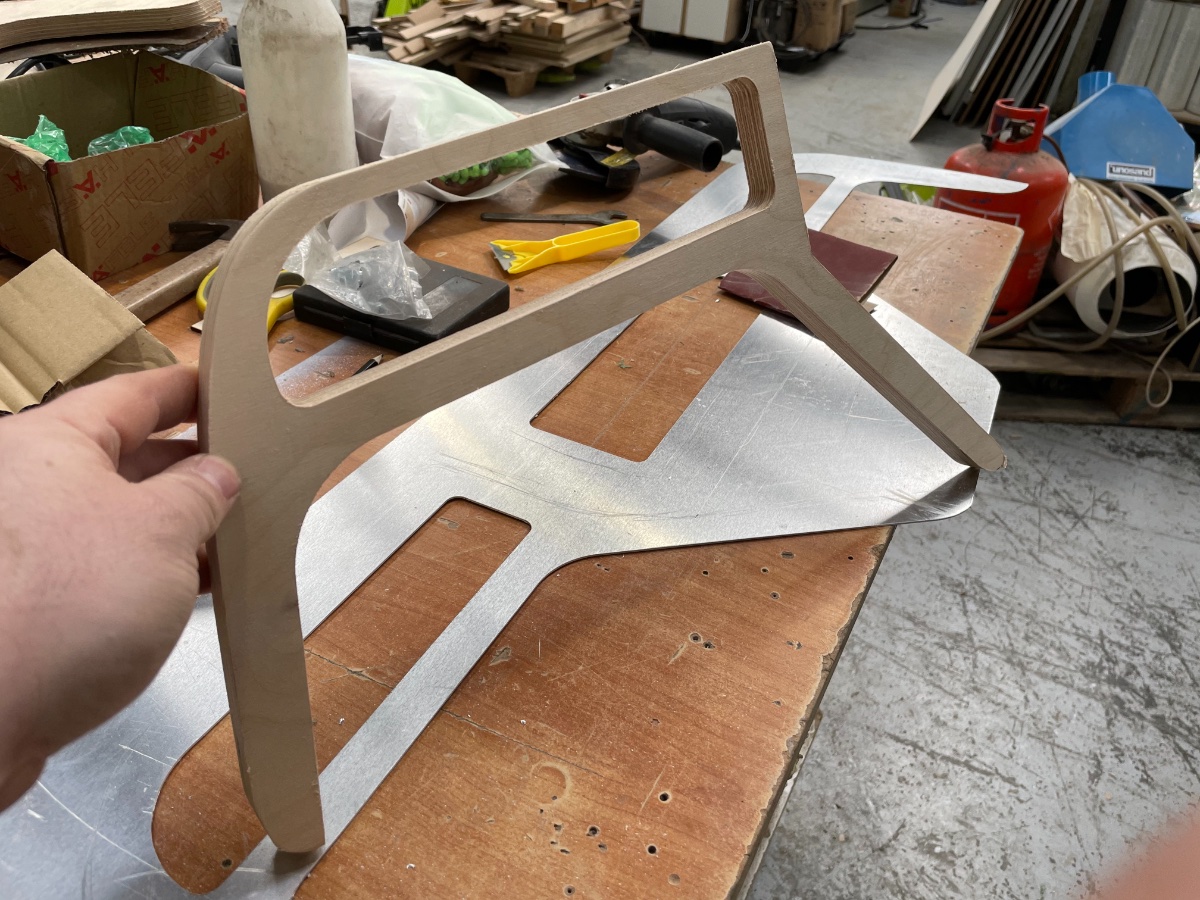
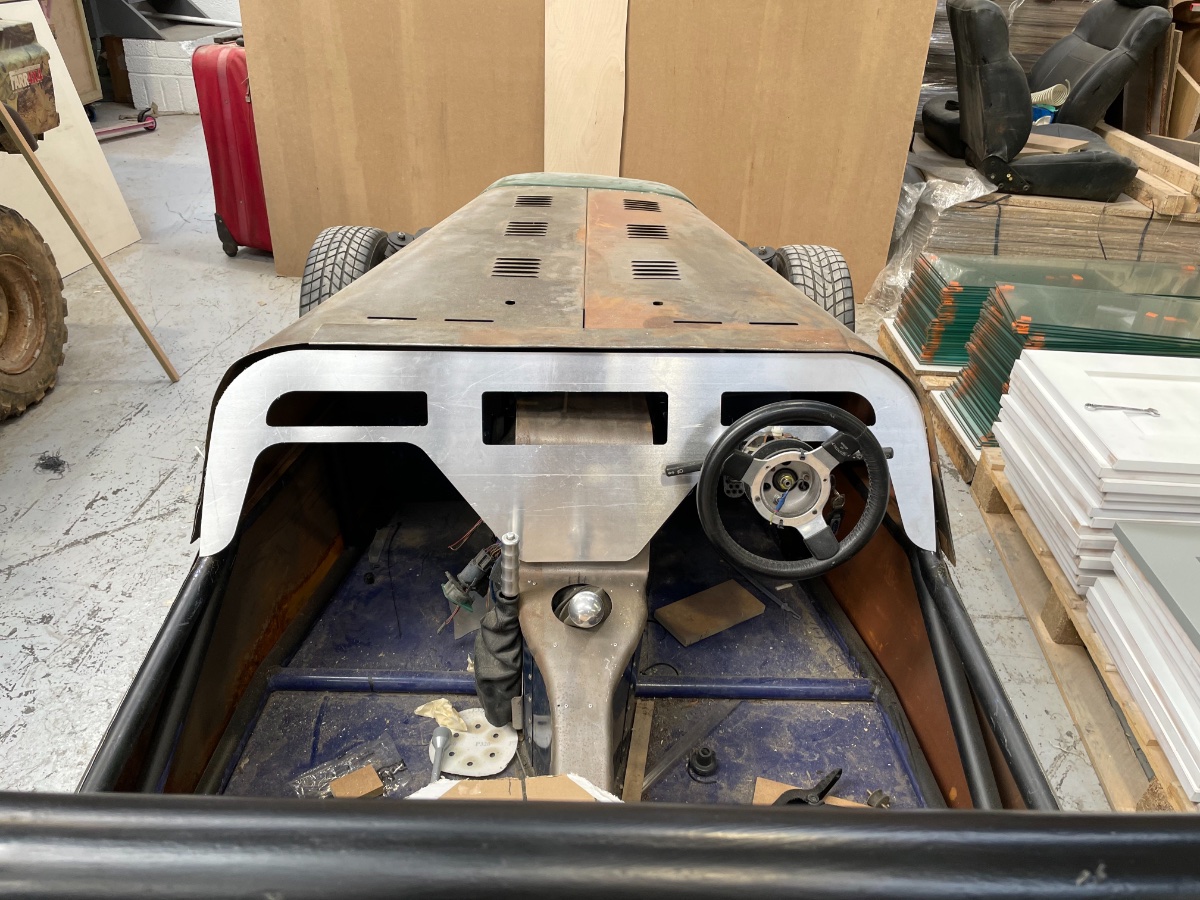
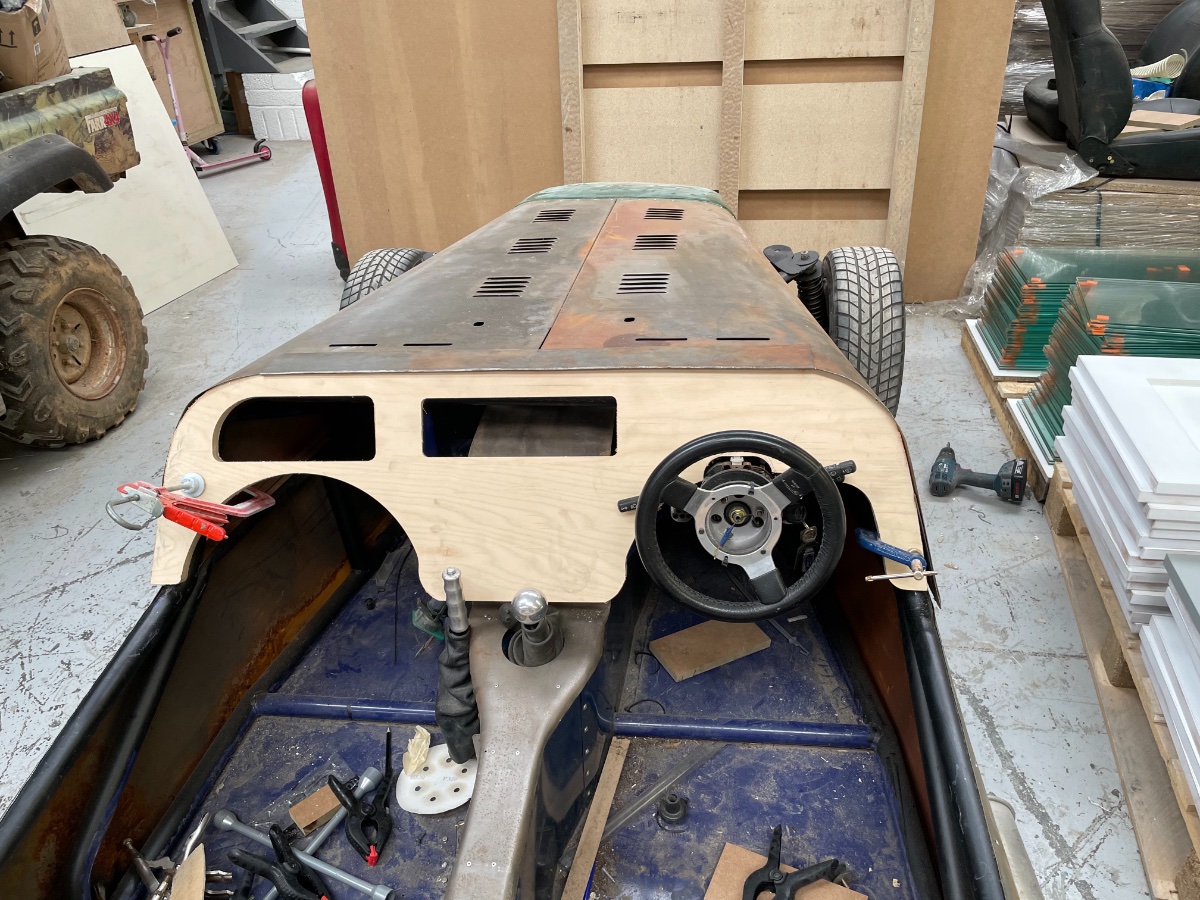
This is where I’m at right now. These wooden parts will be attached to the back making it stiffer but missing the chassis tubes so that it does not sit too far forward. Then a bunch of profiles glued and fixed together will form the thin dual glove boxes that couldn’t be any bigger due to the tube above the dash and having to mount the dash higher to fill the gap where the bonnet wouldn’t fit correctly. getting there.. slowly lol
-
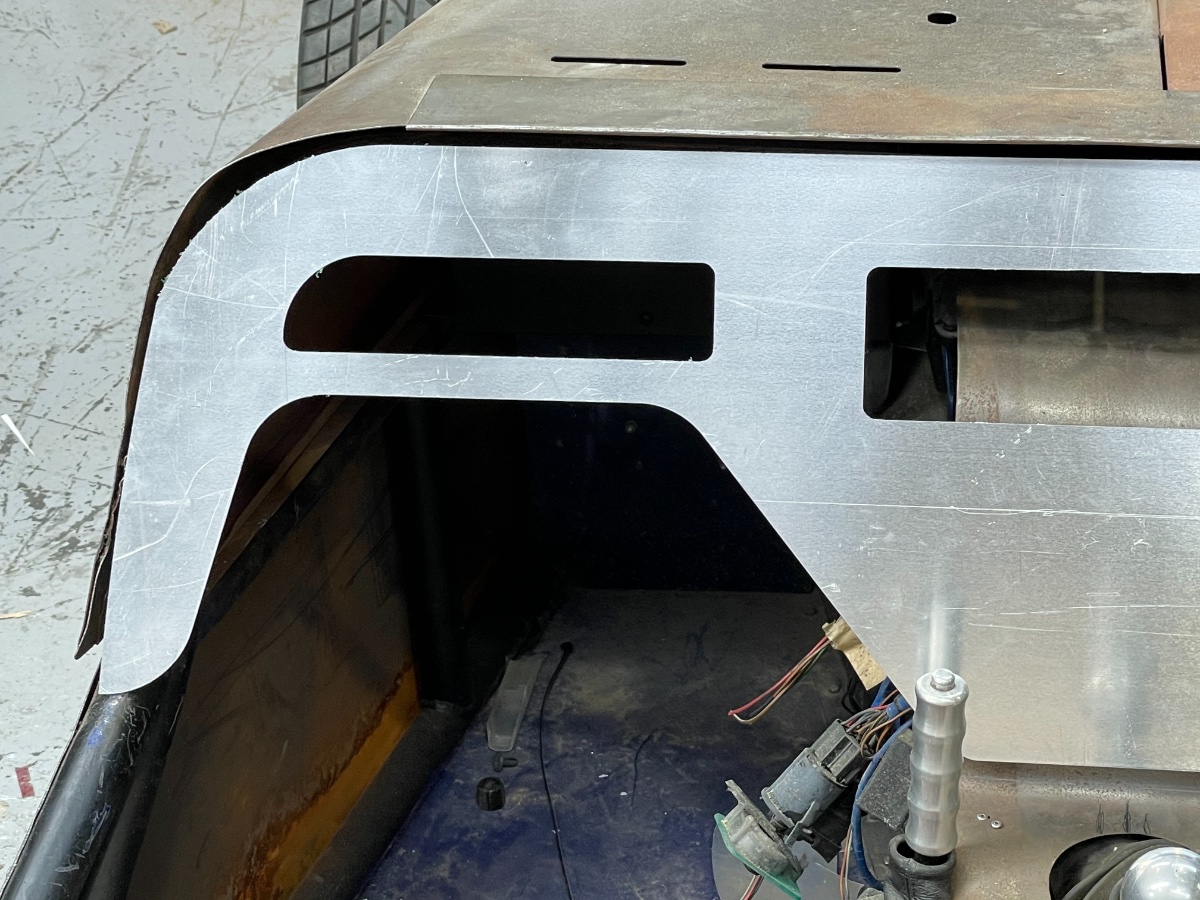
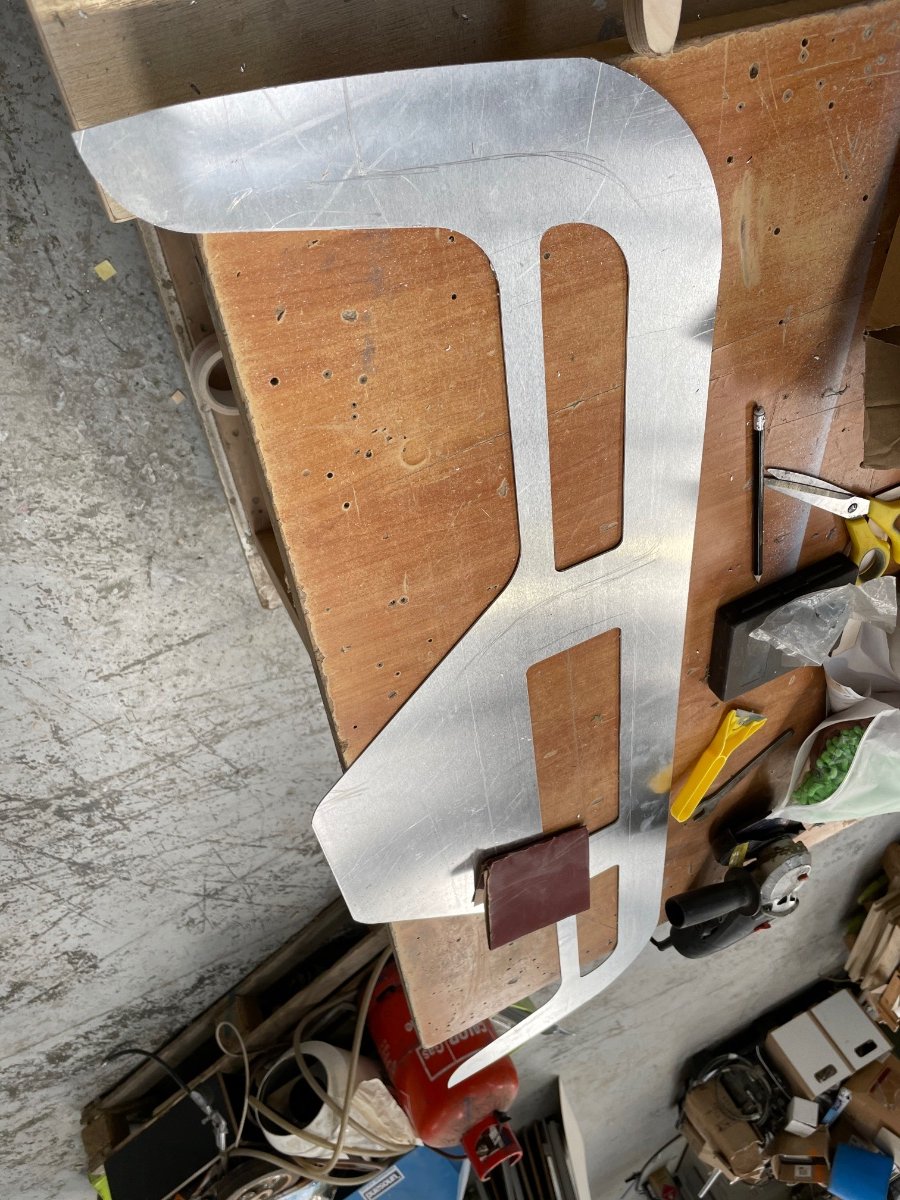
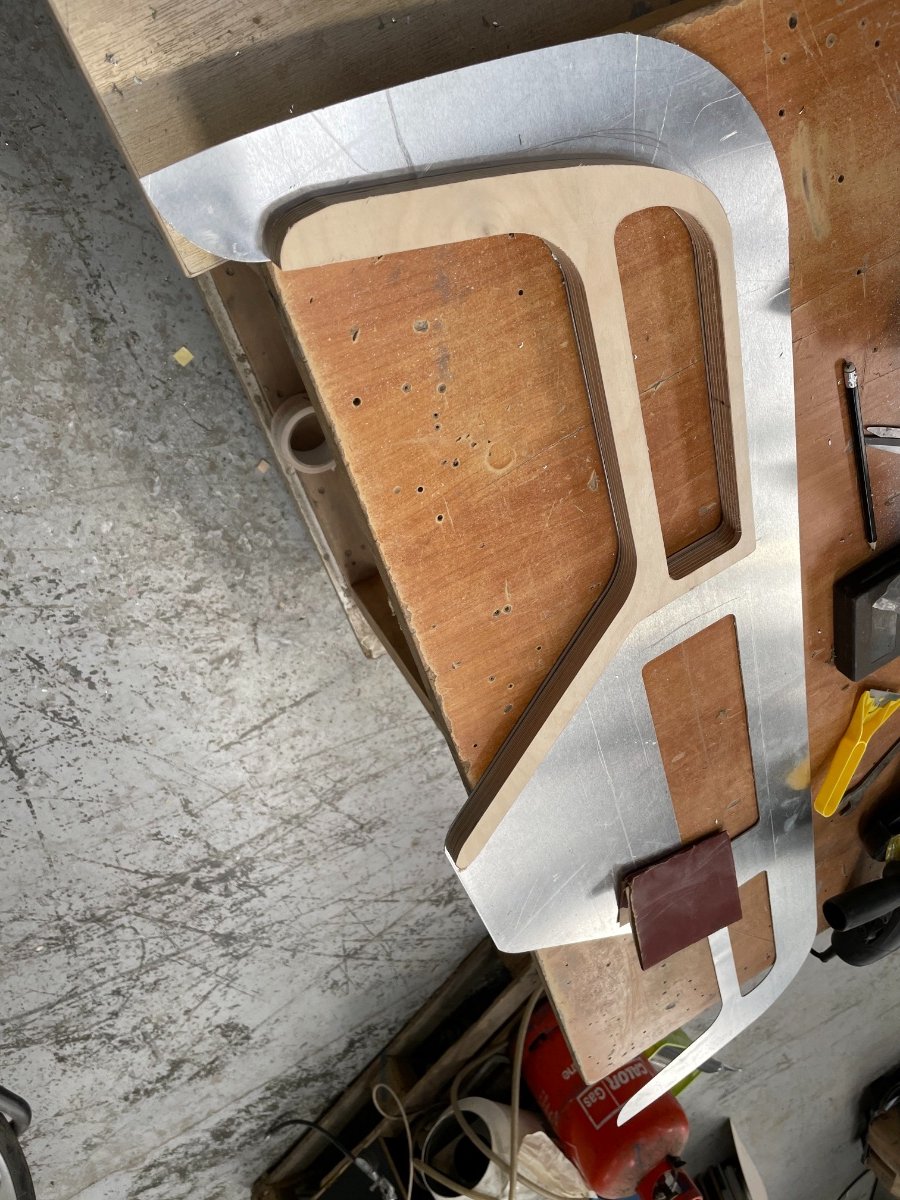
making progress on the dash and have now made it from 4mm alloy machined to shape.... I need to put a radius on the bottom edge as well as build in the two small glove boxes I have made.. My question is.. Im going to machine sections of the dash, ie the bottom edge, again from 18mm ply and then attach that to the back of the 4mm alloy to give the edge a total thickness of 22mm.. but it needs to be a radius of 19mm. So im assuming if i bull nose the bottom edge so that its a profile of a quarter circle... that will be correct?
-
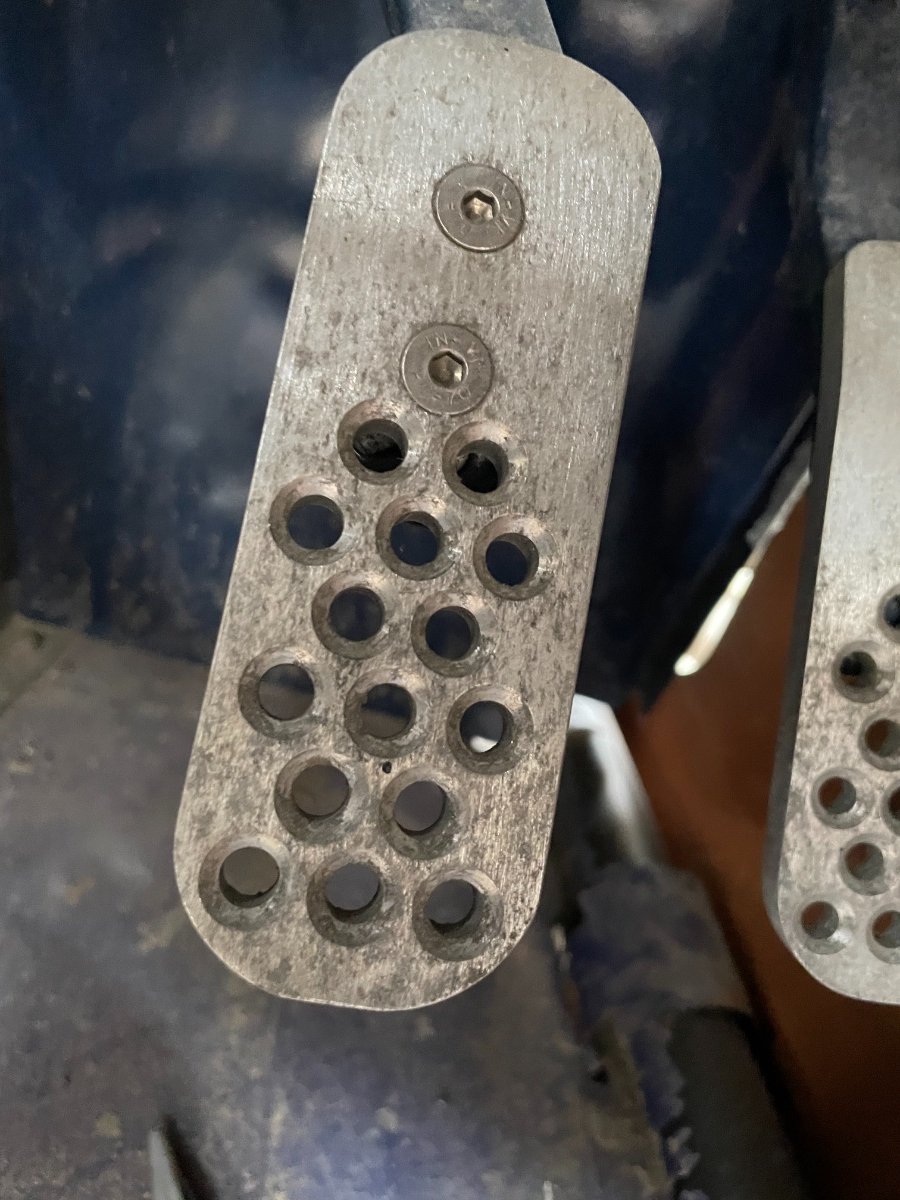
Yikes, didn’t even think of that. This is a closeup of the peddle, it does have holes drilled into it but not worth the oak of a fail to chance it. I’ll buy some more with rubber inserts. Or see if I can add rubber bungs into these holes.
-
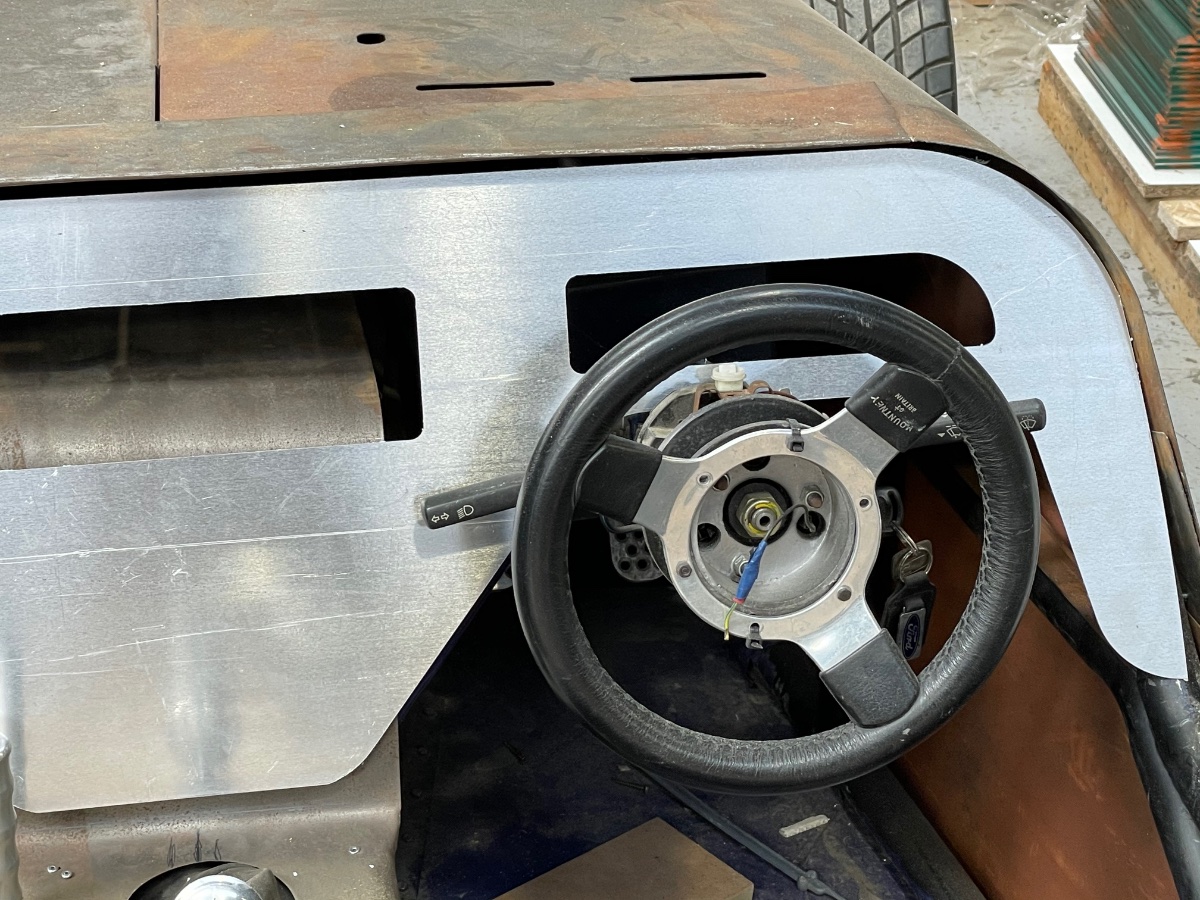
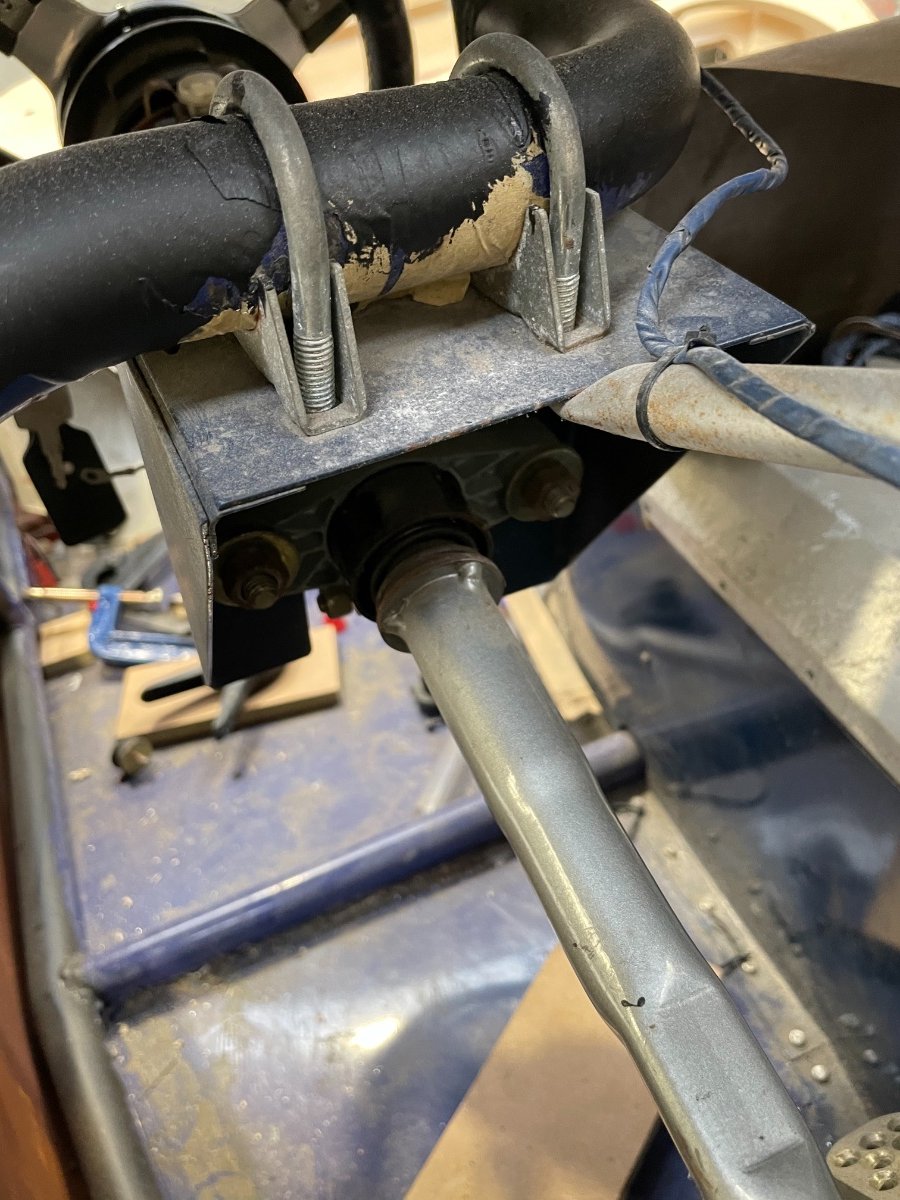
It seems there is some adjustment in the shaft but the bracket makes it impossible to use it. I did think about swinging the wheel on the U slips a bit to lift it up and forward at the same time but there is a strengthening bar also been put from the bracket back which is at its full forward position going to have another look tomorrow.. I may end up machining out the back of the 18mm in places to let it sit further back on the chassis tubes
-
Yea, shame as it could have been an easy fix for the issue
-
I had a look at the column but it seems to be bolted to a bracket and I can’t see how to lengthen the distance between the triangle join and thus bracket
-
I didn’t think this would be possible.. Not with the car now so will try next time. Would be better for sure as the 18mm is a far better option as you say.
-
Ok so this morning was filled with fitting the bonnet and hinging it the Robin Hood way.. then creating a new dash as the metal just was not working. quite pleased with it over all. Need to machine it again from 9mm ply as currently its 18mm and the stalks rub on it when using them. But the shape is ok. Need to cut the middle section off and reattach at an angle so it is tighter against the car in the middle as again it restricts hand space when changing gear. But over all good abs the bonnet closed down nicely over it and will be better when rubber strip is added.
-