

NickandNeil
-
Posts
205 -
Joined
-
Last visited
-
Days Won
4
Content Type
Profiles
Forums
Events
Store
Community Map
Posts posted by NickandNeil
-
-
We have a set of what we believe are Sierra shocks that we just removed from our eximo if you interested? I'll try an get a pic so you can see if they look the same.
-
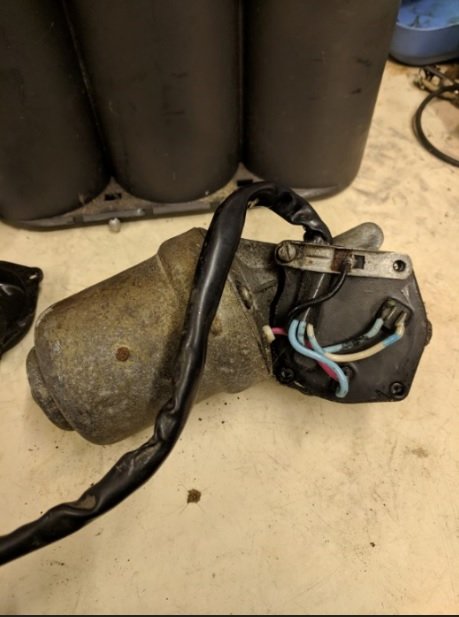
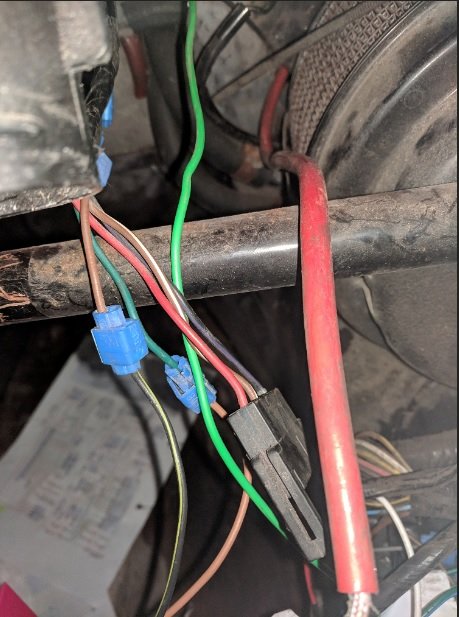
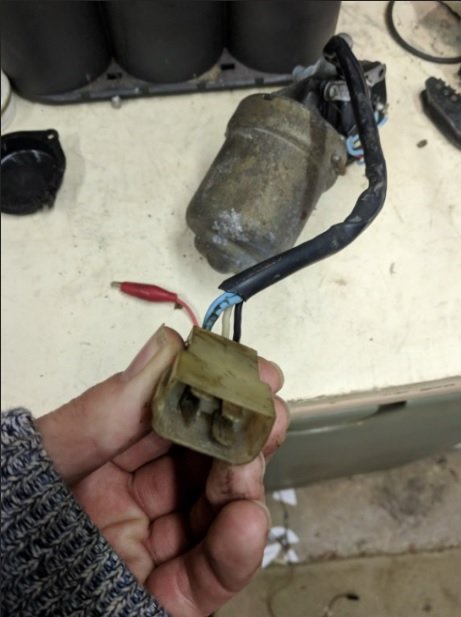
Hi guys i'm hoping you can help me with something we are currently stuck on, we have been having issues getting the wipers working properly to pass the IVA requirements. We only have one speed working out of the 3 options on the stick and after a bit of investigating we have found a bit of an odd set up. We have the 1984 sierra wiring loom and sierra steering column, but an unknown wiper motor which doesn't match any of the sierra wiring diagrams we have, I will add pictures below.
The wiper motor we have only has 4 wires (black, white, blue and blue/black) where as the sierra loom has 5 and after searching the part number on the internet I cant find any information on the motor itself. The main question we have is does anyone recognise it and can this be adapted to fit the sierra loom? or are we better off just trying to get our hands on a second hand sierra one that will plug straight in? We have only found one online for about £30 but its gotta come from Germany, so if anyone has an old one lying around we could be interested in buying?
Thanks in advance. Nick

-
Ah ideal I didn't realize there were any other members in the aria. I'll send you a personal message an hopefully we can meet up.
The build has been going slow over Christmas sadly due to my poor health but we are making progress. I would say we nearly have the whole front of the car finished, just a few little jobs.
-
Just found this picture, thanks longboarder! That's just saved me hours of work.
-
That's great thanks Geordie. Looks like they have exactly what were looking for too.
-
Hi where did you get the gauges and how much were they? We looking for a set an the smiths were just too rich for us too.
-
Looks fantastic so far! I am looking forward to seeing what you do with the interior as we will be starting ours soon and I want to steal ideas
-
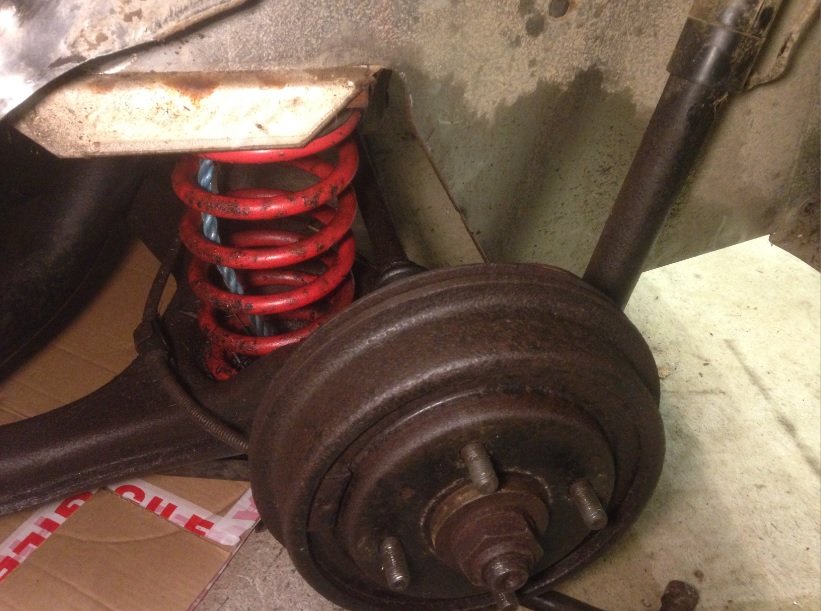
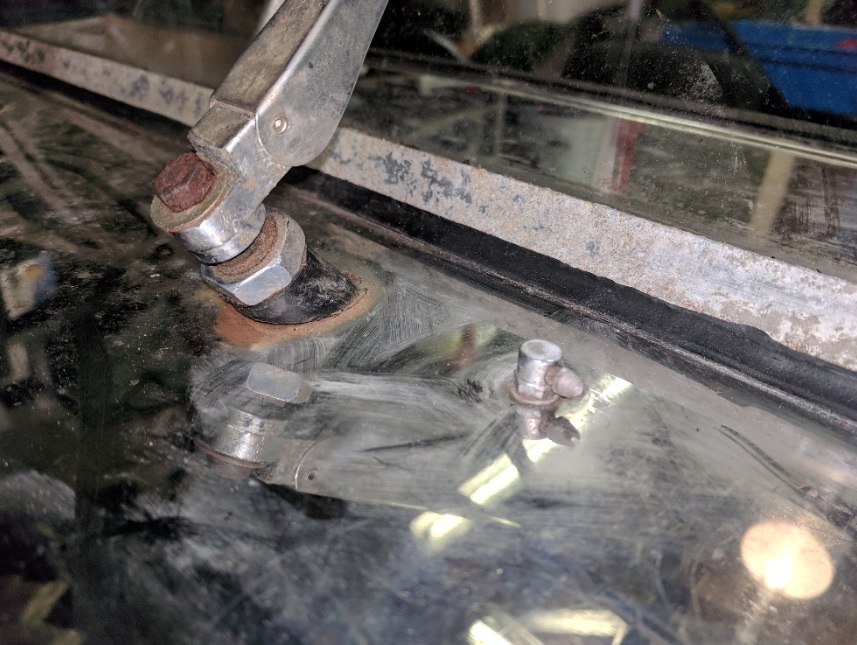
We were more worried about it from an IVA stand point, is the mounting point strong enough where it is or does it need a bit of re-enforcement? Currently with the shock fully extended the spring could fall out without the bit of rope that is currently in place. Seems a bit of an unusual setup but if it is a passable arrangement we don't want to add extra work at this point.
The way I see it there are two main choices with an expensive third. We could either go for a larger but softer spring in the same place as the current one which would probably be the easiest and cheapest fix for now. Or we can go for just a new shock and add a new mounting system, keeping the old spring with an improved top mount. The third would be splashing the cash on the coil over option which isn't really an option.
What do you guys think?
P.S. Just a quick update on what we have been up to. Most of the cars lights now work as they should, after two days of soldering and shrink wrapping connectors all we have left to do is the dashboard lighting and fog light switch. just about all the lighting was fixable with either new bulbs, new switches or just a bit or soldering. We have disassembled the rear breaks ready for a full service and new pads. Replaced the engine oil, put in new spark plugs, new ht leads and distributor cap. Oh and we have done the final fit on the cooling system which is now working a dream!
-
Thanks Mr Toad that's a kind offer, but for the moment were going to stick to our current setup, after all the hours and money we have now put into installing it we want to see if our handy work makes the difference to the cooling (though you may get a panicked message of us if it doesn't).
The Duck, yeah that would be great thanks could definitely do with some advice on this one.
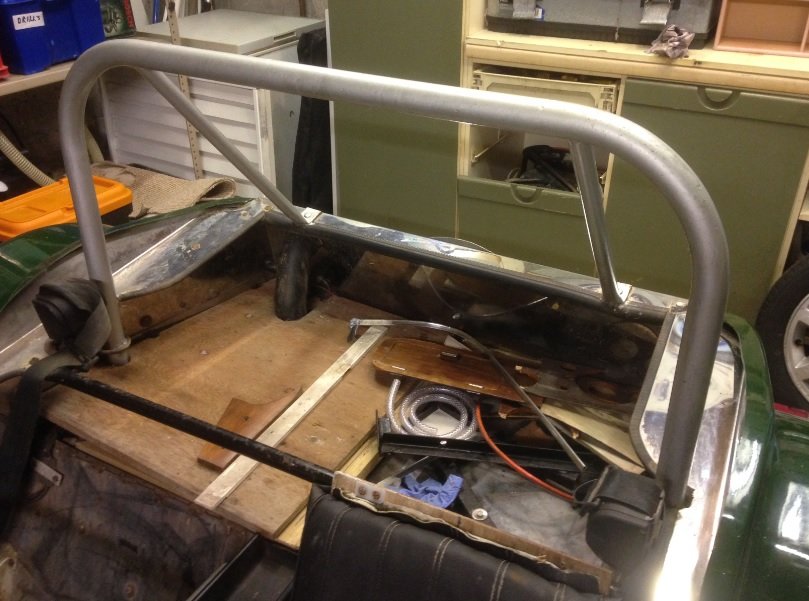
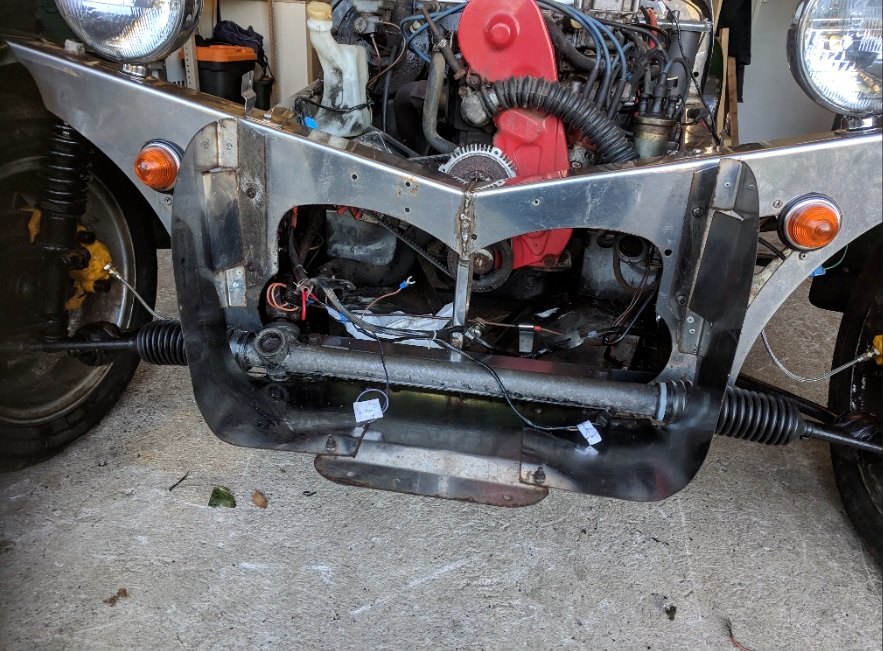
I will attach a few pics of our current rear suspension and our rear roll cage and you can tell us what you think. We are planning on adding 4 point seat belts to replace the ones in the photo. I'm assuming we will be better off ditching the current rear shocks and spring for a coil over option in the space the spring currently uses with a bit of strengthening? if so does anyone have advice on where to find something that should fit in current set up with little modification?
Cheers again
Nick an Neil
-
Good luck! Let us know how it goes.
-
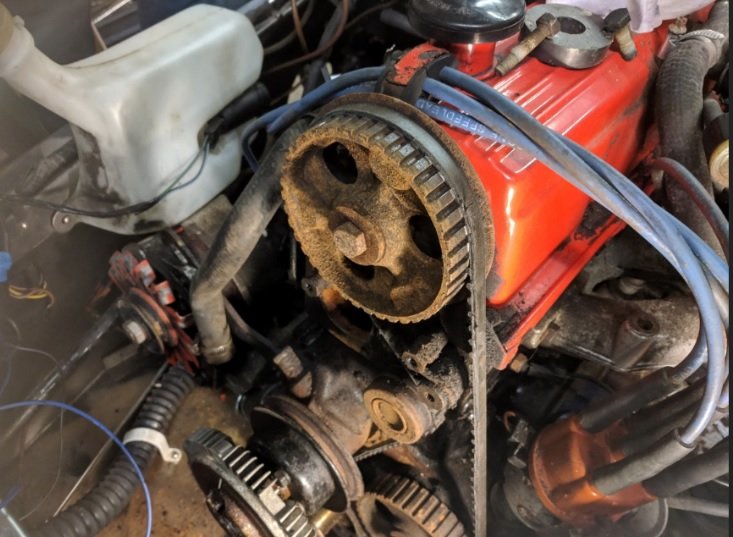
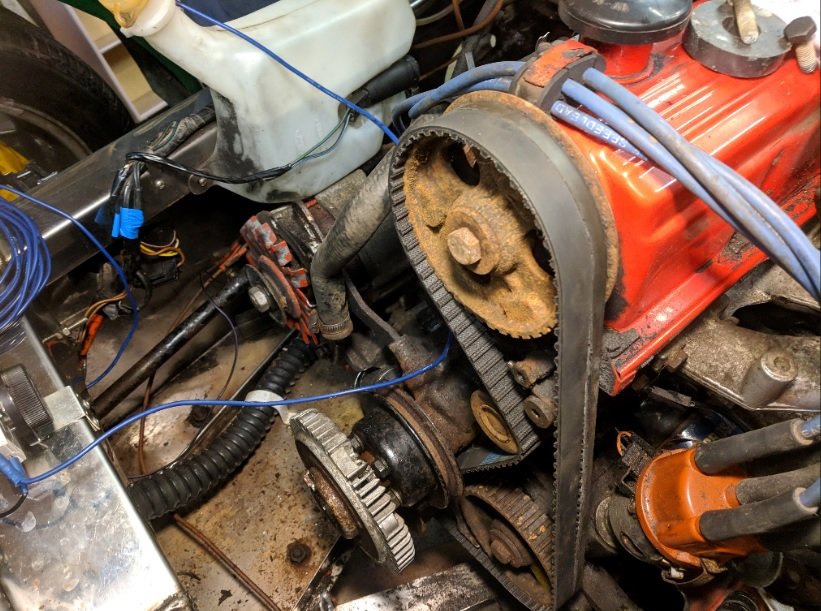
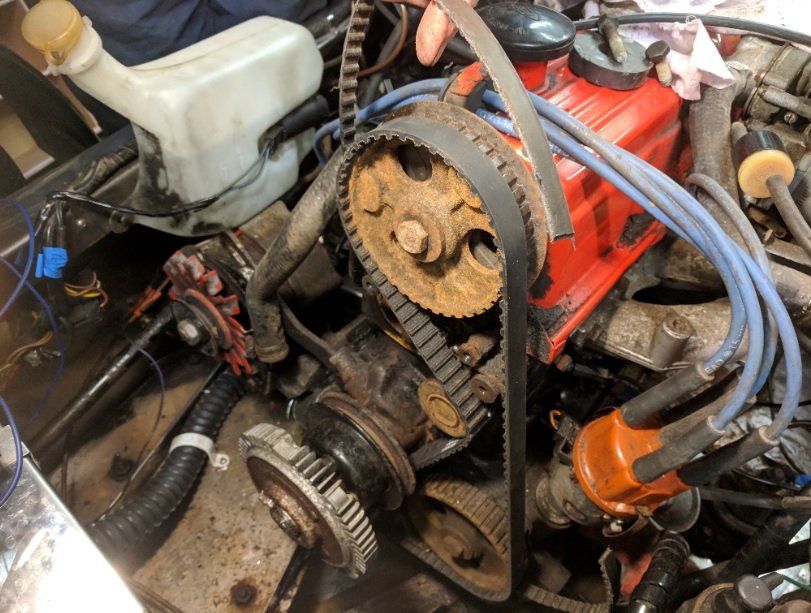
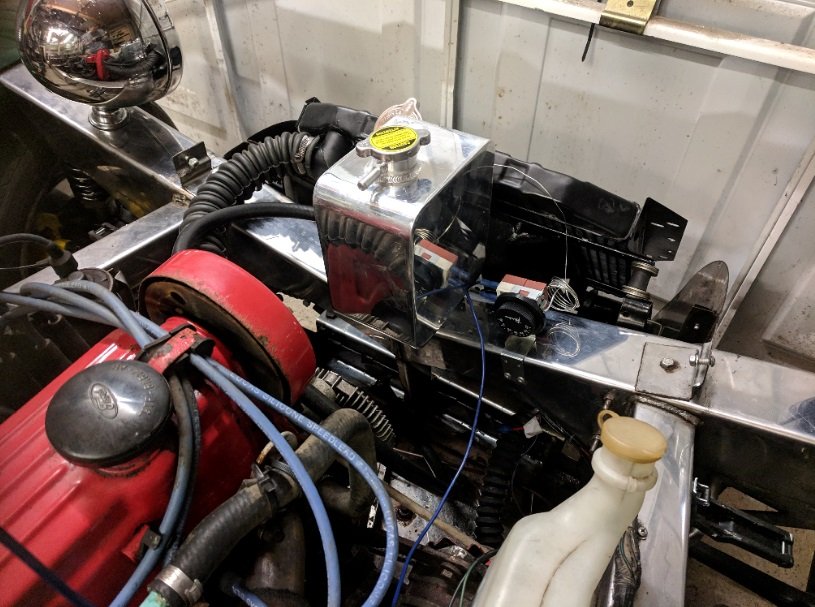
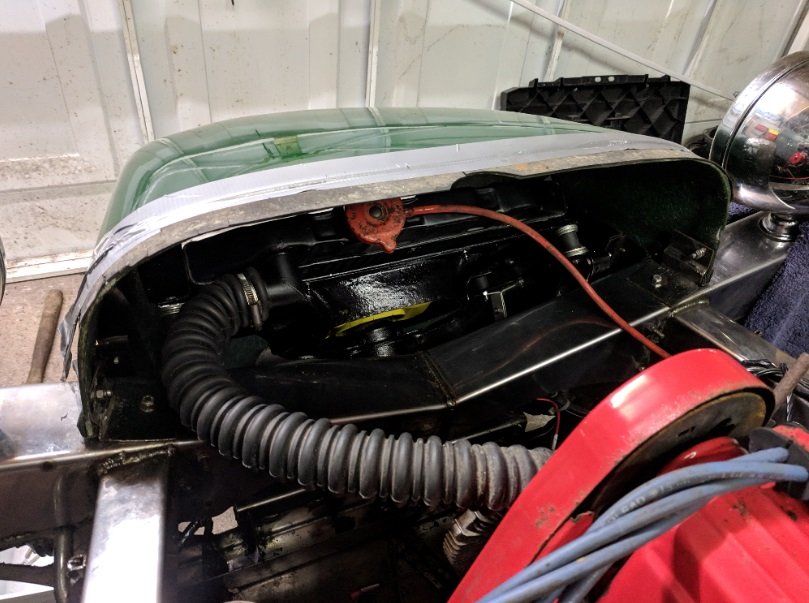
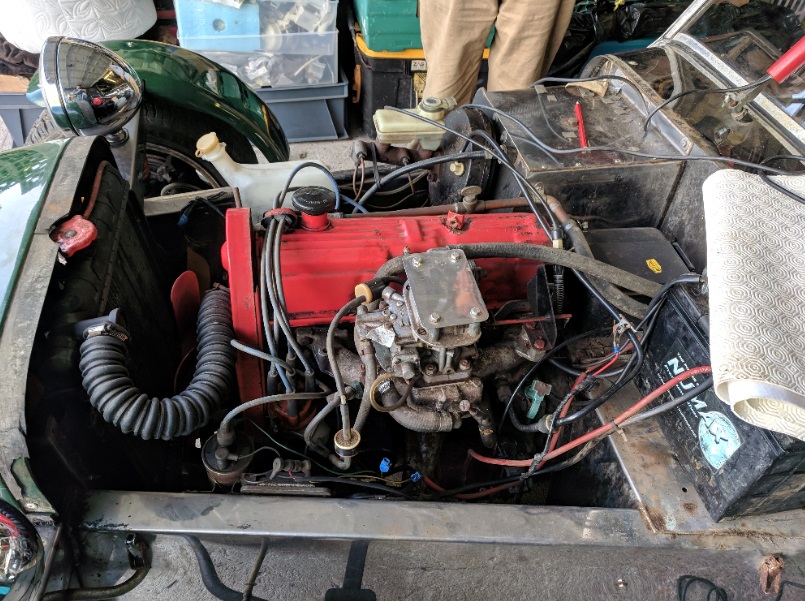
Hi all, since the last update it became obvious that even though we had added the header tank to the system it didn't actually seem to be doing anything. A quick look into the cooling system showed that the header feed pipe had rusted closed, and also that the thermostat had perished and needed replacing. A quick visit to the local shop and we were on our way back with a new thermostat, spark plugs and timing belt. It was surprisingly easy to drill out the header feed pipe and reassembling only took a couple of minutes. I have added a few pictures of the process of changing the timing belt, we used the old cut it in half down the middle and slide on the new one then cut the old one technique.
Unfortunately when once everything was changed and installed we went to start the engine only to quickly realize that we were only running on three cylinders. It only took a minute of searching before one of the HT leads fell apart in my hands, parts are on order and will be here Tuesday.
Brumster, yeah that's the plan. I am thinking of making it out of a single sheet of plastic and then cut out the shape of the radiator and have it really snug in the nose cone. I couldn't find the F1 article you mentioned but I did find a few interesting Youtube videos on the subject which have given me few ideas for how to implement it.
We still have some concerns about the mounting for rear shock absorbers and the seat belt mounting points, could any Exmo owners show us pictures what you have done? I'm not sure what we have is good enough for the IVA.
Thanks for reading
Nick
-
 1
1
-
-
-
Hi so another big gap between posts sorry. On the bright side we have been busy!
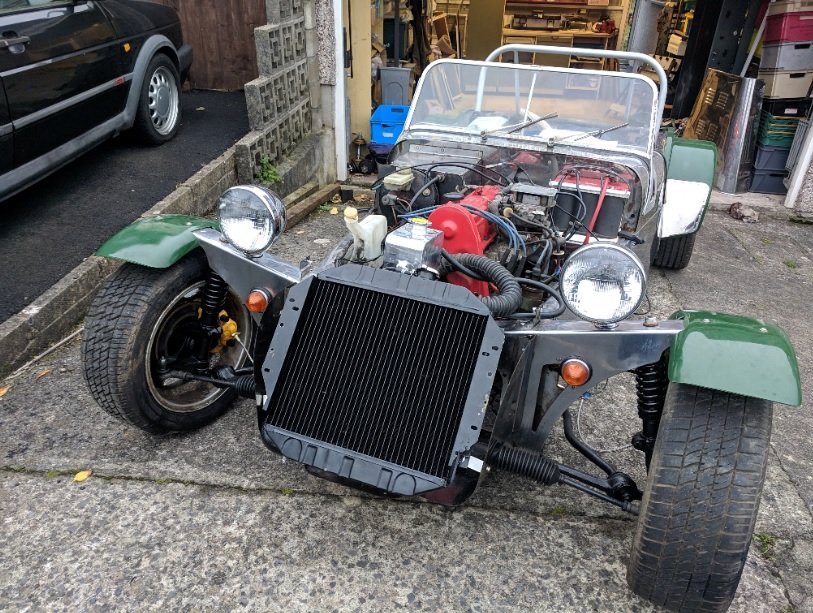
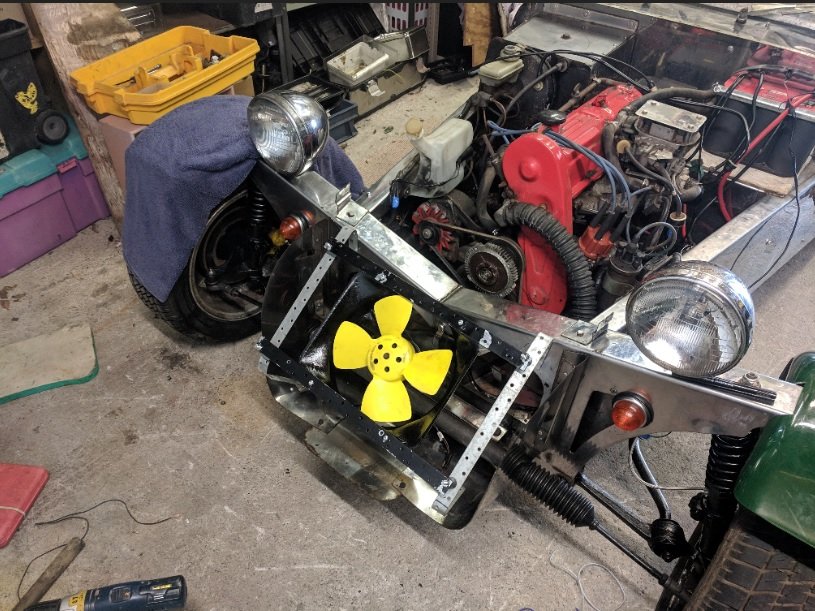
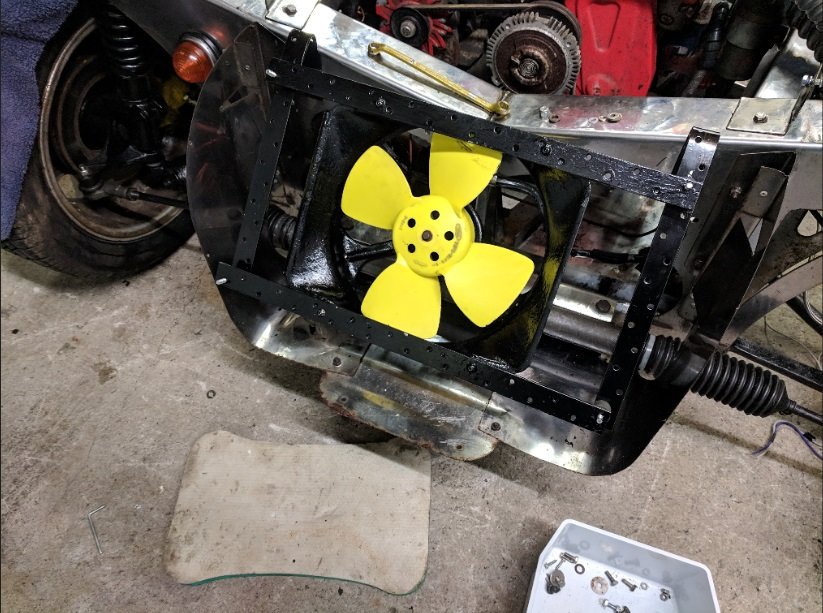
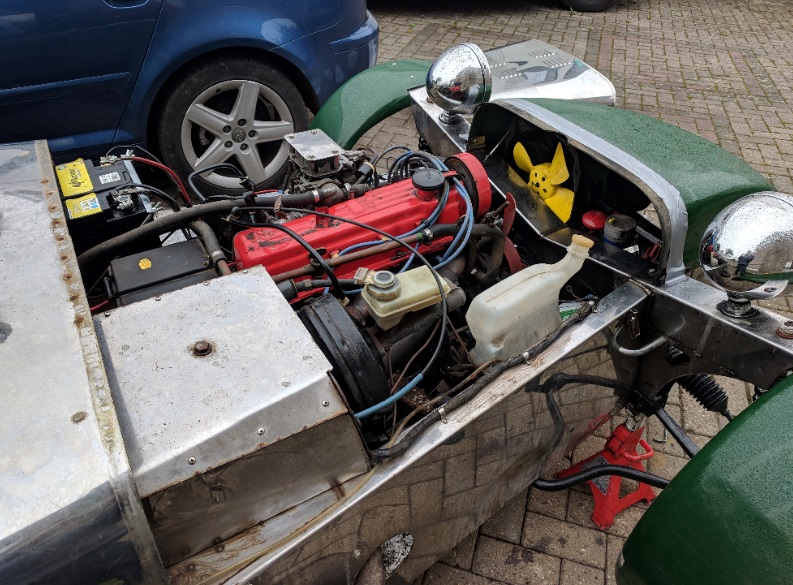
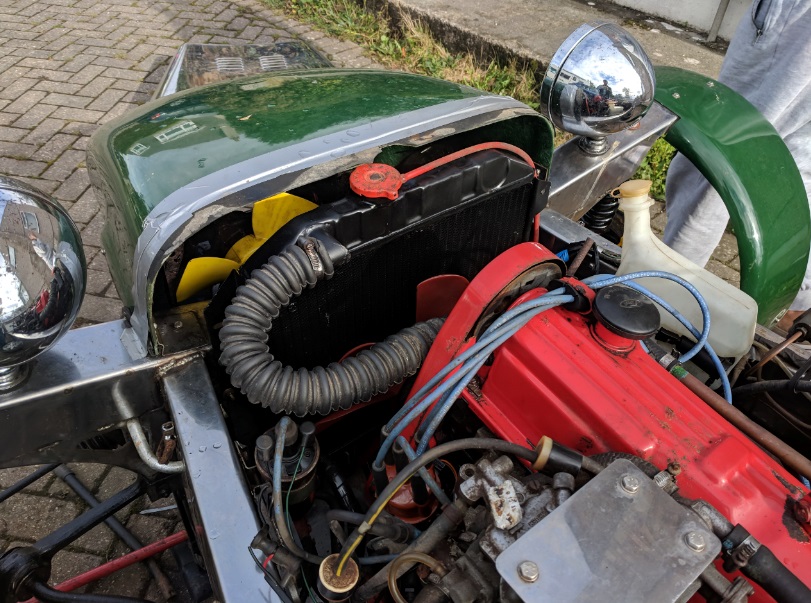
So moving the radiator took a lot longer than expected, as you all know its a pretty tight space for such a big object. Luckily we were able to use our current radiator and just mount it at an angle in the nose cone. As we removed the fan off the engine we have instead mounted a fan behind the radiator sucking air through it and fitted a variable thermostat to control the engine temps. I will attach a few photos of all of this below.
One thing we noticed is that because the radiator has been moved it now sits below the engine so we have had to add in a header tank into the loop as well, not a difficult job and I actually like the way it looks in the engine bay.
Other than the radiator we have done a few other little bits like adding the new chrome trim to the bonnet, fitting the IVA approved bonnet catches, ripping out the old interior and starting to fault find the electronics.
Until next time here are some pics to keep you interested.
-
What guages did you go for in the end? We may be having to replace a few guages soon an we cant afford the good stuff either!
-
So its been a little while since I have updated as I have been pretty busy with work but I have managed to get a few things done in my spare time.
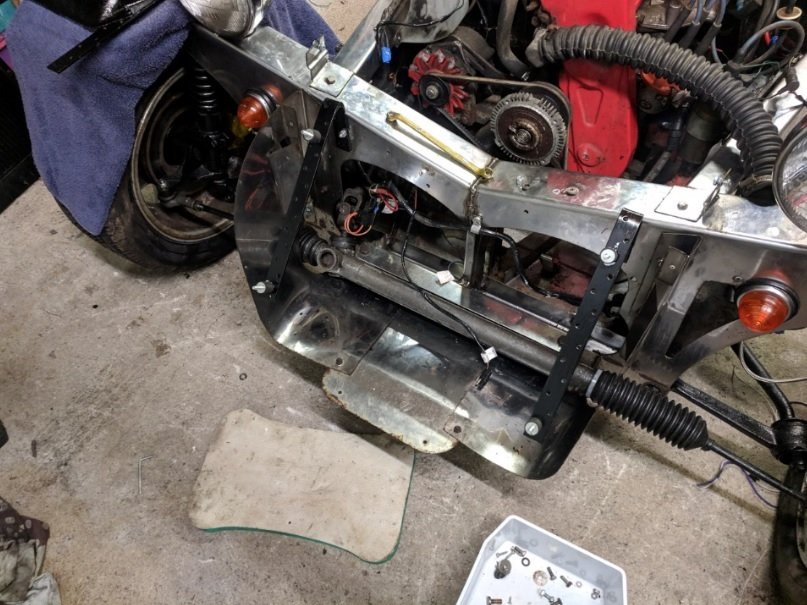
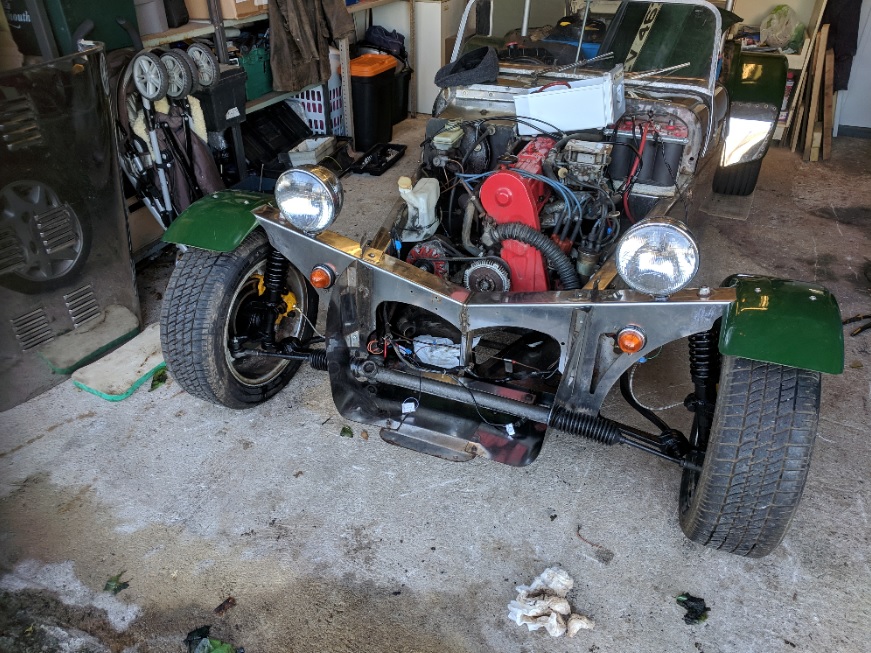
So after finishing the radiator weeks ago we have decided, after advisement, to move it into the nose cone for better cooling performance. This meant I had to dismantle the entire font of the car, something it seems the previous owner never planned to do as there were a lot of rivets holding it on. Fortunately the front came off quickly after a bit of swearing and the liberal use of an angle grinder.
I have also taken out the front fog lights, horn and the extra electric cooling fan the previous owner added in the nose cone. I'm assuming the extra fan was probably his way of trying to improve the cooling. I'm going to move the horn behind the radiator, leave the fog lights out (cheers Peter) and add a thermostat controlled electric fan on the radiator (having already removed the fan off the front of the engine). As I was dismantling things I also decided to rip out the old interior ready to start measuring up for the new one.
So now everything had been taken off and prepared its time to fabricate some brackets for the Radiator and get it all put back together. That's today's job so once that's done I can get back to the electronics, interior and IVA prep.
Here is a few pics of the front without the radiator.
-
1
-
-
Don't we need than in place to pass the IVA?
-
That doesn't surprise me to much. The guy we bought it off had quite the collection of Land Rovers.
-
Also a quick question. I am assuming these wiper arms and spray nozzles wont pass IVA?
-
Yeah that's a good point i'll get another disk on order. Luckily with these cars it only takes 5 minutes to change a disk
Oh an Brumster after a little more head scratching and discussion we have decided to do the move now and get the radiator positioned in front of that buttress and fit an electric fan to pull the air through the radiator. So thanks for the tip on that one, should save a lot of head scratching later on!
We have done a couple of jobs since the last post, including..
Fitting new wiring too and from the battery as the old stuff was a bit to short and a little tatty.
Repaired the rear lights
Removed the dash ready to start work on the electrics
Lots of tinkering with the engine, still trying to sort out the starting issue
So I am back in work again now, and Dad has just had an operation on his arm that is slowing him down so were currently spending more time poring over wiring diagrams and IVA manuals than doing physical work.
Upcoming jobs for my next days off include..
Wiring the fog lights (they are in place but don't seem to work)
Moving the radiator (and wiring electric fan)
Connecting the speedometer and rev counter (and if they are connected then figure out why they aren't working)
Removing the old window screen ready for the new replacement (Thanks Craig!)
Fitting the side repeaters and wiring the indicator lights on the dash
Fitting the new chrome trim and bonnet catches to the bonnet.
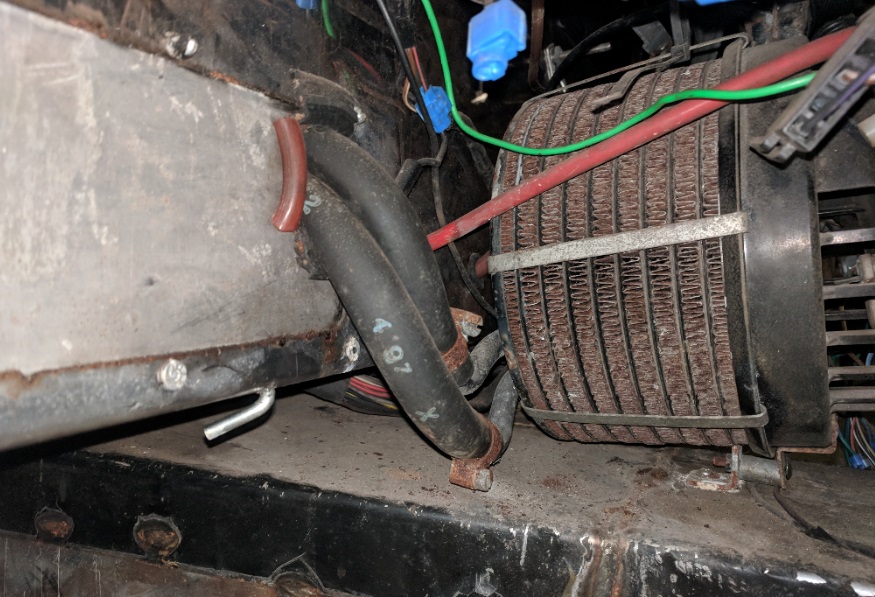
And finally for Dave Ed here are the pictures you wanted of the heating assembly, hope this helps, will be happy to answer any questions you have.
-
1
-
-
Thanks for the quick response gents, have sent you all PM's
-
Brumster, so far it's looking ok with the new rad, temps have gone down loads so I think we'll keep it as is.
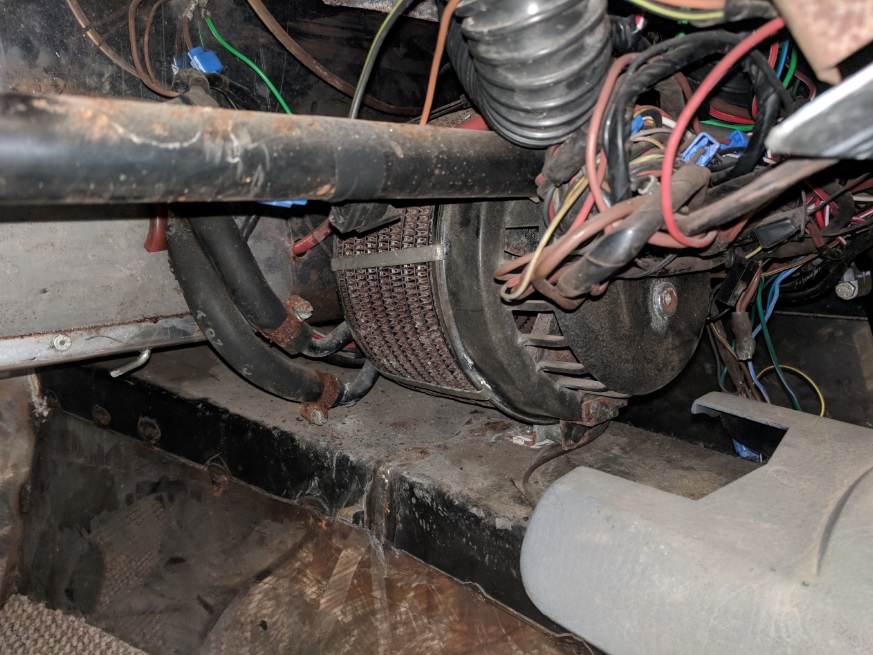
Dave Ed, I'll get some pics tomorrow post them up from you. It's currently on top of the gear box inside the footwell. Have only tried it a couple of times so not sure how well it works.
-
1
-
-
And the Radiator upgrade
-
First of thanks for the response guys that clears up a lot of questions we had.
Secondly here is the promised update. So after having a good lot round the car we have started finding issues already.
We found that we had a leaking radiator which had now been re cored and also upgraded so now has a double core. The old single core would not have been enough to cool setup, which would also explain the second electric fan we found in front of the radiator which was linked to a switch on the dashboard not a thermostat.
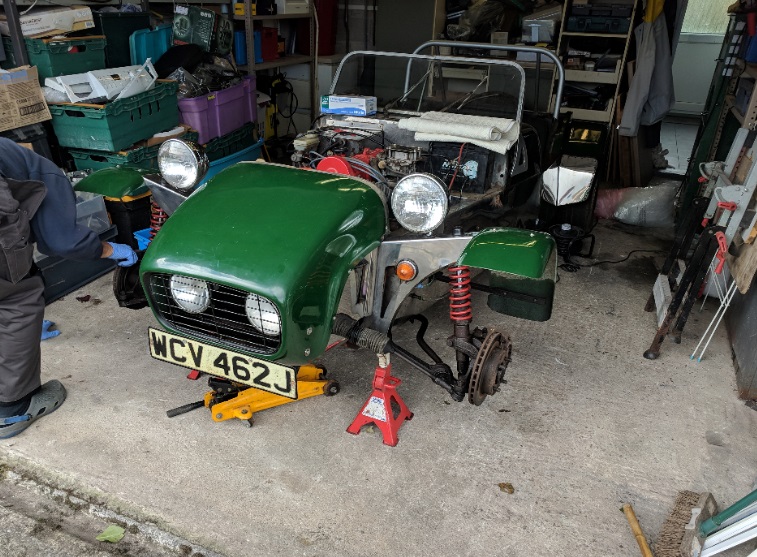
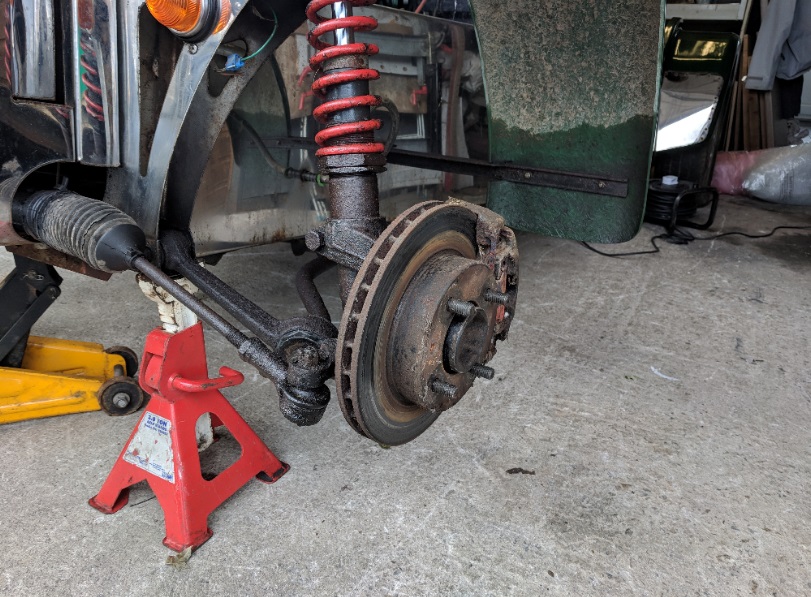
We had three seized breaks and sadly only 1 (the left rear drum) was salvageable meaning we needed to get 1 new disk and two calipers for the front as well as the flexible break lines. Fortunately all of the front suspension only took an afternoon of restoration to make them look fresh with only the steering arms and gaiters being replaced.
Have added a few more before and after pic for you.
-
Hi all
Doing a bit of restoration and are looking for some parts, hoping you guys may have some old bits lying around an can save us buying new.
We are looking for..
A Windscreen
Side repeaters (still not sure what type or where we are putting them yet)
Rear view mirror
Wing mirrors
Bucket seats
Seat belts
Steering wheel (maybe)
Speedometer and Rev counter (maybe) still trying to get ours working.
There will definitely be more added to the list. Give me a message or comment if you have anything.
")

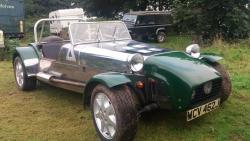
Robin Hood Exmo, From Barn To Iva
in Build Threads
Posted
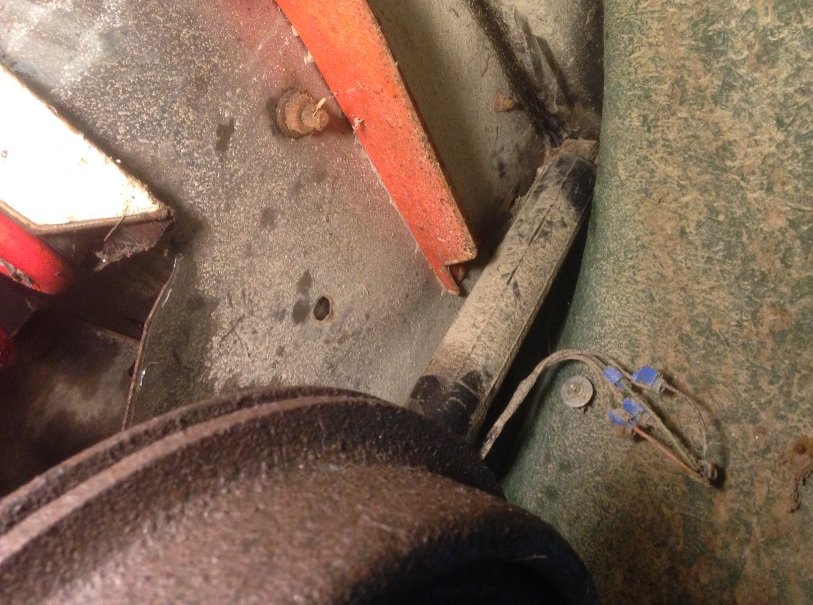
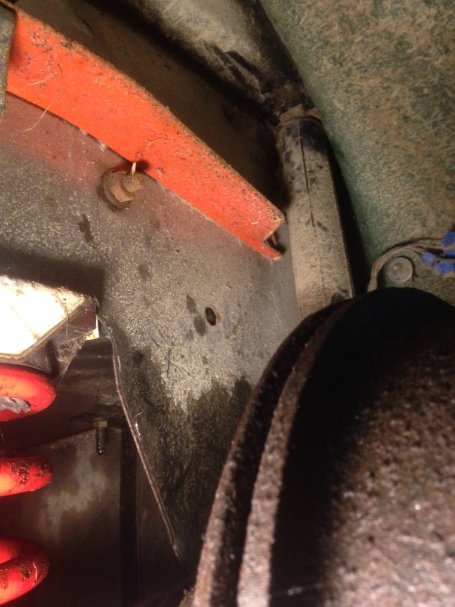
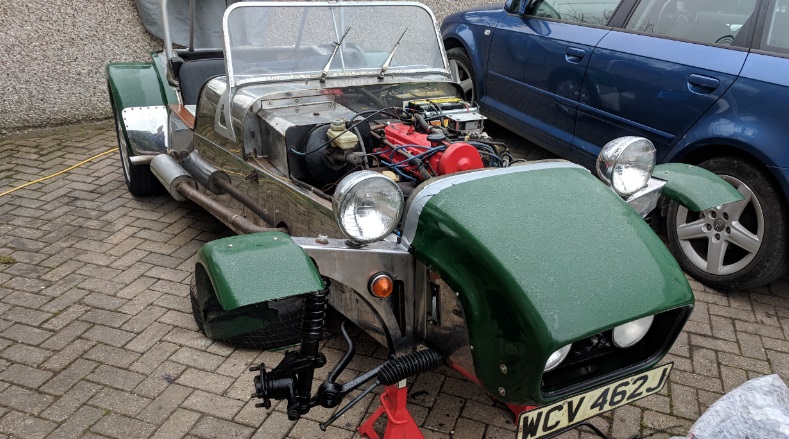
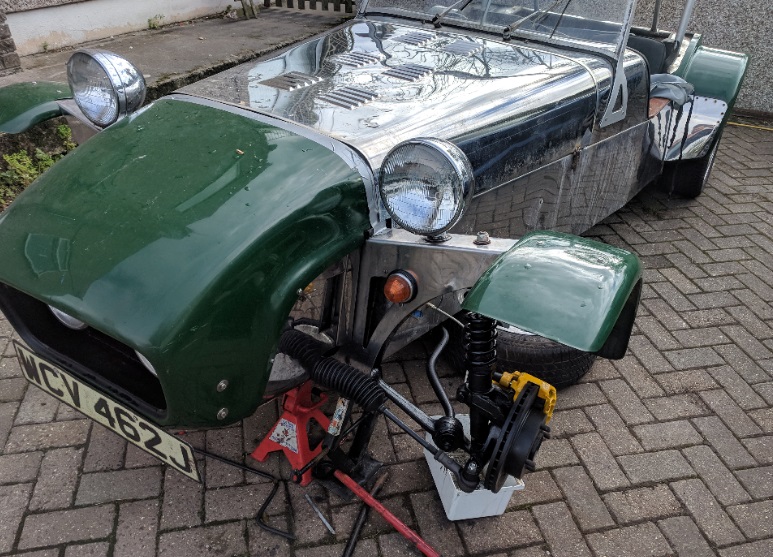
Thanks for the advice on the shocks. We have listened and decieded to keep the sierra main springs and fit a pair of shorter capri shock's. The advantage is that the shock's are now upright so should work better. We had new upper brackets made for the upper mounts that could be bolted to the strong side bar. (see Attached photo.) This also gives us the option for coil overs in the future. (see pic)
We also had to have fittings made for the lowerer shocker mounting, Again see pics.