LewisH
 RHOCaR Member
-
Posts
157 -
Joined
-
Last visited
-
Days Won
6
1 Follower

LewisH's Achievements
")
Wheely good builder! (4/6)
9
Reputation
-
Tested this afternoon again with sliders held open, made no difference. Yes, testing with a cold engine. I got the dial indicator out again on the inlet valve to double check if was fully open at 108deg. Looks to be spot on.
-
I've not tried this. I'll have a go this afternoon and report back, thanks.
-
I have checked the timing using dial indicator to spec, but the compression numbers still seem low to me, I'm just not sure what I should be getting? My head is skimmed and the block has also been re-faced, I was thinking that this could change the required cam timing from the Kent quoted figures and perhaps it needs advancing slightly?
-
Haven't got that far yet unfortunately. My thinking was continuing with advancing the cam timing to see if it helped raise compression even more. I just wasn't sure if it was a good idea? Also not sure if raising compression correlates directly to better running engine.
-
Afternoon all, Bit of an update...difficult to grab an hour these days, but managed to get out this afternoon to check timing and tappet clearances. The cam timing looked slightly out, I have advanced this on the vernier pulley as much as I can - this was a big improvement with compression, jumped from 100psi to 130psi. I then checked clearances, all inlet valves were tight. Re-tested compression and I now have around 140psi on all. Although I am pleased to get some progress, I am still wondering if 140psi is low for a tuned pinto? If it is low, do I carry on advancing the cam timing slightly to see if this keeps improving? It is set currently to roughly 108ATDC (Kent quoted figure for FR32). Any help much appreciated.
-
Brand new, this was installed when i first assembled the engine after re-bore and new head etc. I checked the timing against the quoted figures from Kent, however I'll double check along with tappets etc.
-
Yeah all plugs out and throttle open. When I first installed the Megajolt I checked the ignition timing with a strobe on the base map and then again on the pinto map. Looked to be correct.
-
Yes throttle was wide open. I also found oil on the spark plug threads, does this indicate oil passing by piston rings? The block was re-bored, just wondering if they have over-bored/honed and now it is oversized for pistons???
-
Yeah all reading roughly 100psi. It's a brand new cam as well, I'll double check valve gaps though.
-
I'm using a new compression test kit, not sure how I can verify if it is calibrated correctly?
-
So bit if an update, I've done a compression test and I'm getting just over 100psi in each cylinder. From what I've read, I should be getting close to 200 with a stage 3 head etc. The question is now, how do I find out what is giving me such low compression? I'm assuming this is the cause of low power and misfire etc. Any help much appreciated.
-
I'll try anything at this stage. Another £65 though
-
Really banging my head against the wall here. Nobody that I have contacted locally isn't interested. As soon as I mention kit car and carburettors, they say they can't help me. Does anyone have a contact that could help me? I have a 2.0 pinto, with megajolt ECU and ZX6R carbs, based in Maidenhead SL6. I've tried changing jet sizes, ignition maps, but getting the same result. As above, they idle fine and rev up nicely in the garage, but under load when driving, it doesn't rev past about 2k rpm, sounds almost like it's misfiring.
-
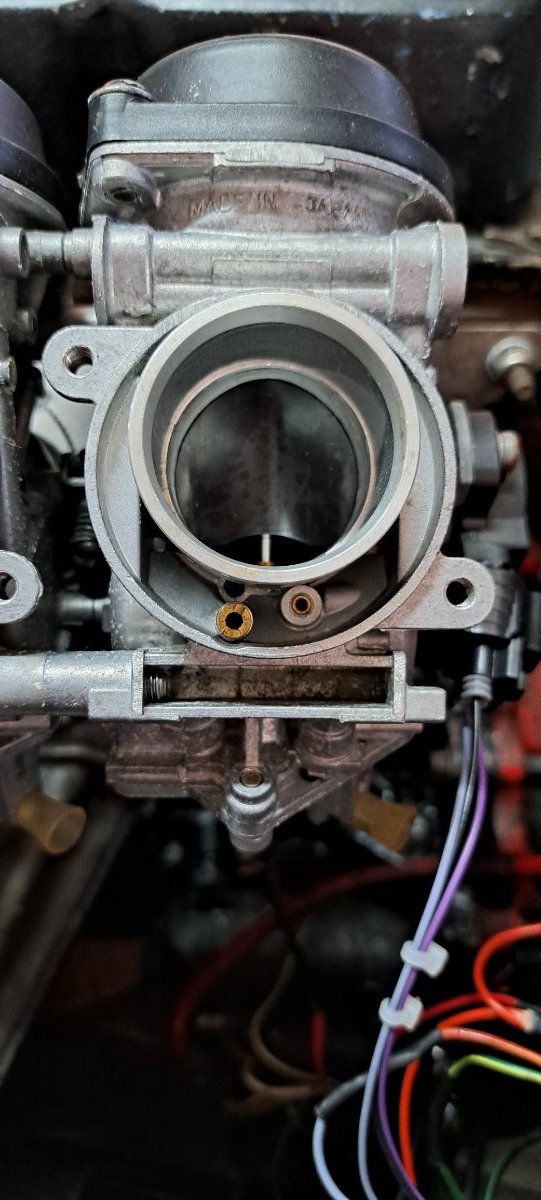
Hi all, I have been struggling like crazy to get ZX6R bike carbs set up on my pinto. They start and idle fine but are running lean and don't really pick up revs on hard acceleration. I've trued upping the jets to 1.8, but it spat fuel back out of the carb, went down to 1.7 which is better, but still v lean and not accelerating. I've read that blocking air correctors is worth trying in order to richen, but I have no idea where the air corrector is. I've taken the air filter off and taken a pic of the jets I can see. Is this the main jet on the left and air corrector on the right? Or do I need to take the bottom of the carb off to access main jet and air corrector? I've tried searching the forum, lot's of talk about what to do, but I'm not 100% on what's what. Please help!

-
Don't worry, problem solved. Faulty TPS - serves me right for buying crap from ebay. If it seems to good to be true, it normally is.
- 1 reply
-
- 1
-