


Big Jim
-
Posts
3,805 -
Joined
-
Last visited
-
Days Won
8
Content Type
Profiles
Forums
Events
Store
Community Map
Posts posted by Big Jim
-
-
You could put 2 pieces of straight wood against each wheel, hold them in place with a "toggy strap" then measure the distance between then both in front of, and behind the wheels. But it's a best to get them set up properly once you've finished altering things on the track rods.
-
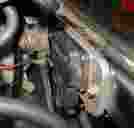
The ignition coil & dizzy have a separate loom of their own, and there are 3 wires coming into the module from the main car loom.
Green/Yellow & Black/red go to the Dizzy.
Brown goes to earth.
Green goes to the -ive side of the coil and also to the tacho.
Black/Green goes to (eventually) pin 58 on the ignition switch
Black goes to +ive side of the coil, and can either go (eventually) to pin16 on the
ignition switch, or it can be feed from a fuse that is live when the ignition is on.
But all this depends if you have this type of ignition module.

-
Which model do you have? if it's the 2B, watch for the bracket breaking on the early ones, then the wing dissapears under the wheel, dragging your brake pipe with it. They were modified and strengthened later.
If it's not a 2B, then the brackets could be made any-which-way, you'll just have to decide if they are strong enough or not.
There's a couple of photo's of some very nice brackets on a 2B, made by Steve Ryland, on the NW web site.
-
no real problem for MOT, just flash rate. But for SVA they have to be within a certain distance from the outer limit of the car.
-
Oh, you'd have filled it OK, but 10 mins down the road, a couple of pints of best antifreeze & water would be sprayed out of your radiator overflow pipe.
-
-
I brazed (soft soldered) around the outside dia, then filed it down until it was a "smack with a hammer" fit, it never came out.
-
When you build it back together, get a good quality head gasket, one wqith lots of red seal tracks in it. expect to pay around £10 - £13 for one. DON'T skimp and use a cheap one! On the other hand, use a cheap inlet manifold gasket, as they tend to have morte "paper" to them. Don't use any form of sealant on the head gasket, just make sure that all the bolt holes are dry, and the faces are bone dry.
-
From the water take off (½" dia) at the bottom of the water pump, pipe it around the back of the engine (this would be where the heater would come into the system) and into the back of the carb, if it is water choke. if not then straight into the connector coming out of the bottom of the inlet manifold. If it does have a water choke, then you obviously run from the other side of the choke to the manifold connector.
You need to put a header tank / overflow tank into the cooling system, check out dave Andrew's web site for a diagram of how to do this, if you have any problems with it, then come back to us, (I have mine different)
-
It's taking some time to clean that engine block, building the car is certainly going to be a long job!!
-
There is an open invitation to all you Hoodies, get your cars out and join us in Welsh Wales for the weekend.The outing is being run by two of our Northwest members Jim Robbo (tight wad) and Mitch Gaynor (I'll build this car sometime) it's not expensive, (it won't be if Robbo's anything to do with it!
)there's no sleeping rough under canvas involved at this time of the year,( but you will need a sleeping bag.)For an idea what it's about, go to, http://nw.rhocar.org/walesmeet.htm
Then if you want to join in, contact Robbo, who's e-mail address is on the article.
Come on, lets go and wake up all those daffodile eaters.
-
The jig saw should cut it, obviously with the correct blade in, don't try to run too fast.
PS. It's nice to see that you're making some progress on it.
Greg Holden has cut off the front of his Exmo and fitted a double wishbone set up. (I'n not sure if i got a photo or two, I'll put the disk in and see.
Nope! Got a piccy of Greg, but not of his suspenders!!
-
Yes we all have those moments, but at least it hasn't cost you.
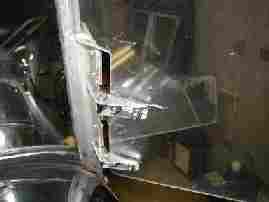
Whilst you're doing the screen, why don't you strengthen it all up by welding a couple of strips of flat bar, about ½" wide on the inside of each piller, so that the frame fits into a "channel" when the weld is dressed up and painted they look right and are much stronger.
You can just see that my frame is inside a "channel"
-
Mat, if you're going to take off the caps, ie, big end & mains, check out how I did the Vauxhall engine on my article. You don't need to take out the pistons or anything, but as Geordie jim says, do replace the oil seals in the front & back of the crankcase. If the crank doesn't look worn, then you don't need to start messing about measuring it. Put new shell bearings in with plenty of clean oil all over them. Make sure you use a good torque spanner not one of these cheapo things. You don't need to change the big end/mains bolts, they can be reused. Do put new valve seals on if you have the head off, if it's not off, then you need to borrow my special tool.
I have a spare camshaft out of an injection engine, in good order that you can have if you want it.
-
Anyone got any ideas for quietening my car down a bit. I hope to get on track at Donny but the exhaust is marginal and the induction roar is way over the top.
Any tips.
Nigel
A proper silencer maybe, as for the induction roar, it's probably echoing around that bread bin that you've got stuck on the side! ;-)) (note; that's a smiley face with a wink, 'cause I still can't bloody do them!!)

 )there's no sleeping rough under canvas involved at this time of the year,( but you will need a sleeping bag.)

Polishing The Stainless!
in Fitting & bodywork
Posted
BE VERY CAREFULL of any metal polish, you do not want any abrasive stuff, as yes, there is a film on the surface, and it's not "proper" stainless steel, there's a high % of "ordinary" stuff in it, (Just try a magnet!) I find that cheap glass cleaner spray does the job, £1 from our local bargain shop. Don't use the fancy glass cleaner like Windolene, it smears like hell.
What that stainless spray is like, I don't know.