Jump to content

Thought I Ought To Say Hello Again


Landie71

Recommended Posts

Hi all

Though I ought to re-introduce myself again. It's been a very long time since I've been on here & even longer since I put any bits on the Zero.


I've got a very early Zero which I'll be putting a 2L Pinto engine in. I got the stainless kit from GBS & the donor pack & V5 with it. I was making progress with it, then family circumstance changed (not serious, more chaotic - daughter arrived, son had to move to special school etc, etc!) & the part built Zero had to hide under a cover for a good couple of years.


Anyway I've now got the build bug again & put just a few hours in over the past week & want to live in the garage now.


The point I stopped at was trying to fit a Mk3 Fiesta steering column in because I liked the switch layout better than the Sierra - wiring was easy enough, fitting the column was harder. Anyway after significant faffing, I've gone back to the Sierra one & have to admit it's not that bad actually & I've seen that I need to use the original steering components to keep an age related plate anyway.


So next job is to finish off fitting the steering column, I think I might need to take a little bit off the chassis mounting point where the column bolts to it to allow the column to sit a few cm's lower as I've got the GRP dash & it doesn't quite fit!


Anyway enough ramblings from me, wanted to say thanks to everyone on here though - reading a few recent posts on here has motivated me to get going again. Once I am, I hope I can contributes as well learn from everyone.


Cheers

Marcus

Link to comment
Share on other sites

I think you should trim the dash not the chassis. Lowering the column in the cabin will raise it in the engine bay causing all sorts of issues. Remember tha the dash in the region of the column will be covered by the cowl so not seen. Enjoy your garage day.

Edited by ozz
Link to comment
Share on other sites

Thanks ozz - I'll have another look. I've got the GRP dash from GBS & the upper cowling goes under & behind the dash.


I'm not looking at lowering it much, where the steering column bolts to the chassis (a-U shaped bracket on my chassis - don't know if this has changed on laters ones), the bottom of the column angle adjustment mechanism catches on the bottom of the U so I was thinking of just cutting the bottom of the U so it's squarer to allow the column to drop a bit lower to allow it to then fit under the dash. Off to tinker now as the film starts soon - I'll let you know what I come up with

Link to comment
Share on other sites

Hi Landie,

I have an early zero and fitted the dash but had to trim the dash, if you don't as Ozz mentioned it will cause issue in the engine bay and hit your knees whilst driving. Not to mention making it harder to get in and out, in the end I have opted for a removable steering wheel.

post-4145-0-13729700-1433060017_thumb.jpg

Link to comment
Share on other sites

Thanks Mark - nice neat cut you've made.

I took the plunge & cut the bottom bit out of the U bracket so now it looks like this:

normal_IMG_3824.JPG

I've now been able to fit the cowling on & by lowering the steering wheel as low at will go, put the GRP dash in place. One it's in I can then list the steering wheel up & it's actually only about 5mm lower than it was before I made the cut. I guess it's just given me enough room to jiggle the dash into place. So it now looks like:

normal_IMG_3833.JPG

Sorry for the poor quality pictures btw.


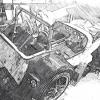
Seen as I'd got the ladders out in the garage, I couldn't help taking the following picture of work so far:

normal_IMG_3830.JPG

Anyway off to tinker a bit more - going to try & get the holes drilled for the seats & then workout how I'm going to strengthen the area around them.


TTFN

Marcus

Link to comment
Share on other sites

Thanks David - I recon if I had two weeks uninterrupted time it'd be about ready for an IVA, but somehow getting that seems to take some doing. Going to try & do a little each week & get it ready for the summer (just not saying which summer!)

Link to comment
Share on other sites

Seats are easy in the zero because the floor is welded to the chassis drill the holes and put big washers on each bolt. assuming a fixed seat position get 4 studs or cut the heads off some m8 bolts and put them loosely in the bottom of the seat a dab of tippex on the ends and place seat into position to mark the holes. Then drill put the seat in with the studs then remove a stud one at a time and replace with bolt and washer.

Link to comment
Share on other sites

I'm using sear runners actually (Mrs Me might like a drive every so often & she's not quite as tall as me), I've managed to get them onto the bottom of the seats, although putting the back bolts in was fiddly to say the least. I've marked & drilled through the floor ok, but then I've read a few posts about IVA requirements & seat mounting & got a little worried.


Can I ask anyone - as long as I put the harnesses around the seats rather than through the cutouts at the top, am I ok to put the bolts down through the runners, through the floor & put repair washers on the underneath with nyloc nuts on or should I be putting something stronger underneath to spread the load further?


TIA

Marcus

Link to comment
Share on other sites

Join the conversation

You can post now and register later. If you have an account, sign in now to post with your account.

Guest
Reply to this topic...

×   Pasted as rich text.   Paste as plain text instead

  Only 75 emoji are allowed.

×   Your link has been automatically embedded.   Display as a link instead

×   Your previous content has been restored.   Clear editor

×   You cannot paste images directly. Upload or insert images from URL.

Loading...
  • Recently Browsing   0 members

    • No registered users viewing this page.
×
×
  • Create New...