MarkBzero
 RHOCaR Member
-
Posts
2,235 -
Joined
-
Last visited
-
Days Won
49
Content Type
Profiles
Forums
Events
Store
Community Map
Everything posted by MarkBzero
-
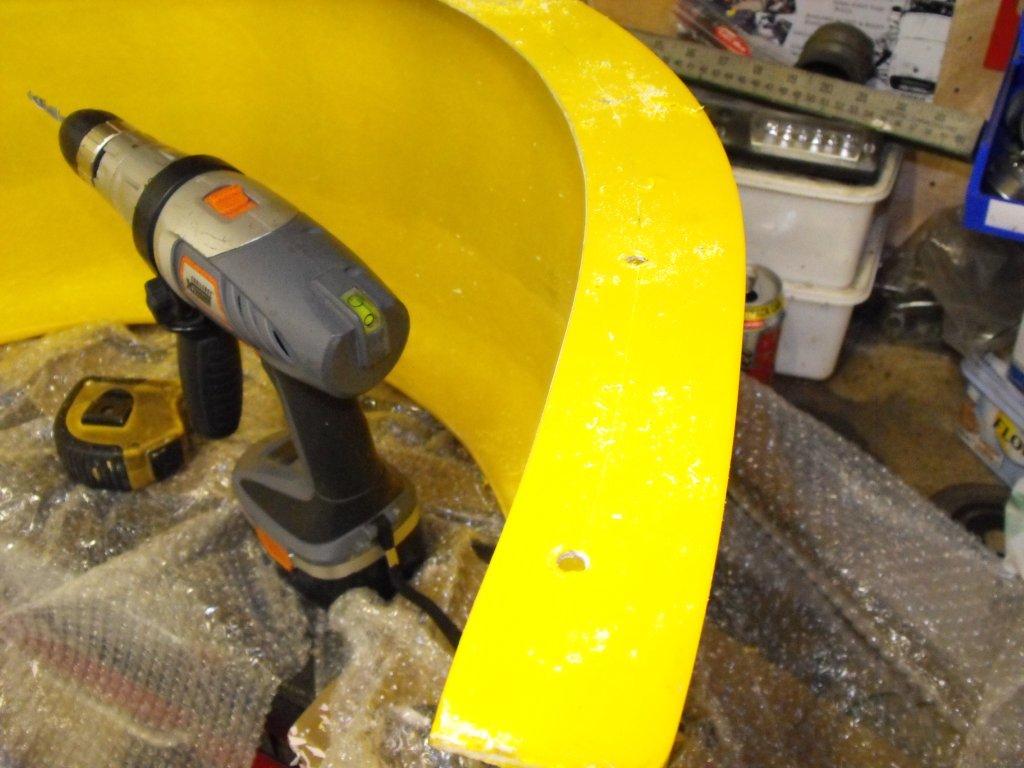
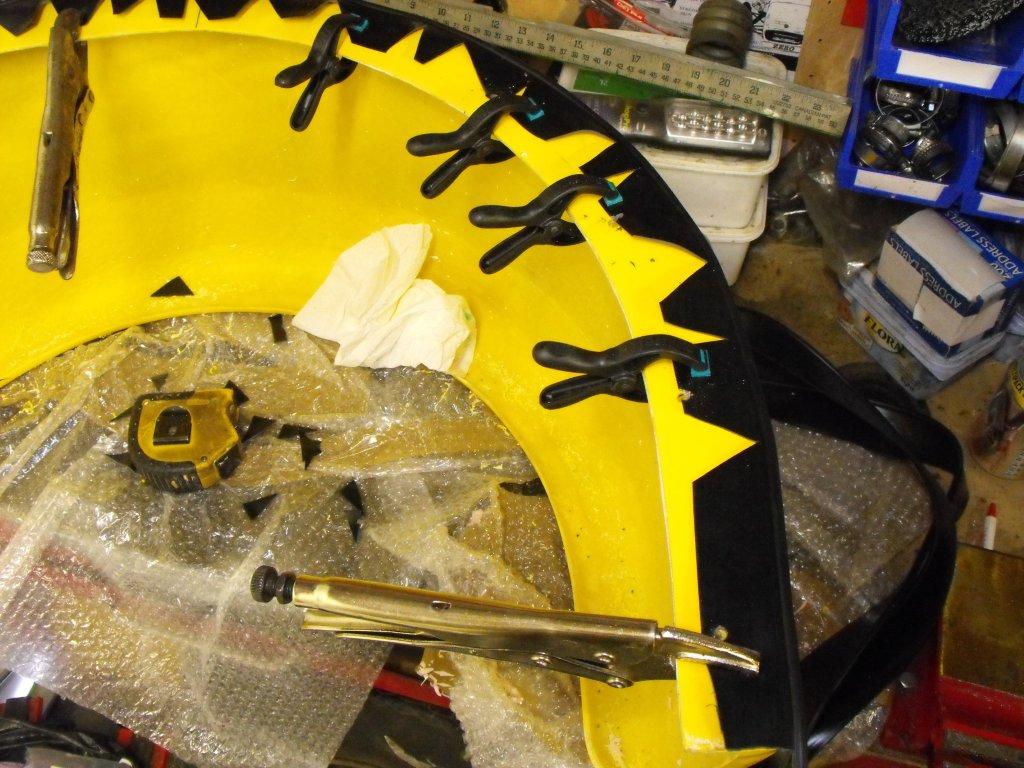
That's the rear of the arches complete with lights, so I thought now would be a good time to fit the stone guards. Very easy drill equally spaced holes, glue rubber trim on and rivet. Don't forget to deburr the hole and remove the protective plastic before riveting. Also you can push the stone guard into the tadpole trim on the wheel arch.

-
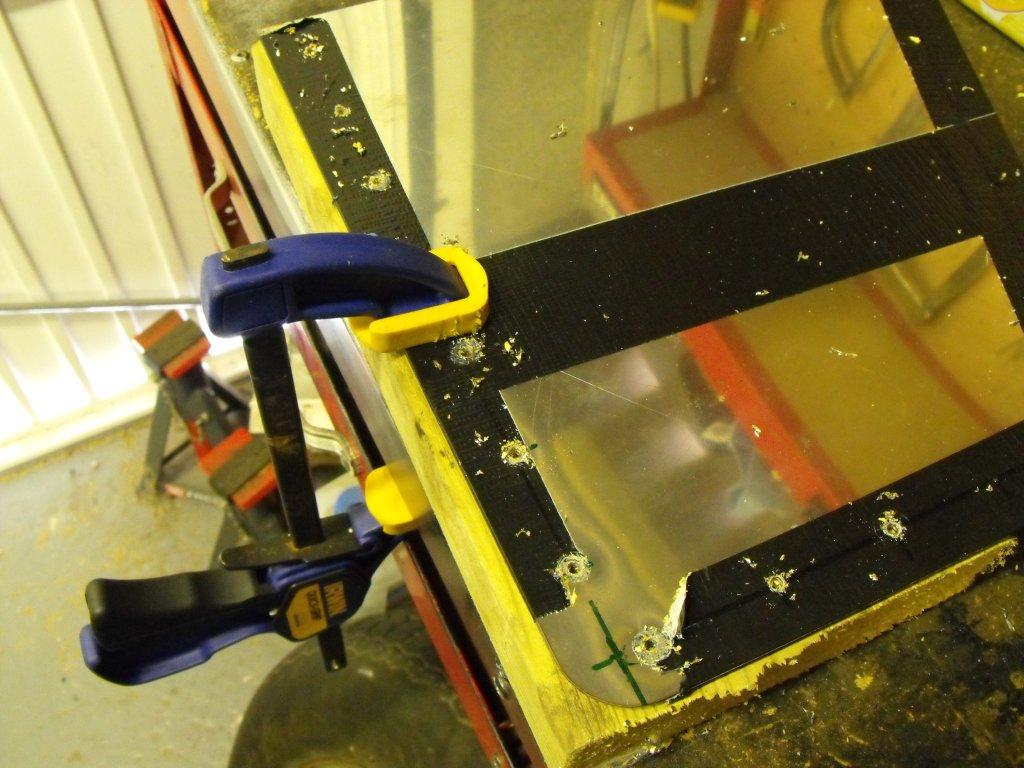
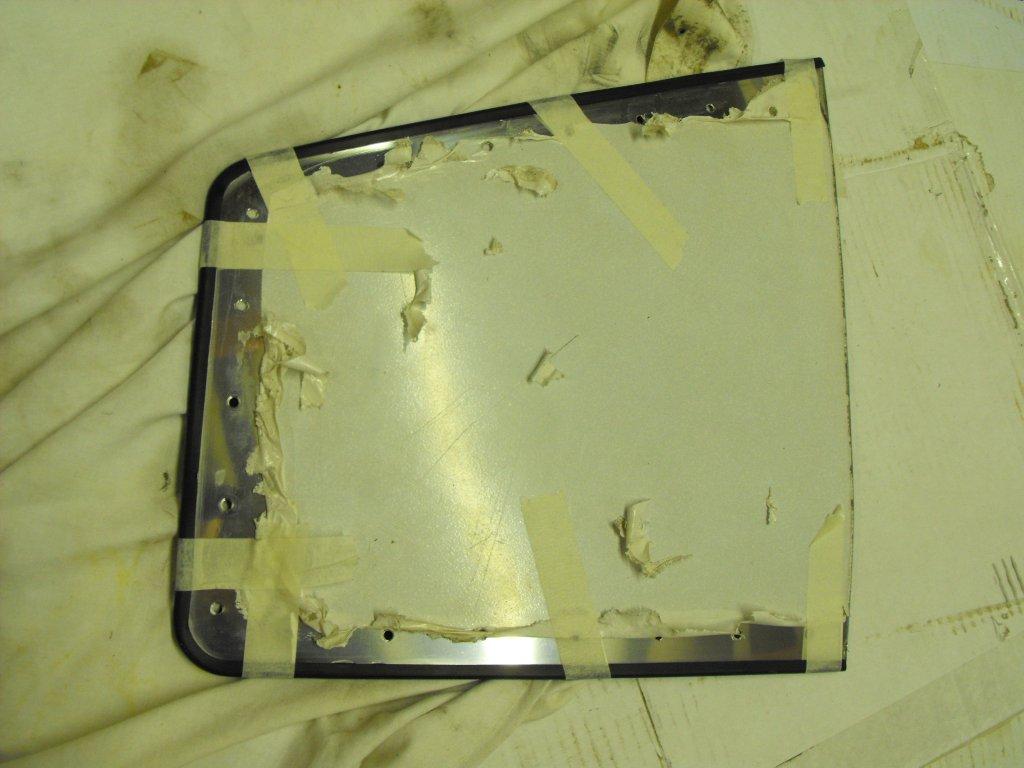
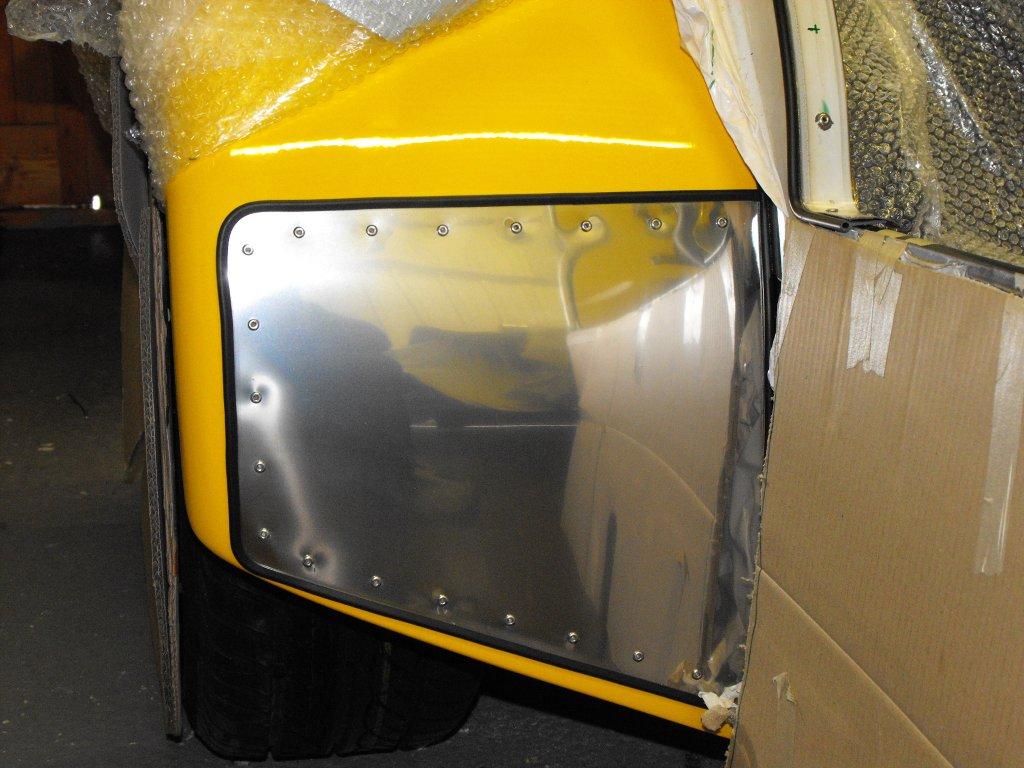
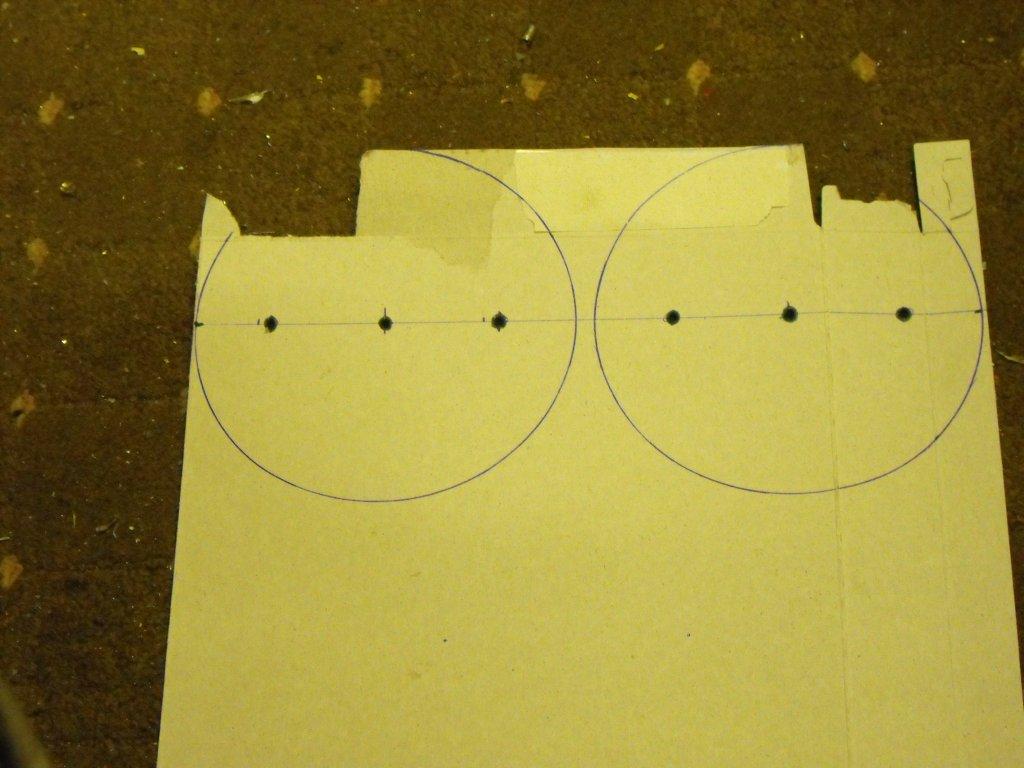
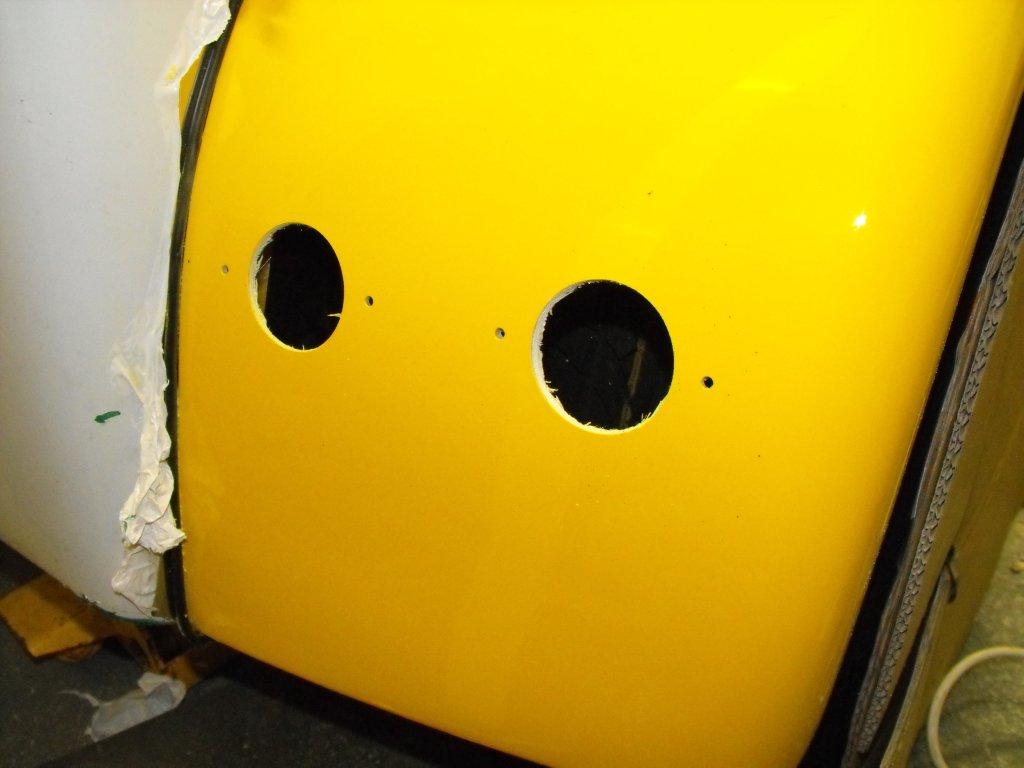
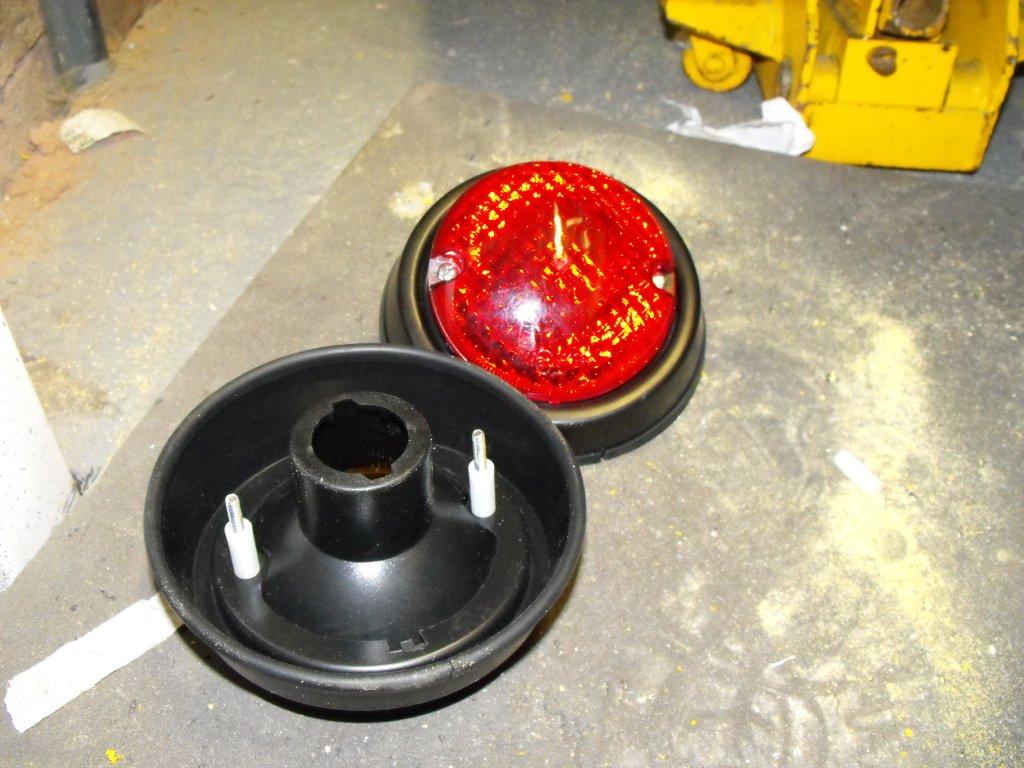
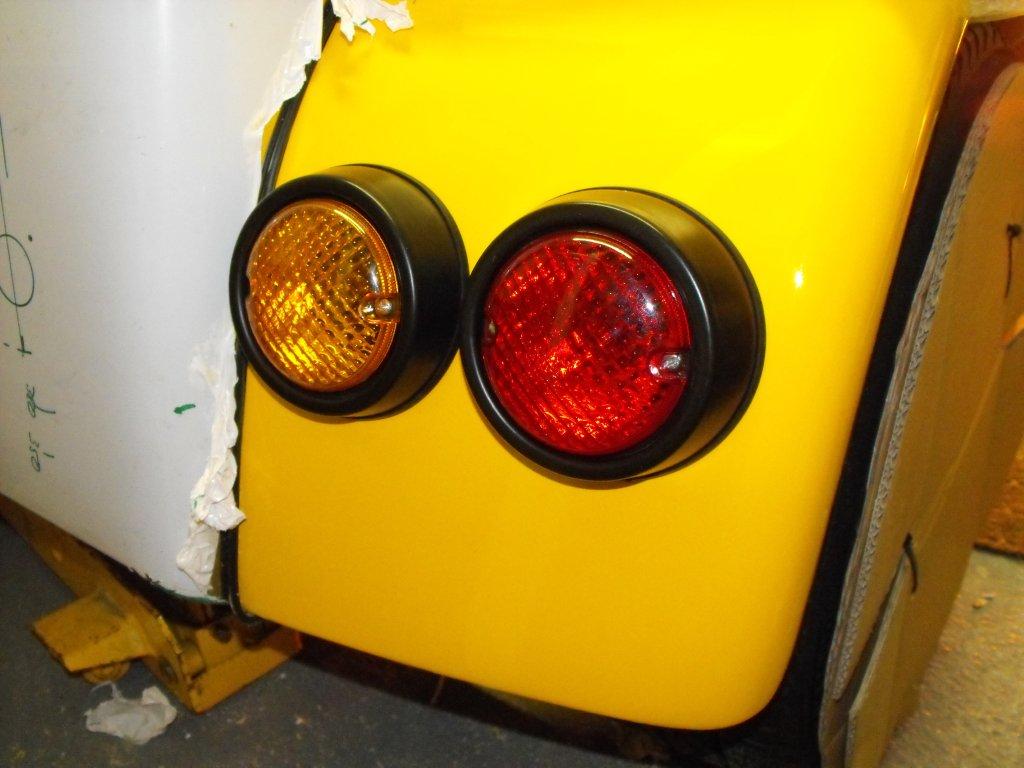
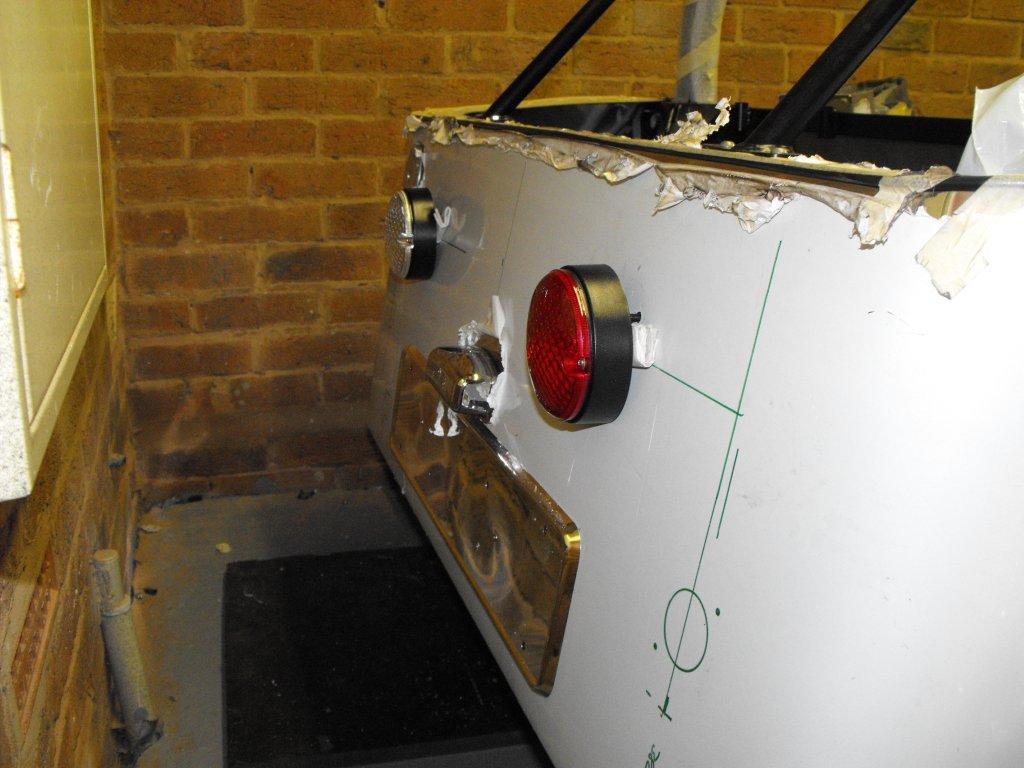
Rear indicators, stop and tail lights were already wired so I only had to fit the light units. Firstly I made a template that was aligned against the body and bottom of the rear wheel arch, for two reasons to make sure the lights are correctly mounted considering IVA requirements (height, position form outer edge etc.) and to ensure both sides are fitted in the same place. I then used a hole cutter for the bulb carrier to fit, heart breaking cutting new wheel arches. I then used some angled light housings to mount the units, to ensure the finish was acceptable I trimmed in small rubber u trim. Then with spacers fitted to the mounting screws I fitted the housing and lights to the car.
-
Thanks Nick, too late for me may be your comments will help others, how useful would a build manual be? The other pain was the stainless steel body work, the rear section was in three parts and with my skill level I could not extend.
-
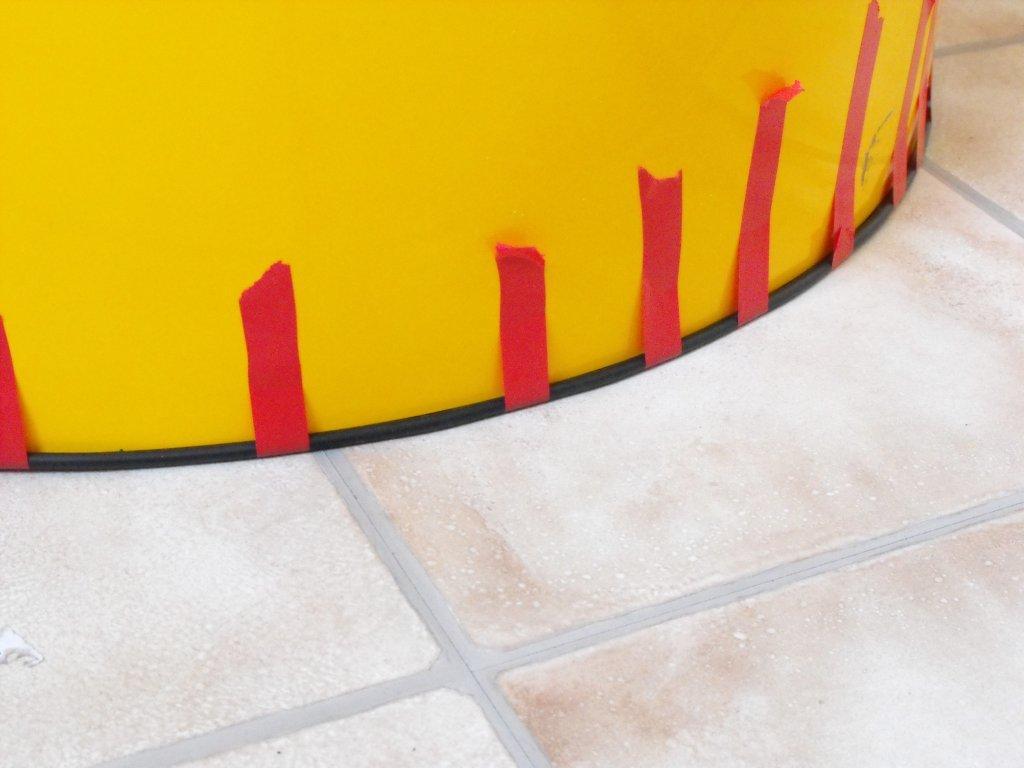
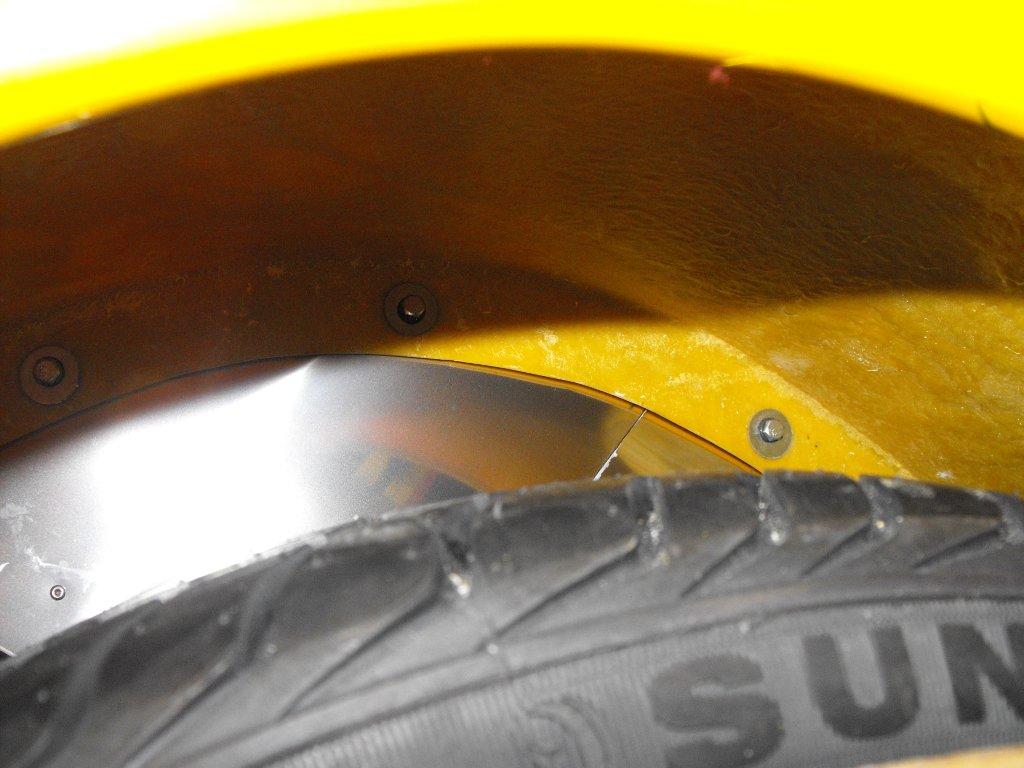
Rear wheel arches, a simple job but for some reason nobody can get the wheels dead-centre not enough rear panel I think. First of all I put some blocks of wood and foam on the wheel to support the weight of the arch and to measure all angles to ensure they would both be the same. I then traced the inside of the wheel arch onto the car body, form this I marked where I need to drill for straight through bolts that I could access in the boot area and where to use rivnuts. I marked the arch in the same place and drilled the arches. I then glued the tadpole trim to the wheel arch and cut some notches out so it could follow the curve without bunching up. Will I ever learn, it was on the kitchen floor (no room in garage) and yes there was a little residual glue that left a 4-5" black arc on the floor and some how the wife translated that into you got a kit car I need a new kitchen..... go figure! I bonded some flat washers to protect the fiberglass, and then bolted the arch to the body.
-
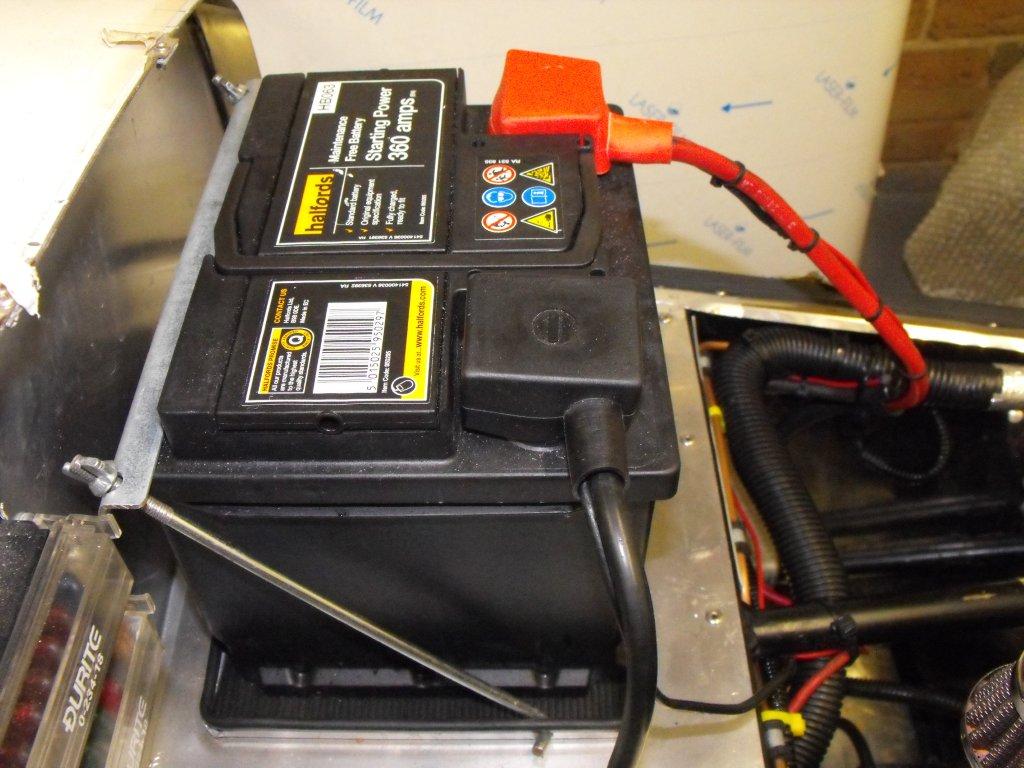
Battery was straight forward, a piece of aluminium with all four edges bent and in the side I drilled a two hole for the clamps. I had to add more thread to the clamping bolt because the battery was short. When I fitted the battery tray, I included some rubber trim and mat.
-
Thanks David, can't wait for DVLA to return the registration number and tax.
-
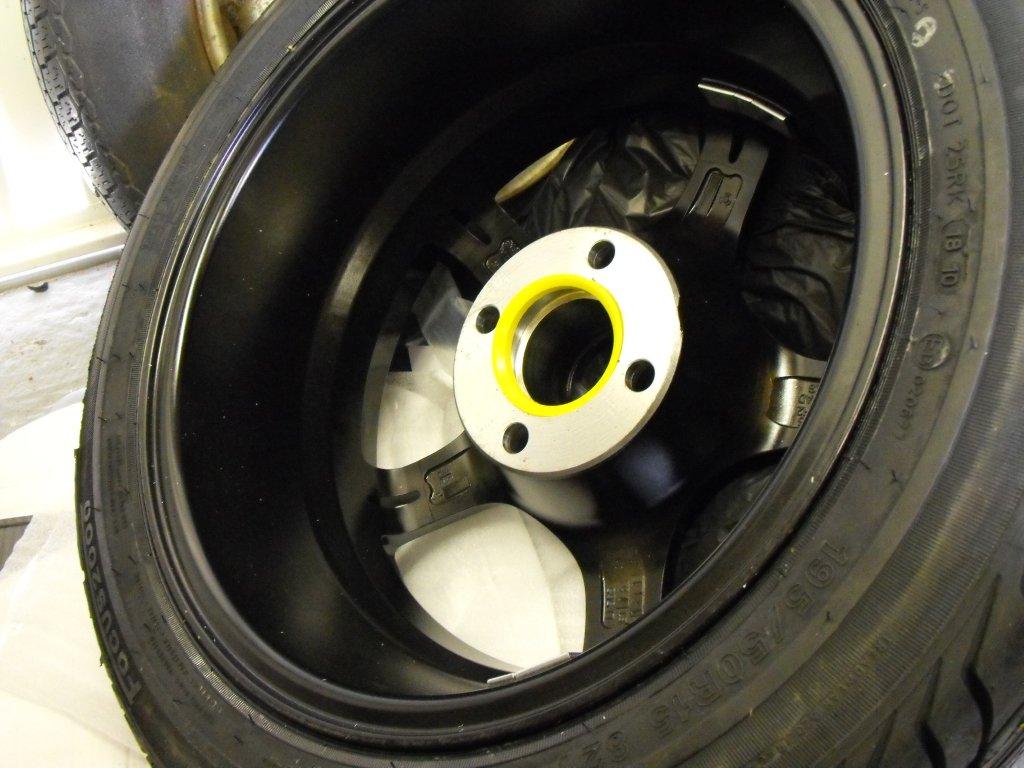
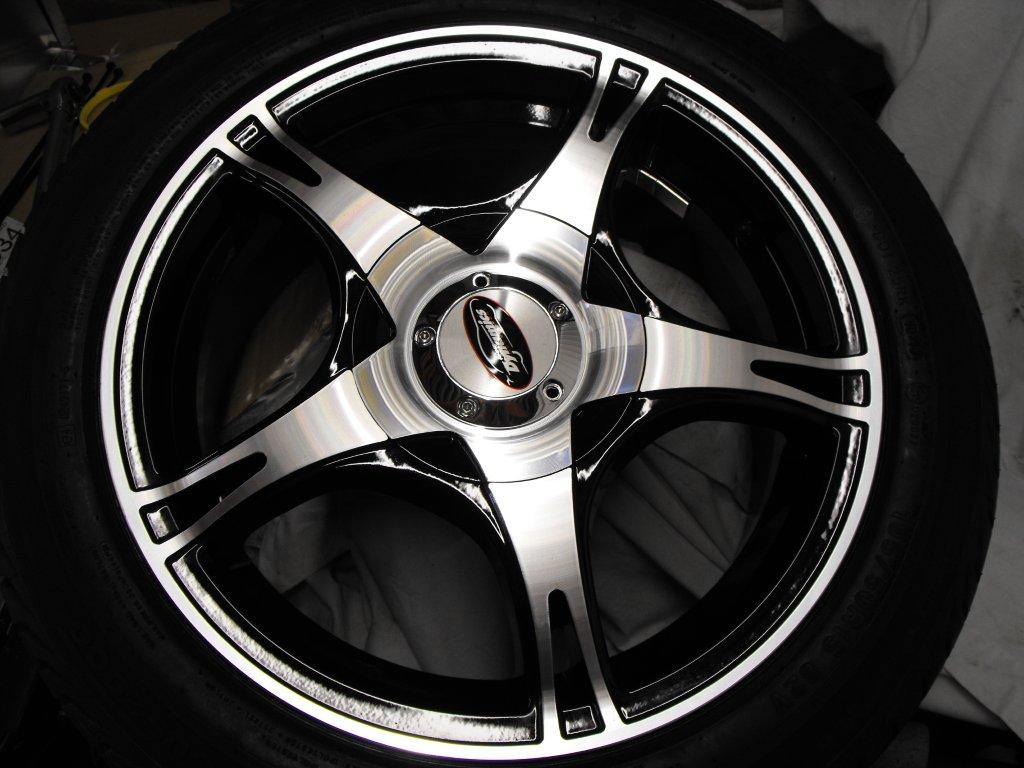
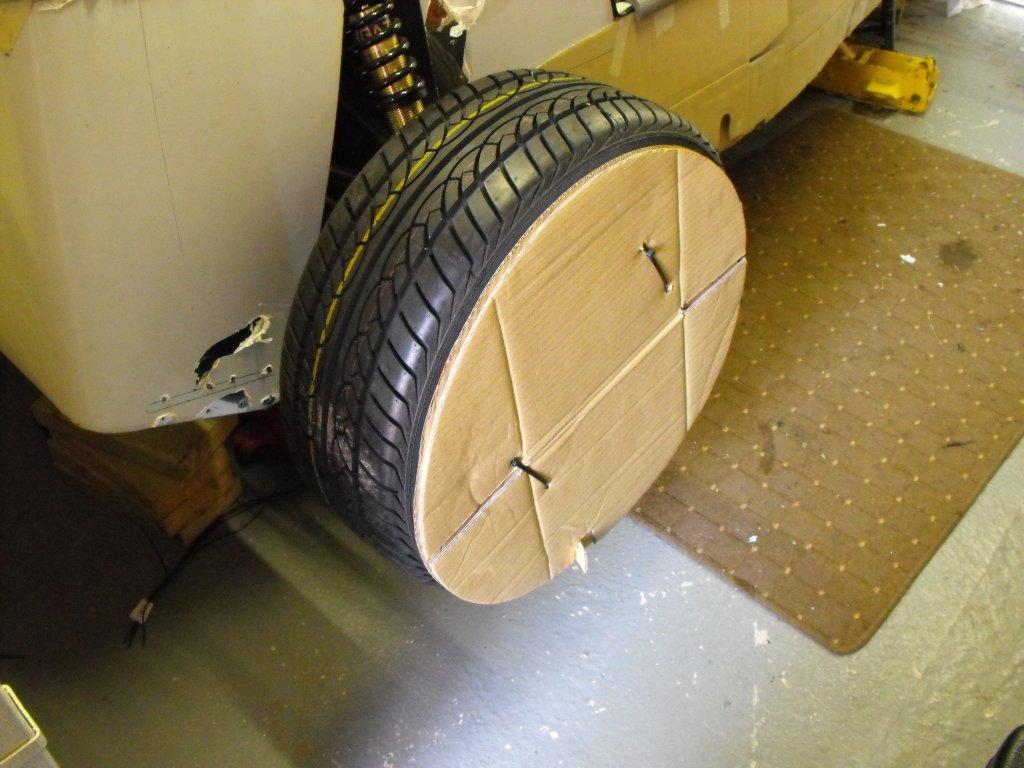
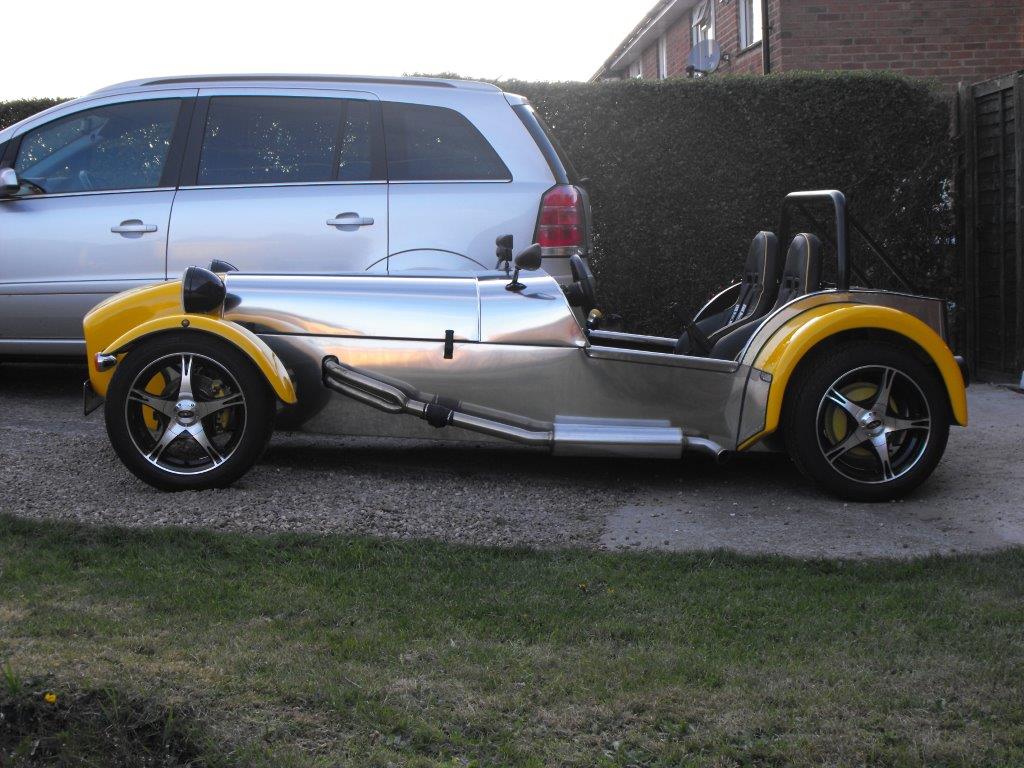
With the seats and steering fitted I thought it would be good to push the car onto the driveway. So next job was the wheels, I got these from Wheelbase on the internet the operator was very helpful and professional. Like most people on the forum there is a lot of debate black or silver, so to be different I went for black and silver. They were the third most expensive purchase on the build after the Zero base kit and IVA fees. Fitted a yellow spacer to fit the sierra hub perfectly. Then protected the wheels from potential damage with a few cable ties and cardboard. Finished car, I like the contrast with the stainless steel body.
-
Thanks Nick.
-
Thanks Alan, I'll be there.
-
No competition black looks best, sporty!
-
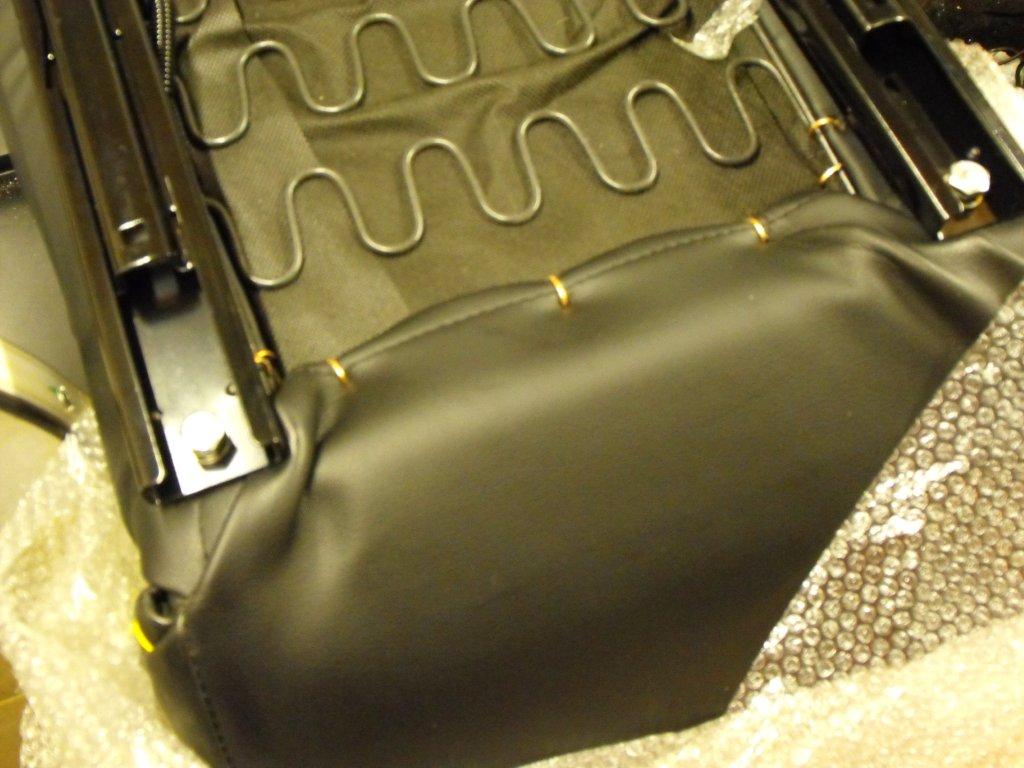
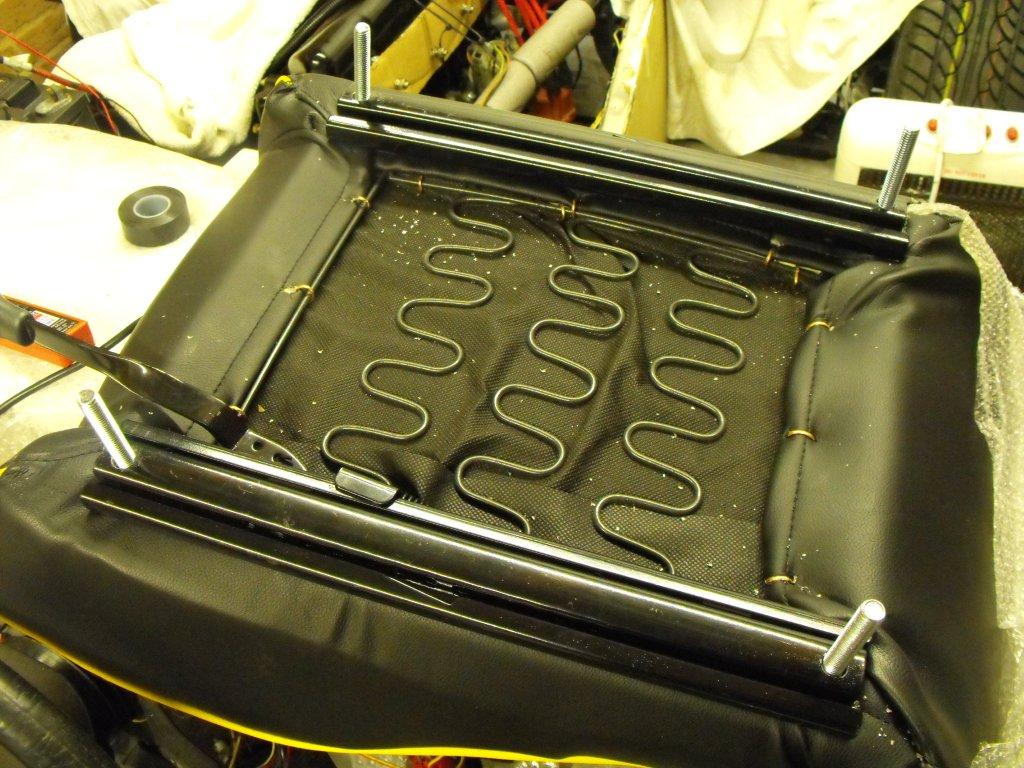
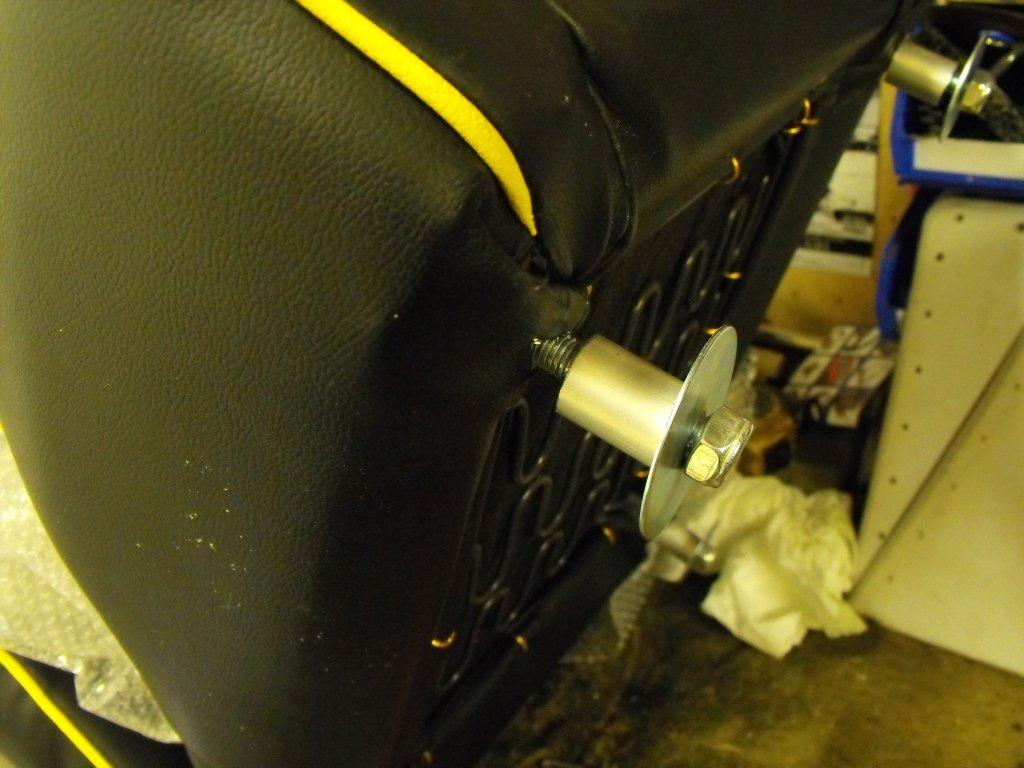
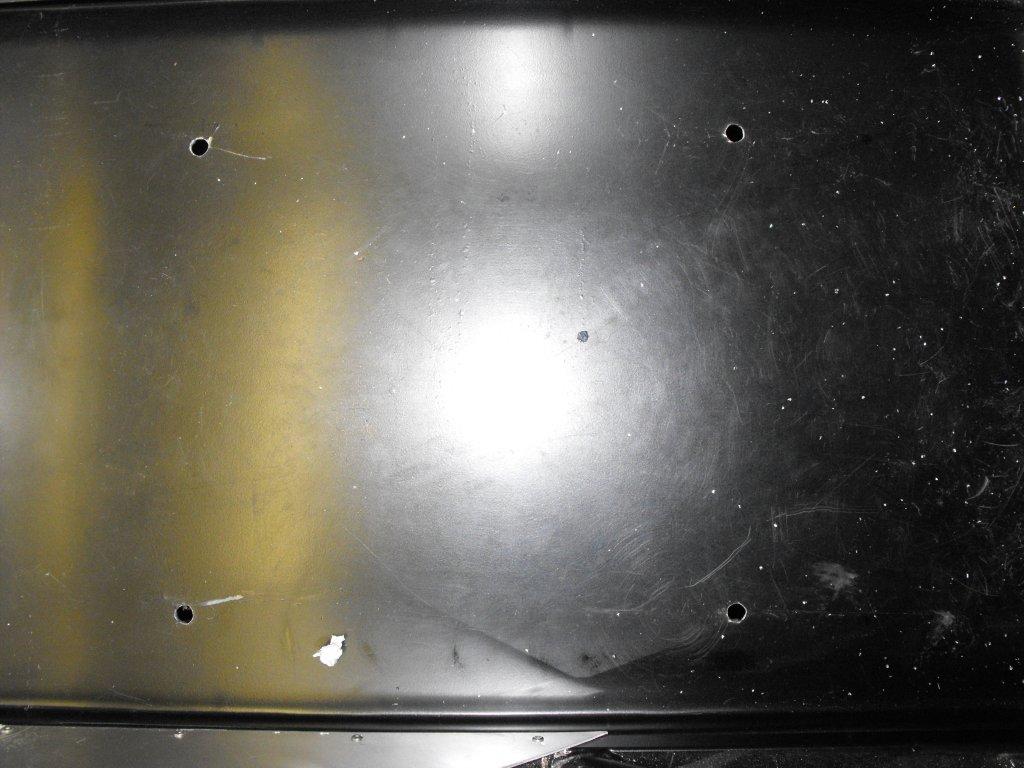
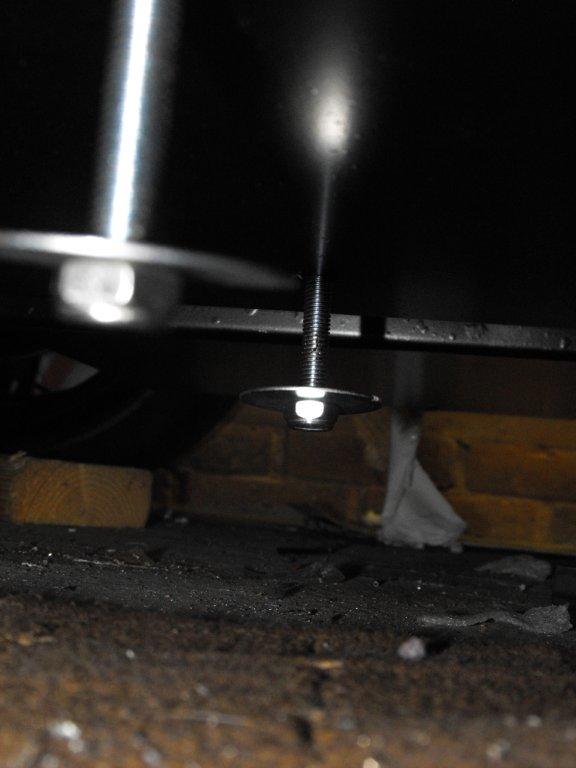
I fitted the driver seat on runners and the passenger seat using some spacers. First I secured the runners to the drivers seat with high tensile 8.8 bolts, then used the same for the runners to the body. The passenger seat I used the same bolts and cut off the heads, as extra security I also welded the bolt to the seat. Fitted spacers the same thickness as the runners, marked the floor plan and drilled through. I used some large flat washers during the build but upgraded to some 6mm steel plate before IVA.
-
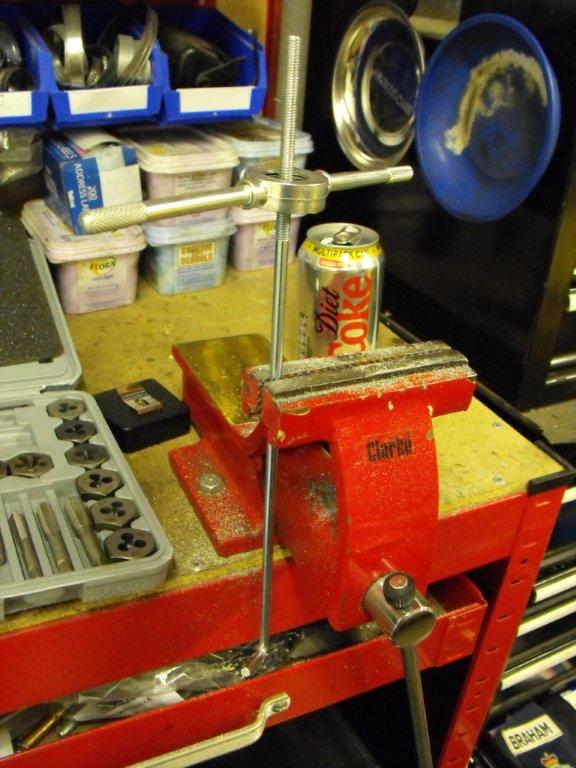
Not an embarrassing question we have all learned something new, about brake flaring tools and ends. You cannot argue this is a significant benefit of the club - wise words of experience and knowledge, priceless.
-
I have to interrupt this build thread briefly and shout out 'PASSED IVA TODAY, YIPEE' . Now to deal with DVLA and registration.......
-
Reversing light, No. plate light and fog light.
-
Thank you, I will be at Stoneleigh but in tintop I doubt DVLA will give me the paperwork and plates in time. Going to pick up screen and hood from GBS.
-
At last at Kidderminister VOSA test station my GBS Zero has passed IVA re-test, working away for the next three days so DVLA paperwork can wait until the weekend. Thank you to all Rhocar members who have provided advice and support.
-
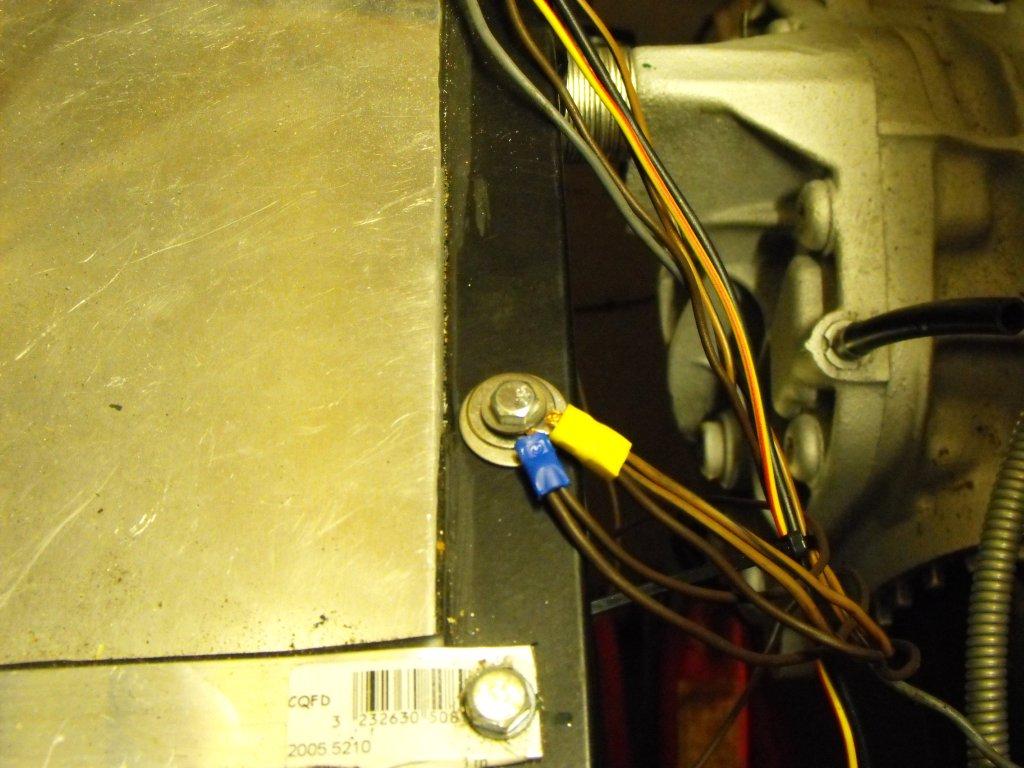
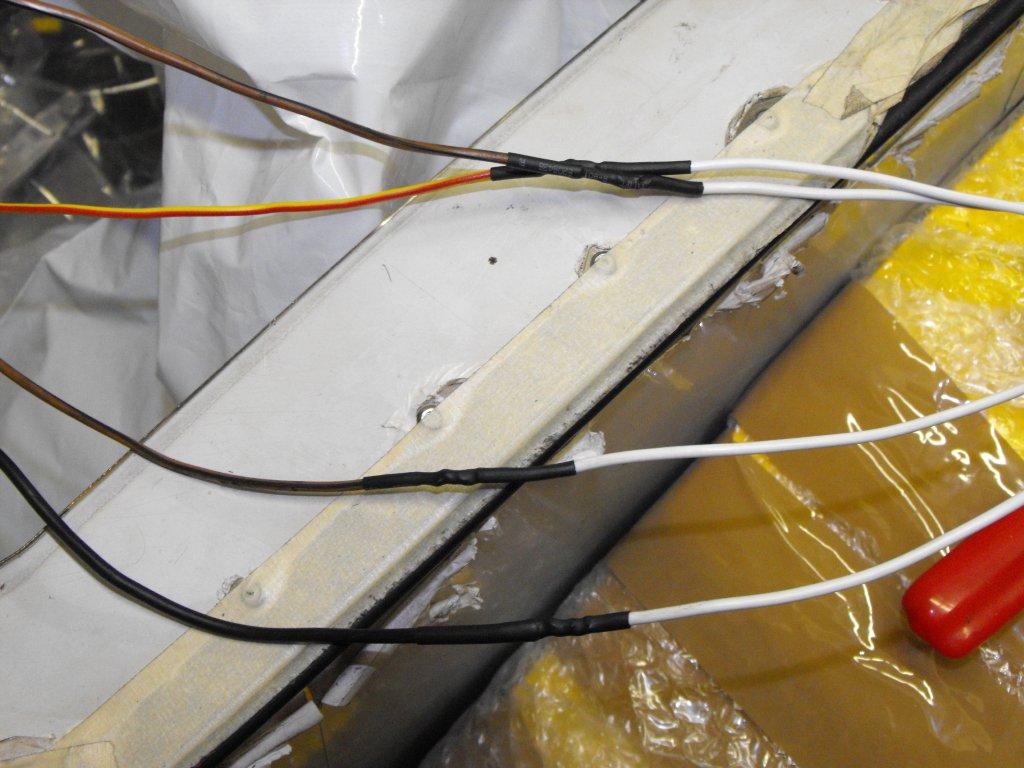
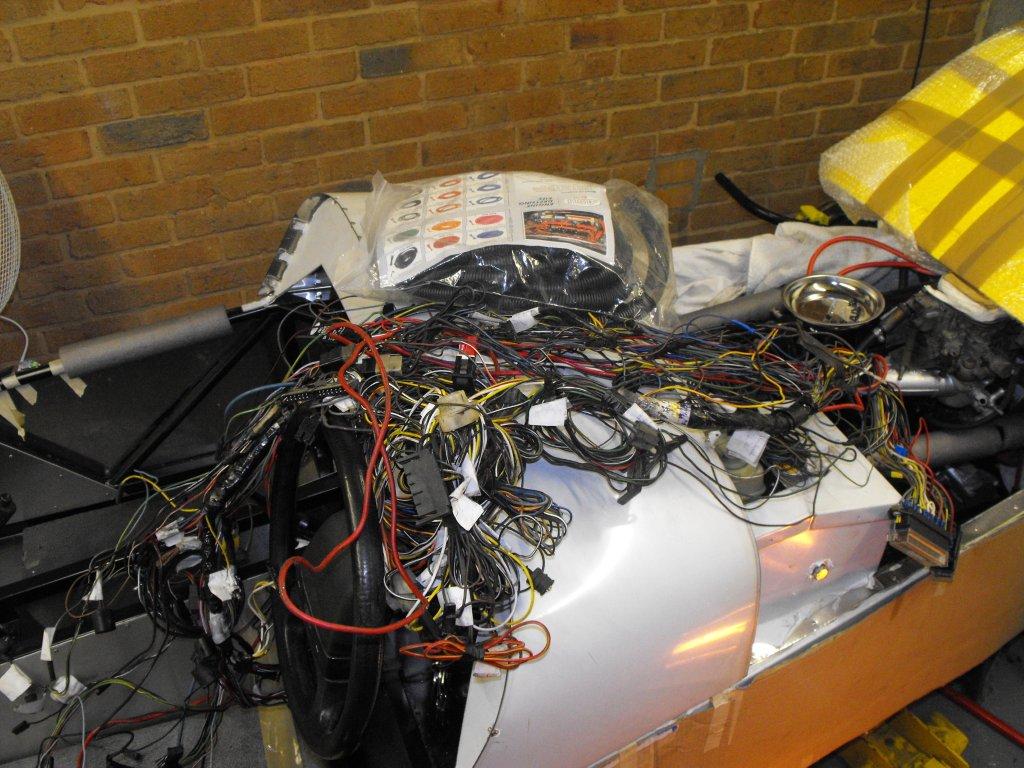
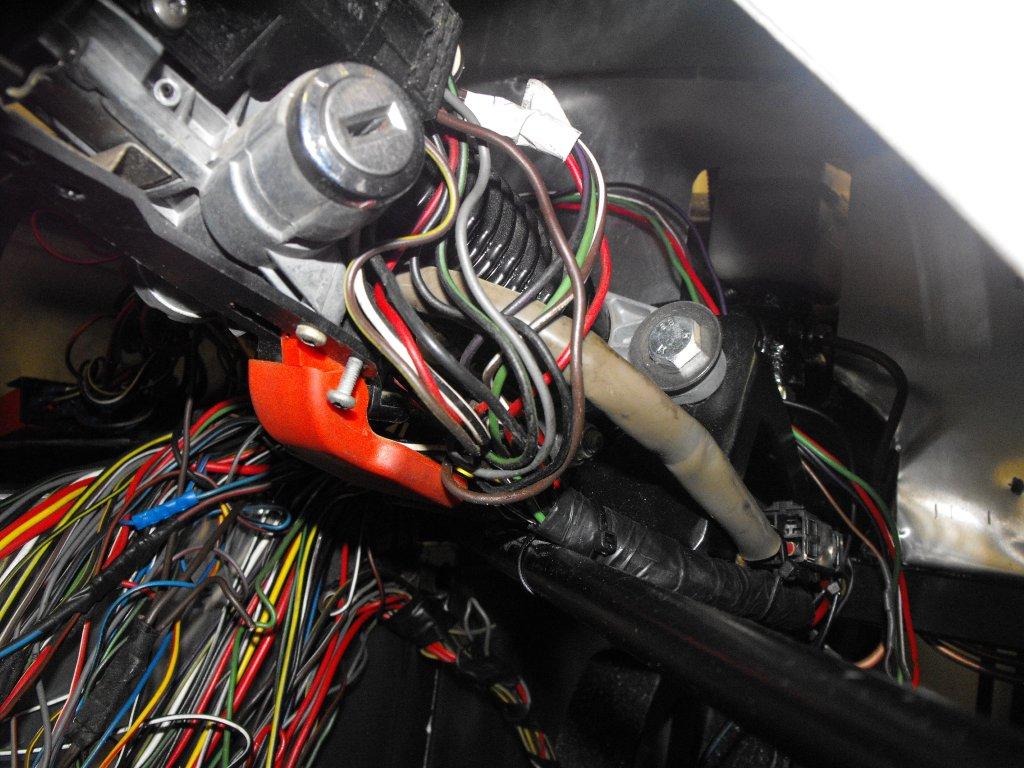
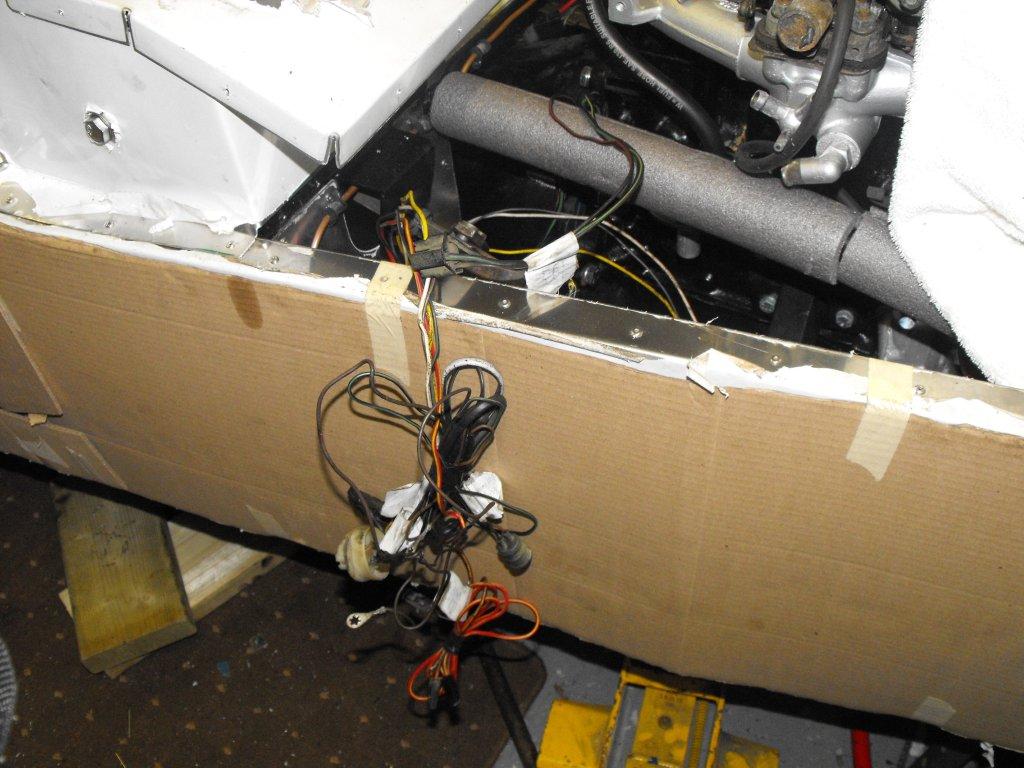
Don't want to bored you so I will not show every electrical connection but below you will get the idea and method followed. I fitted a few earth points on various points on the chassis, including a separate point for the fuel level sender. I used solder, tested the circuit and then used some heat shrink on all light connections. And finally, used the corrugated conduit, joined with either self amalgamating tape or heat shrink, all secure with cable ties or p clips.
-
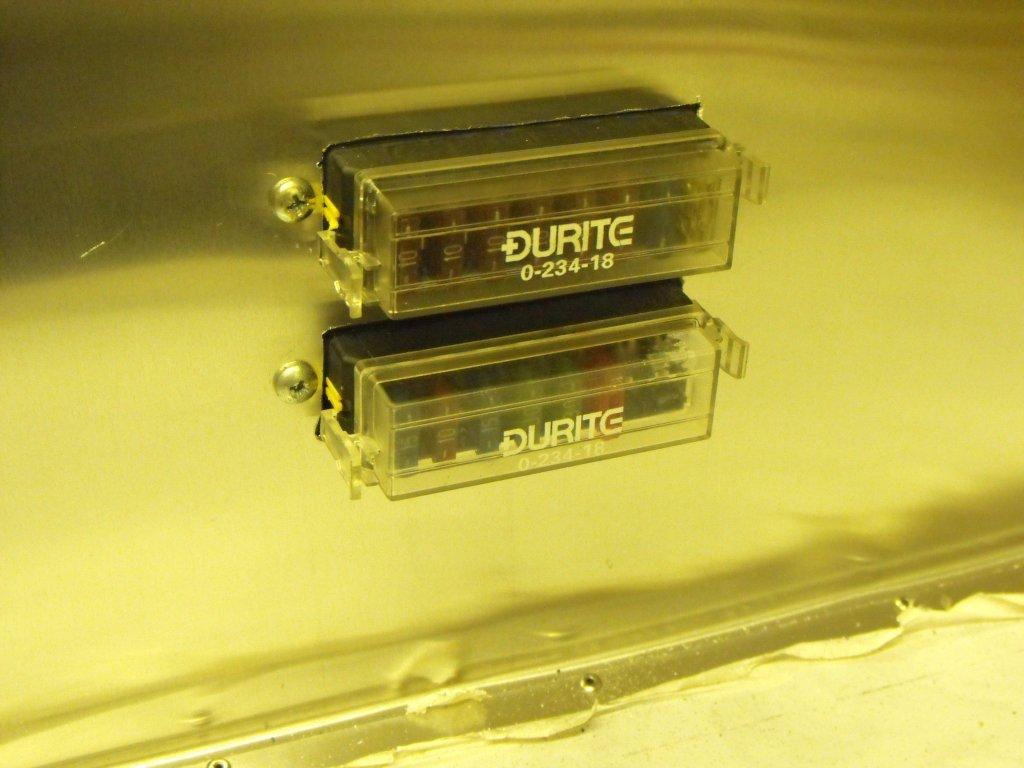
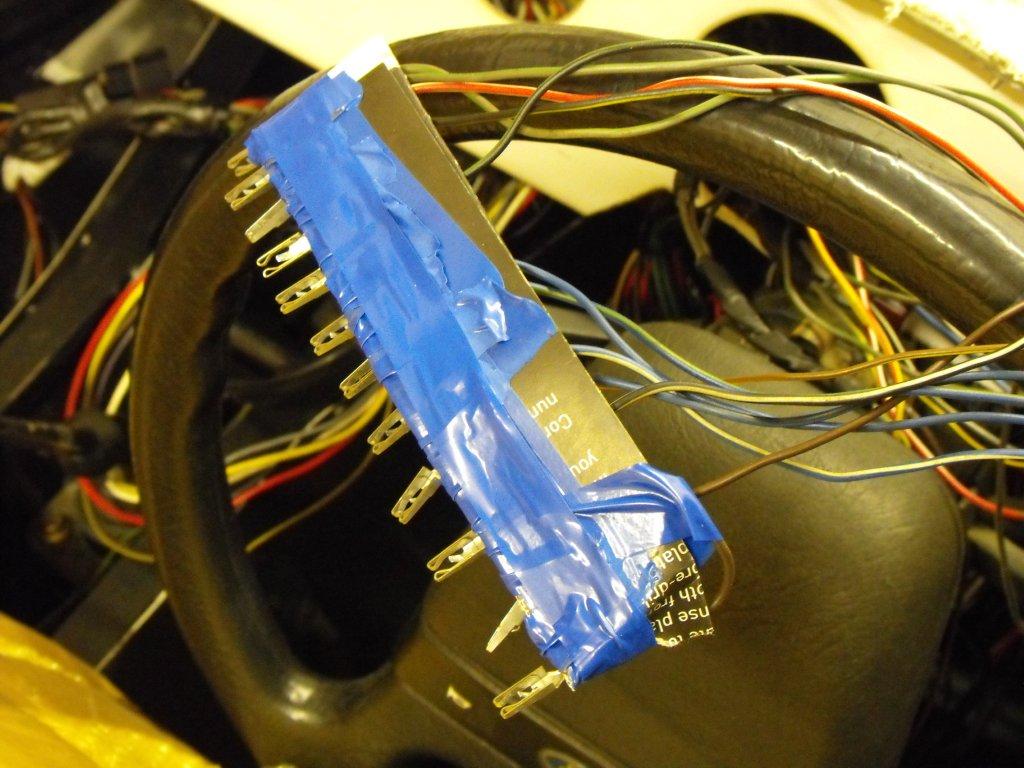
Electrics, let the fun begin. As previously mentioned I decided to use the Sierra loom to save cost. I also purchase some split corrugated plastic sleeve to cover the electric wires when fitted. I thought the first job to do was to fit the new fuse holders to the scuttle, at least I now have a starting point. Then all the ignition switches and column switches, easy when retaining the original loom. I then split the loom to front of the car, under the scuttle through a grommet and to the rear same exit point and down the tunnel. All the dash wiring was separated from the plug and marked on a piece of card for later.
-
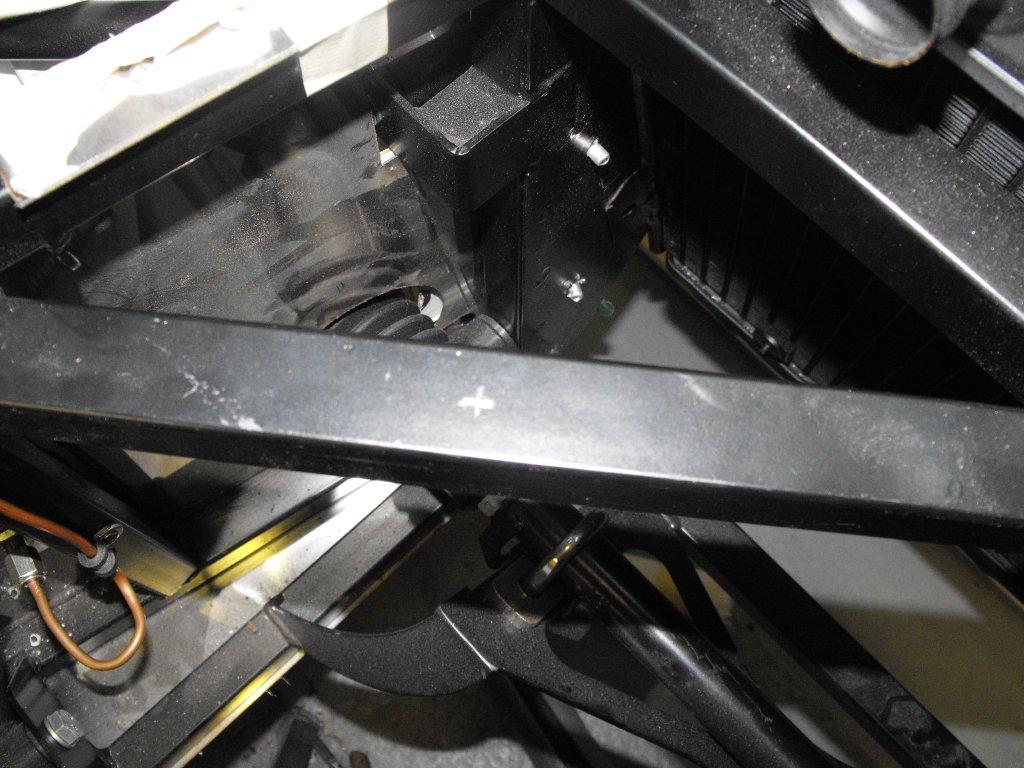
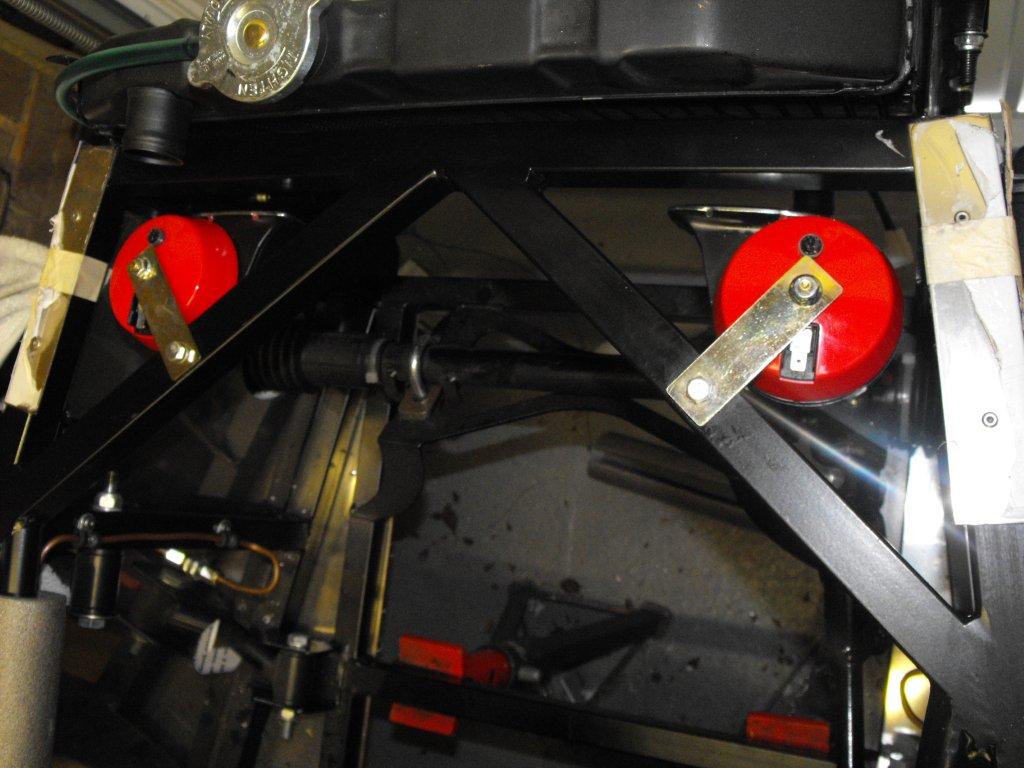
I decided to fit the horns in a void that nothing else was going to fit, on the front chassis strengthening bracket area. Simple drill a hole, fit rivnut and bolt together. Wiring will come later when I fit the modified sierra loom. I was slightly concerned that rain water could enter the horns so I twisted the bracket to point downwards, to drain naturally. Although when I fitted the nose cone the top of the radiator was protected.
-
Good to hear, I don't want to use the AA too often. Thank you
-
Looks good, with so many cars together. Who is going to write the article for 'Boys in the hood' to show the members who do not use the internet forum?
-
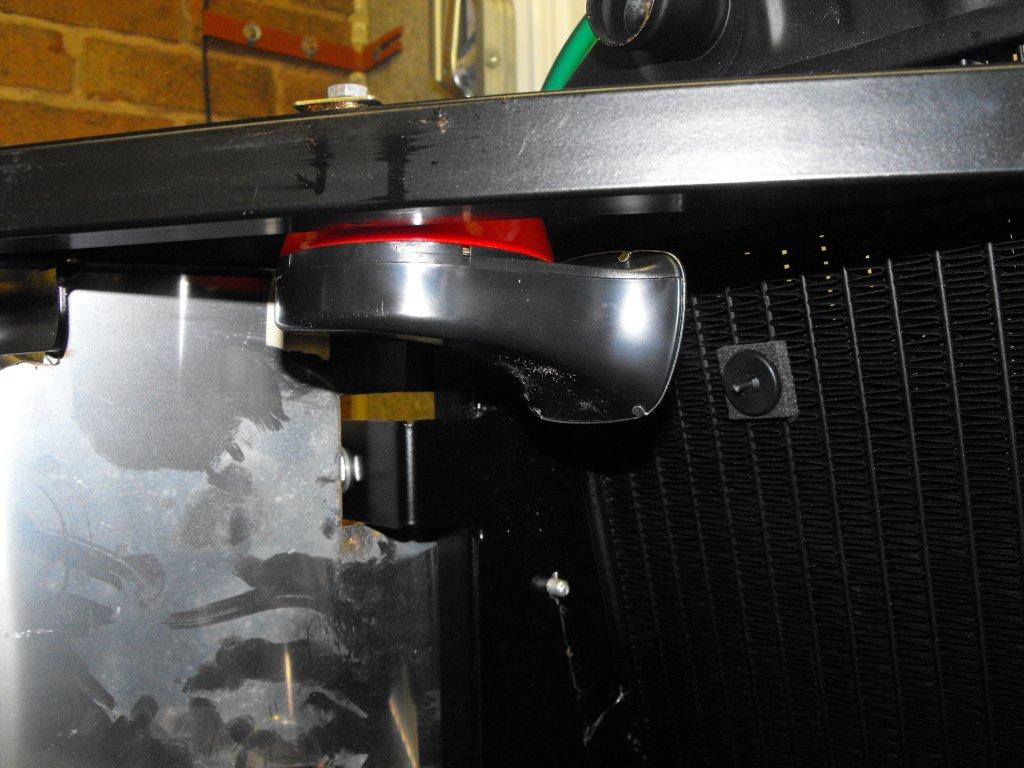
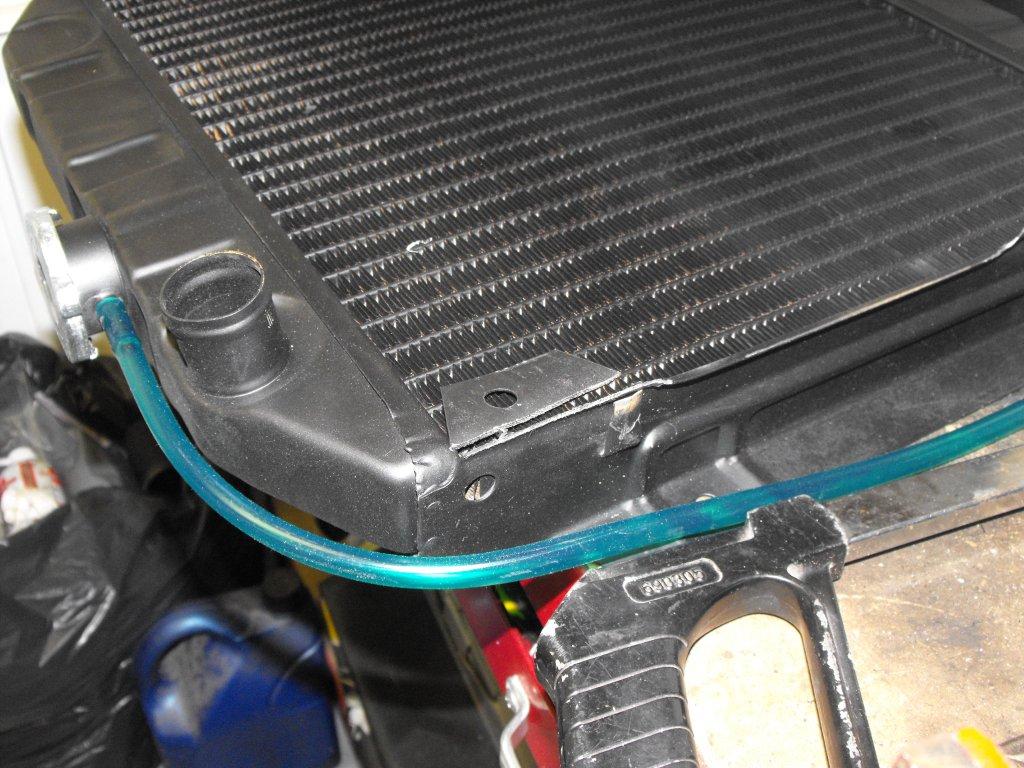
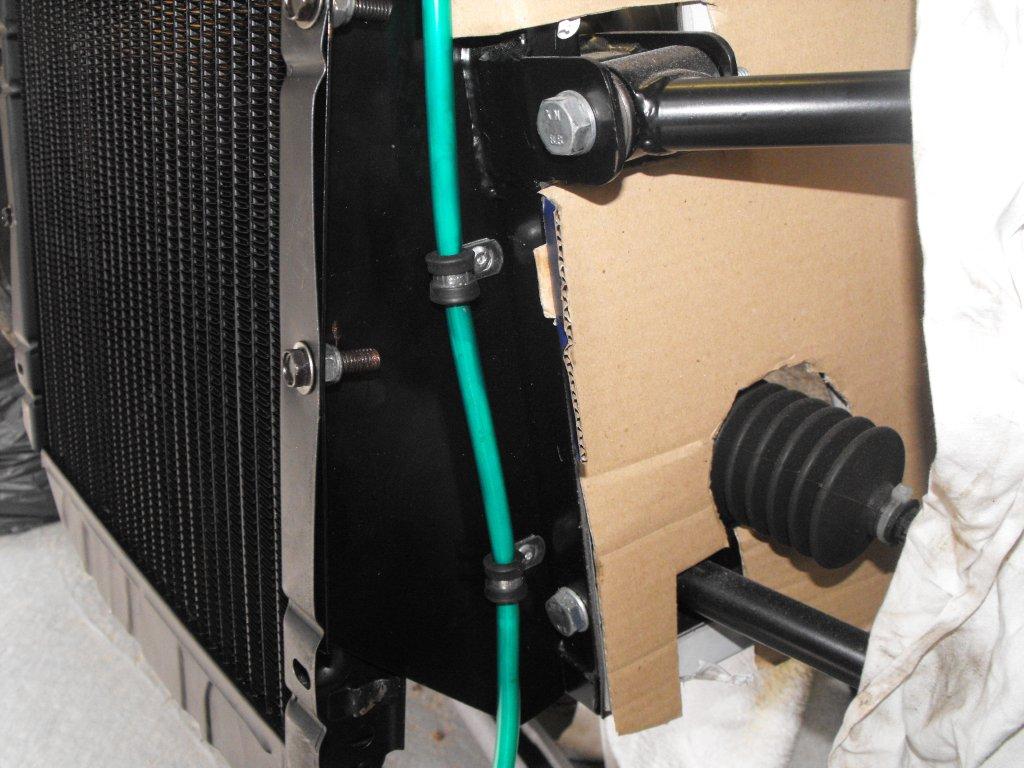
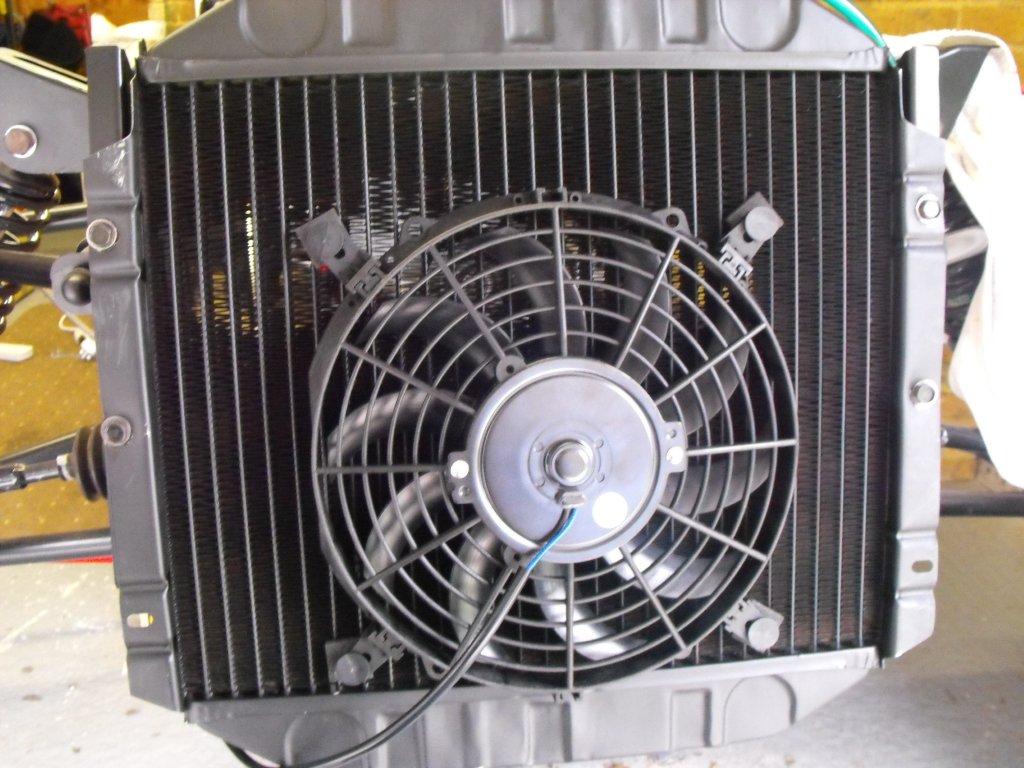
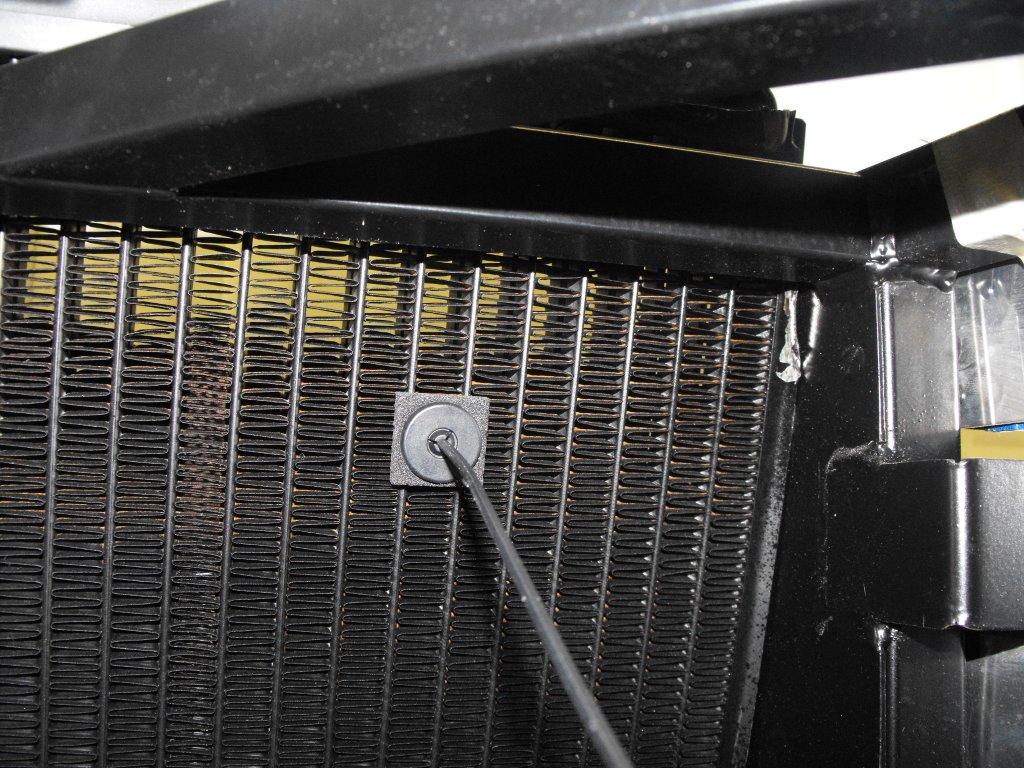
From one end of the car to the other, to fit the radiator. To fit the rad into the Zero brackets I had to trim a little of the mounting bracket. Then test fit to make sure the bottom hose clears the steering rack, marked the holes then removed the rad to drill the holes. I mounted the rad using bolts, flat washers and nylocs. At the same time I fitted some p clips for the overfill/pressure pipe. The fan was fitted with through rad fittings from CBS, almost an inline cable tie not sure if these are any good I suppose time will tell. I opted for the radiator with traditional rad cap. In the future or if the rad needs replacing I will opt for the plain radiator and fit a rad cap to the top hose where you access it without removing the nose cone, what a pain, winter project!
-
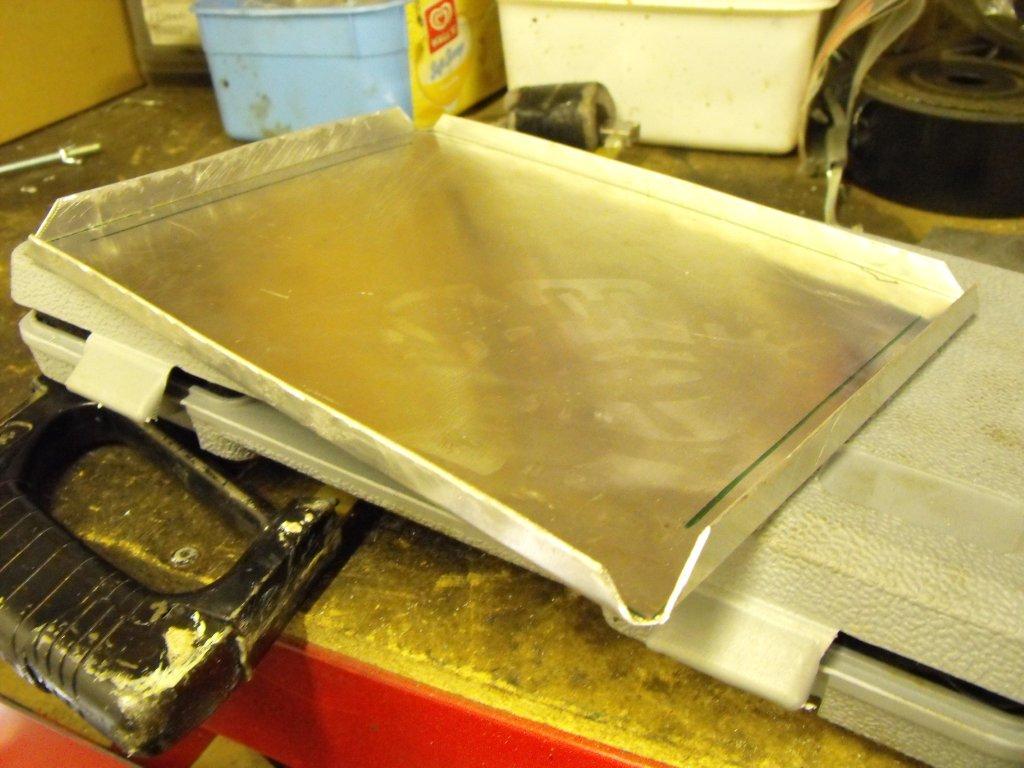
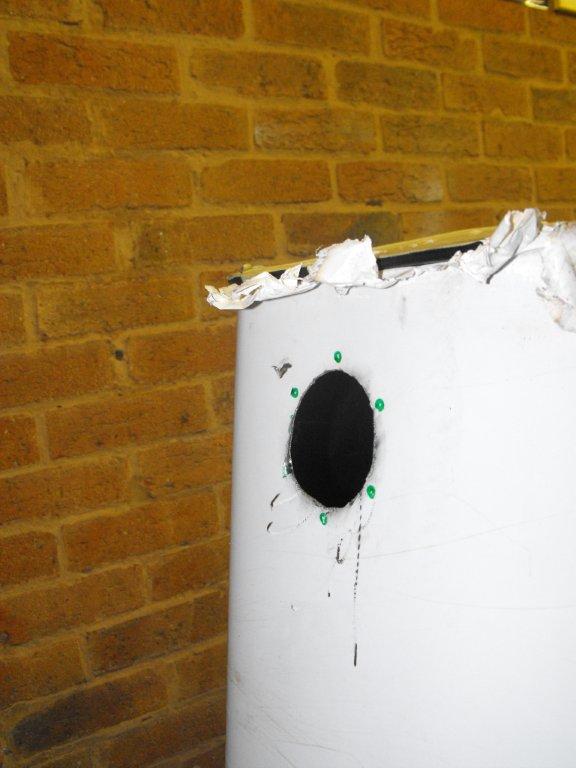
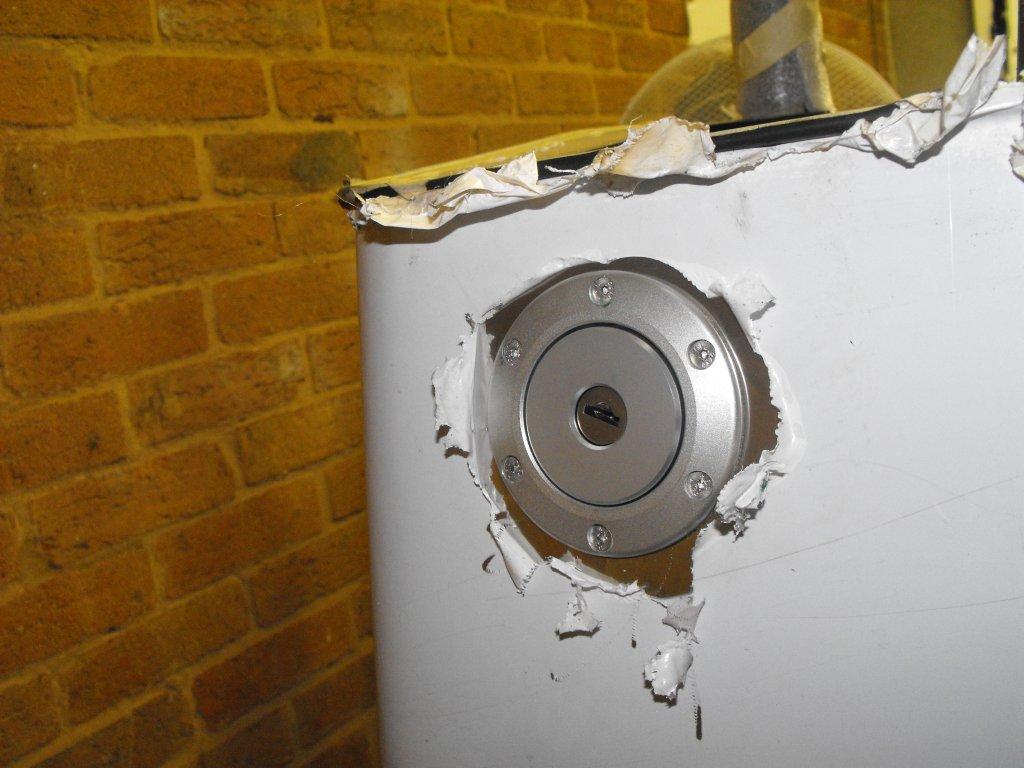
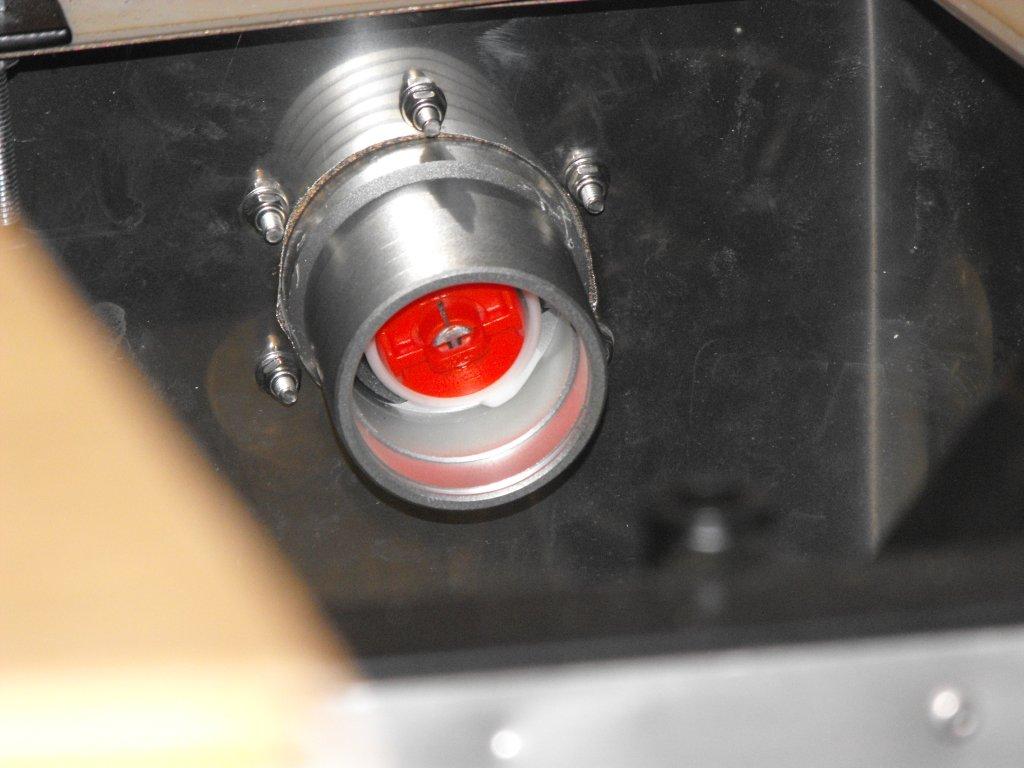
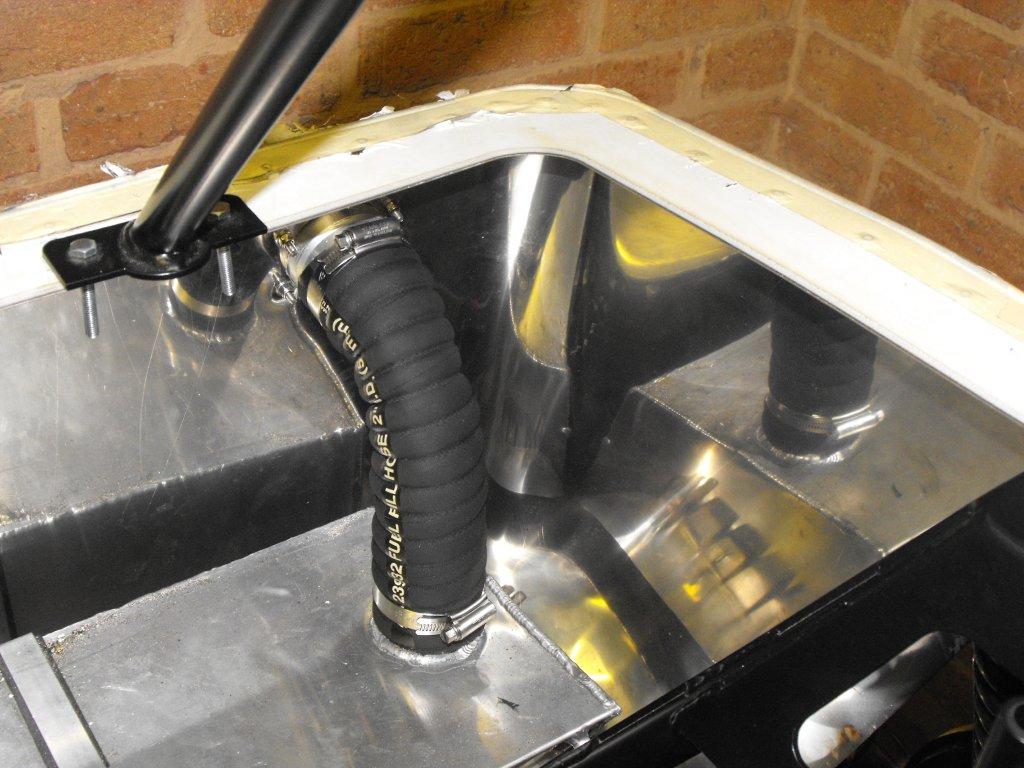
Quick and easy job next, or that what I thought. I did not have the right size cutter for the fuel filler so I had to drill lost of holes in the stainless steel rear panel which took ages and blunted most of my cobalt drill bits. Then with a dremel type tool I started to smooth the rough edges, well I killed the cheap dremel imitation within a few minutes. Then I bought an air powered die grinder, much better! Well, except for the one time it slip out of the hole and went down my nice shiny panel, after a bit of cursing I fitted the filler with new nylocs and cork gasket. I then fitted the fuel filler hose, with the writing pointing directly to the VOSA examiner.
-
No argument, the best classic car in my opinion is a 1968 Shelby Mustang GT500, the new version launched this year looks fantastic and still has the great lines and superb engine power.