


cb750
 RHOCaR Member
-
Posts
1,428 -
Joined
-
Last visited
-
Days Won
16
Content Type
Profiles
Forums
Events
Store
Community Map
Posts posted by cb750
-
-
Sorry to hear about this. Fortunately you weren't hurt. Our neighbour was dragged out of his, punched and threatened with an iron bar.
-
Haven't done a car but I used a variable temperature heat gun on my wrap so that I could adjust to the temperature I needed without melting the wrap! I needed another pair of hands as well. Someone told me to use a hairdrier but I found that was useless. I found that the wrap will creep back where you have had to stretch it when it gets warm again. Just take your time and you should do it!
-
Have you checked how far the fuel take off pipe goes into the tank? When I checked mine it was about 50 mm off the tank base so I was not getting roughly 20% of the available fuel. Does need to be off the bottom to stop picking up crap!
-
Now sold!
-
Thanks tractor
-
Now sold
-
Too True!!
-
Surplus to requirements: 6-hole fuel sender as shown in photo. Never fitted.
£23 including postage to standard post code areas

-
Thanks tractor, just PM'd you
Rob
-
Don't know what flasher unit you used but shouldn't it have a separate output for the single dash bulb that is isolated from the main flasher output like the original ford one?
-
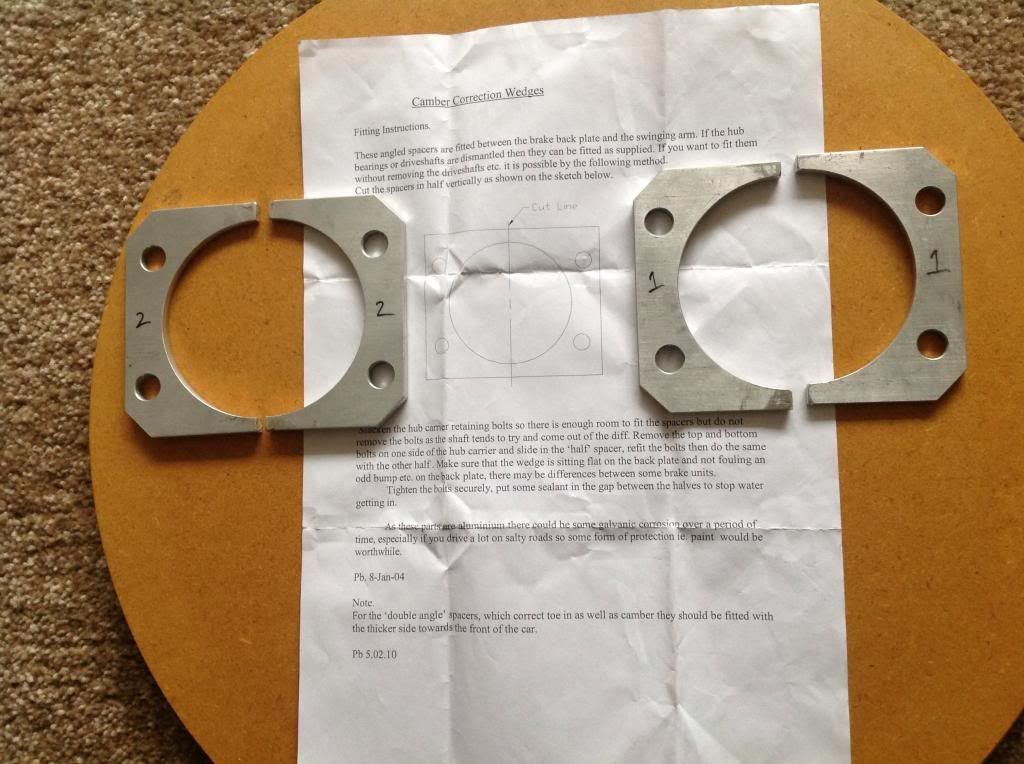
Surplus to requirements a pair of camber wedges. Not used but cut in half ready to fit without removing driveshafts.
£22.50 including postage to standard UK post codes
-
Great fun playing with a lathe, you will find lots of bits and pieces to make now!!
-
Mower man, just PM'd you
-
Haven't seen one like that. Would like to have a look at it if I get to meet you at a show.
Rob
-
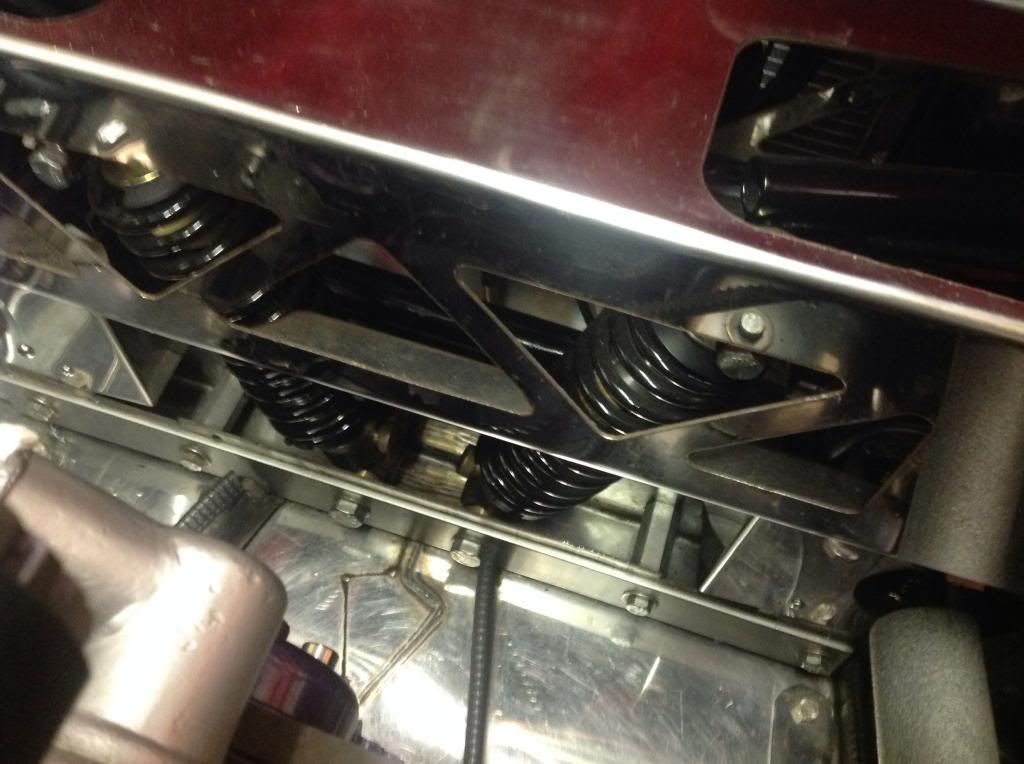
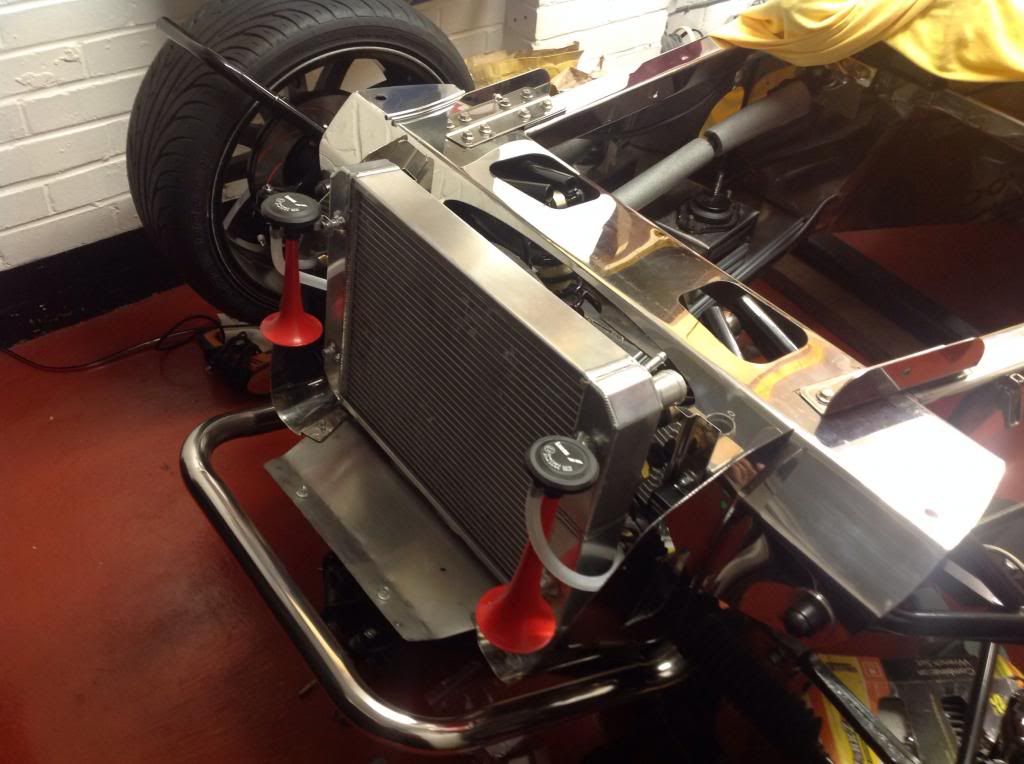
hi Blue, photo taken as best as I can. Yes its only bolted through the stainless sheet but this has lasted for 15-20,000 miles without problems but I have now improved it as I said by bolting through both verticals and clamping the 2 sides together, 60mm diameter thick washers have been fitted under the bolt head and nut to spread the load. I have put up other photos showing the parts I used for my mod, also showing the reinforcing I have done to the lower shock mounts as I was told that this bottom folded channel has been know to bend (I think it happened when using the original high poundage spring rates which put a shock load down on to it)
Rob
-
I am off out at the moment, I will try and get a photo taken and posted up
Rob
-
Excellent piece of work!
-
Forgot to add re the rear bang, check the shock absorber mounting method at the top. Mine had weak angle mounts that had started to come loose and cracked the mounting points on the monocoque. I replaced mine with box section and side plates bolted through reinforcing plates on the boot side, welded up the cracks and added reinforcing plates there. Jobs a "good un"
-
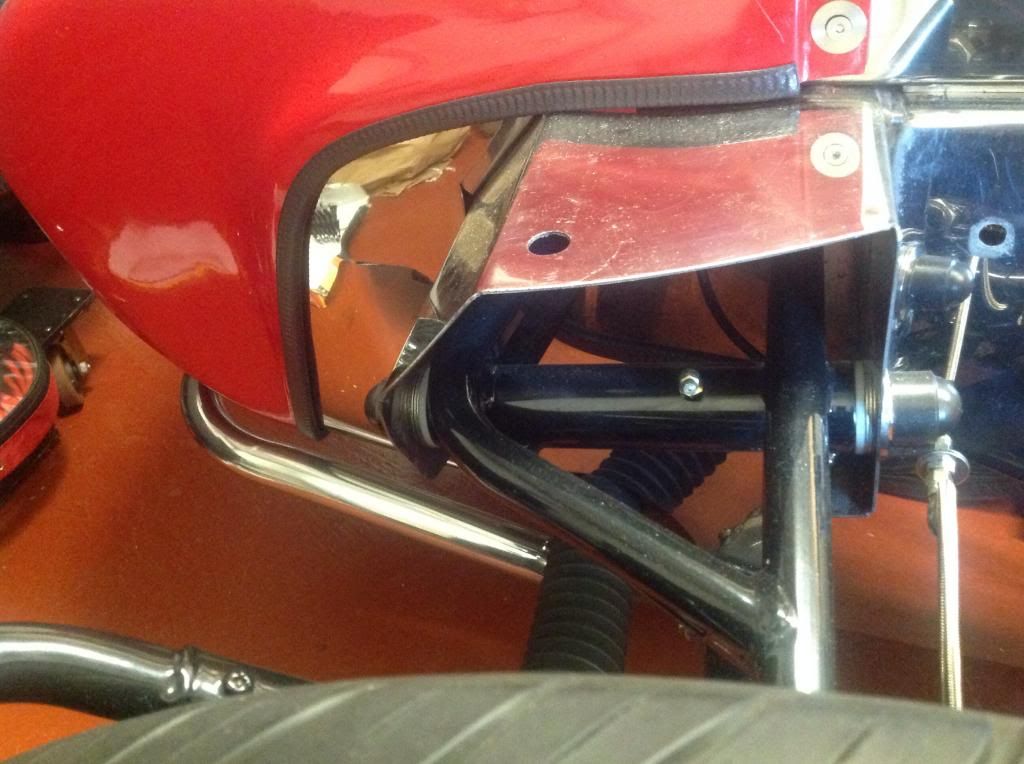
The top angles hold the nosecone in place on mine, they are bolted through the front member and top of the monocoque sides. I used reinforcing plates underneath. I have had to use a photobucket account to put my photos up as the file sizes were too large like yours.
Hope you get it sorted
Rob
-
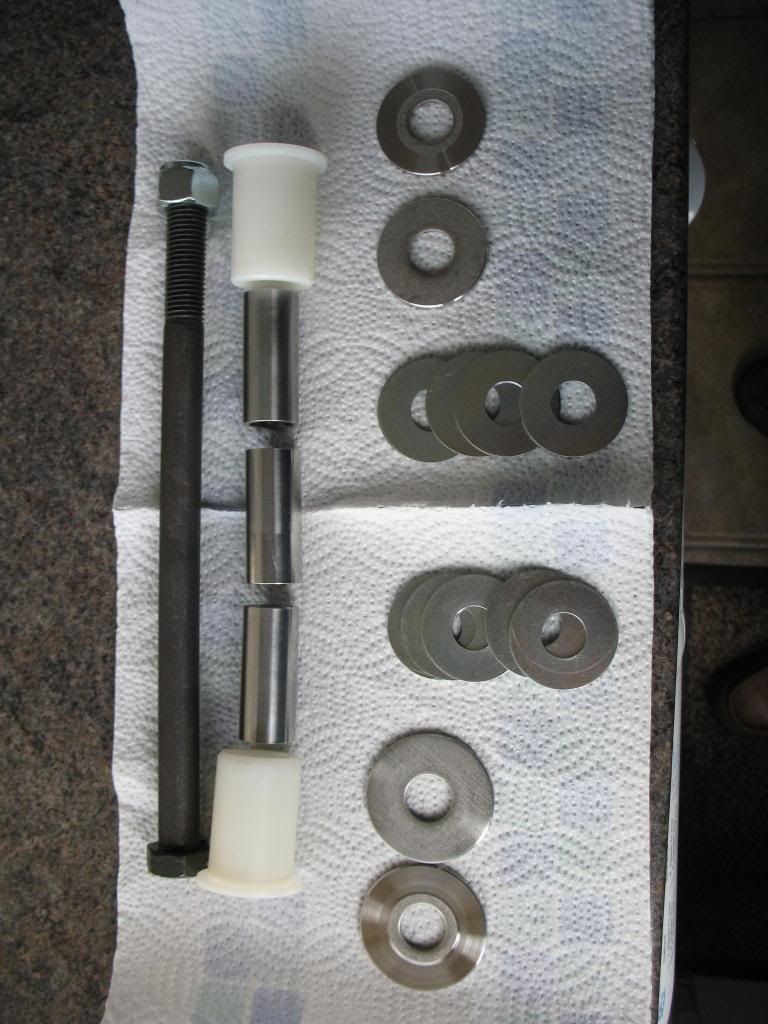
Blue, does your front end look similar to mine? This is a 3A. As mentioned before I changed the pivot rod for a long M16 HT bolt ,machined spacers and flanged nylon bushes so that I could clamp both sides of the cross member securely but allow the wishbone to pivot.
-
Blue, Just looked at your photo. My cracks were nothing like that! They were only fine stress cracks which were easily welded up. If that is your front suspension pivot rod has it seized in the top wishbone and then twisted in the chassis to cause the tear?
-
Forgot about that one! Mine hadn't cracked but the pivot rod had rotated and elongated it's mounting hole. I altered the complete rod system by drilling out the holes and replacing the rod with an m16 HT bolt and flanged nylon bushes plus spacer tubes so that the bolt can be tightened fully but the wishbone was free to rotate. The shim system was kept so that geometry can be adjusted. Grease nipple also added
-
Around the engine mount towers (support trays crack)
At the rear of the tower support trays near bulkhead
Rear of the monocoque where the shock absorber angles or support tubes mount (tubes/angles flex and crack the body)
Top of the scuttle cracked on mine where the previous owner had cut a lot of dash area away to mount the sierra instruments
Area underneath pedal box front if the box hasn't been strengthened. It twists back and forth when the brake/clutch is pressed
Top of bulkhead to monocoque side rails weld has been known to crack
Plus those at the front!!
My gearbox support angle also had the start of cracking around its mounting holes, I replaced this with box section.
All mine were reinforced and professionally welded up
-
Iva For 3A
in IVA
I've done something similar to snapperpaul at the rear of my 3A. I used 3mm steel plates inside and out of the boot sides that go the full length of the boot. The rollbar sits on plates welded to the bottom of these and are triangulated for strength. The rollbar is adapted to bolt down through these plates and I have used high tensile U bolts instead of the standard ones that were in the kit.
To improve the shock mounts and to take some of the load off the side of the monocoque, 50mm square tube with top and bottom extensions is bolted through these plates as well as bolting through reinforcing plates that sit inside the monocoque side "tubes" at the original mounting points. The shocks locate on these 50mm tubes. These don't twist or deflect like the original angle iron mounts that were supplied
I can't post a photo as all my pics are too large and I can't get them down small enough. If you want any pics please PM me with your email address.
Rob

Facet Solid State Pump
in Mechanics
Posted
What type of pumps are these that you are talking about, solid state or interrupter? I've bought a red top interrupter and now I'm worried it's going to be noisy!