

Sparepart
 RHOCaR Member
-
Posts
303 -
Joined
-
Last visited
-
Days Won
14
Content Type
Profiles
Forums
Events
Store
Community Map
Posts posted by Sparepart
-
-
I'm rebuilding an Exmo also, will keep an eye on your build, good luck! I notice you have chopped off the ends of the suspension "arms" so you can have cycle wings. I have standard system and am looking at the problem with the strength of the arm around the top mount for the strut. When you get to it I'd like to know if you took any steps to strengthen this area and use a taper bearing perhaps.
-
Thank you for that mouse clicking exercise .... does it feel good to expose yourself to a wider audience? Soon we will be seeing all about your invovment in the PPE fiasco. Seriously though I hope you do get the chance to tell the real story and don't forget royalties!.
-
Before I fitted the pillars I made an outline drawing on a piece of A3 paper. That is I plonked one on the paper and drew around it. I used the drawing to calculate the angle via triangulation. I have made a PDF of the drawing. If you have access to an A3 printer then you too can have the outline. I attach the PDF here. Ignore all the dimensions, they are for the right angle trianges I made to derive the slope. The outline is obvious, and an A3 "actual size" print will be the actual outline. Both pillars are the same. I cant see why you could not get hold of some thick sheet steel, and cut them out yourself, the ones that came with the Exmo were just thick mild steel, very roughly cut out with plasma. On the other hand, if you decide to go this way you will face the task of forming the triangular part to the scuttle contour. This is not easy. AND as you already have a screen fitted, you have the added constraint of not wanting to move the base line of the screen. I notice that you have only two bolts between the pillar and the scuttle sides, some freedom for new holes. I guess in the end you have to weigh up the hours of work involved in fitting different pillars against your other alternatives.
-
If it helps, like Brumster, my Exmo pillars are not the same as yours, I have mesured accurately and done the old SOH CAH TOA calculation I learned in school, they all come out at 65 degrees, between the "base" and the pillar.
-
While we are on mouse stories. My next door neighbour used poison, while I was using traps. A while after there were no more mice in traps or signs of droppings or gnawed bags of flour etc. I noticed a bad smell whenever I took a shower, at first I thought it was usual BO ... but one morning the smell made my eyes water. I investigated in the loft, as soon as I stuck my head through the trap door the smell was like a wall. Torch in one hand, cloth over my nose and mouth with the other I picked my way over the joists to the large header tank and peered over the edge to see a decomposing bloated mouse at the surface. Returning with a plastic bag I tried fishing it out by the tail, but the tail just came away, returning with latex gloves I scooped as many of the bits out as I could, all the time causing fresh waves of obnoxion. Obviously I had to disinfect the system and then flush many times before using it. Now, years later, I still have a good sniff of any shower water before I get under it, not just in my house, anywhere.
-
Yes I agree with nelmo, Old farmhouse is probably harbouring a plague, they are using the car as a playground and not living there. I've had similar problems in the past. Forget humane traps or poison, keep putting down spring traps until no more mice are caught. Smooth peanut butter worked best for me, not a big dollup, just enough to fill the little bowl on the trap. Position the "front" of the trap so that is up against a vertical surface, like a wall or the side of a box etc. This makes sure the mouse approaches from the side and gets a good clean chop of the neck when the trap closes, quite humane.
It helps to avoid further infestations by making sure there is no easy food around, bird feeders drop seeds, cats and dogs feeding bowls kept clean. All food anywhere near ground level kept in steel containers. I don't think they can digest what they gnaw at inside the car its mostly plastic, I think they gnaw to wear away their teeth which i think keep growing. They multiply to eat all the food that is available. No food, no mice. Innocent things like food scraps, bread, peelings etc in a compost bin can keep them around. Thats my experience.
-
I purchased an Exmo in one of the batches, not sure which, think it was second batch. Echoing what others have said this was a budget kit. I bought an MOT failed Sierra, stripped it down, fitted the parts to the kit and hey presto! .... well not quite so easy as I found out. I have the original simple brochure and order form that I picked up at the Exeter car show where I saw a fully built example that started me on a path of many triumphs and tragedies. I also have copied all the build videos to digital format, but they are quite long, poor quality and no longer any use as no one has a fresh kit anymore.
In any case, I have uploaded some files to my cloud space, a PDF with the brochure, order form, partslist, and collection instructions (with a map of where to drive your van to collect all the parts). Also there is a big MPG which is the first build tape (too big for the BT server to play, needs to be downloaded) and a few WMV clips that give you an idea of the video quality. I also have a printed 21 page "Build Manual", I could scan that if you want, but like I say, not much use now.
Use the link below, and feel free to rummage through the few files that are there.
https://btcloud.bt.com/web/app/share/invite/0BwowO474i
-
 1
1
-
 1
1
-
-
Apologies, I forgot to congratulate you, well done! ...also I remember that the SVA pass certificate had to be the original and they kept it .... so make good copies of everything (sorry if thats grandma sucking eggs). This period of time is very frustrating, you are all ready to go out joyriding, just need to get those plates. Patience.
-
It's been years since I did this, however it was just paperwork pushing ... and not much cash, at least then.
I'd start with this link to the gov site ...
https://www.gov.uk/vehicle-registration/kitconverted-vehicles
Good luck.
-
For some reason I find a bit more time on my hands just now. I often look at For Sale and other forums (fora?) that are near the top of the list ... but not scrolled down ... now I see Chit Chat ... and over another cuppa .. notice this thread ... and see that on Feb 1st I was listed as a new member .... suprising since I have been paying subs and getting mags for years ... no matter ... I saw a new member in Chichester ... then looked at the map but neither of us were there ... then I saw the request to add ourselves if we wanted (I agree, you cant do it automatically, its confidential) ... so I added myself. I wonder how many others are not on the map through ignorance like myself?. I am not sure if I want to get really chummy with a load of local people in the South whom I have never met, at my age I can be quite grumpy at times (no excuse I know but true) .... however If I can help someone with obviously one common interest ... and they are not far away then ... some form of quid pro quo (that is Welsh for lend my a pound) might be possible.
-
Thanks for that input. Easy to try when I re-assemble, and no cost.
-
Sorry I can't help, I have one but it's on my car. I am lazy however, and it looks like you are motivated to look for a replacement. I would like to try splitting the one I have and using a piano hinge, but I am too chicken to just go ahead in case I end up with a useless bonnet. So I am very interested in how you get on with your search. Please update this thread to let us know how you are getting on. I wonder if it would be easier to get one in aluminium, would that look too odd ?
I guess you have looked at this on eBay ?
It's SS and not cheap .... might fit ?
-
Thanks for sharing your experence. I'll look at tie bars if only for better handling. As well as all the challeges you mention the radius arm ends will move foward giving a twist to the inboard bushes. It all stacks up against trying, just leave the caster as it is, be happy with that. You may well have saved me undertaking some dangerous experimentation. I am glad that you reminded me about the top mounts, mine are as from factory, no bulge or crack, only a matter of time though. Better to fix that rather than worry about self center.
-
I am rebuilding my Exmo, in a few weeks time I hope to reach the front end. When I put it together the first time I made sure that the wheels were squared up, in line, body in middle etc. It took a long time measuring before I bolted it all up. There were just too many measurement going on for me to consider caster, I just let things settle where the bushes seemed to take them. The result was even tyre wear, no wandering, no crabbing, BUT no self centering. I have skimmed through the 77 other topics in this forum that mention caster. I did not notice anyone making adjustments to caster on an Exmo. As I see it, I can't change the fore and aft position of the top of the strut because its trapped in the outrigger. The only way is to move the bottom by sliding the antiroll bar forward or backward. In principle a simple thing (I think) just move the two U clamps. I wonder if anyone else has tried this?. Is it worth making the mods so that it is easily adjustable, like mounting the u clamps on beefy brackets with a screw adjustment that can then be clamped firmly?. I am not confident that I can measure the caster accurately enough ? to say add x degrees of caster, so if its easily adjustable I can set it via a suck and see approach? If I over do anything then it could get dangerous and behave like a supermarket trolly. Any insights would be gratefully recieved.
-
Hi, I did not notice this thread before, I must be asleep. I have been rebuilding an Exmo for a long while and will go through all your posts more carefully. The one I am rebuilding was very hastily thrown together by myself in 1999 just before the end of the world, just past what was then SVA, on the road for a bit, no WS, no carpets, plywood seats, see road out of back etc, then in a garage till 3 years ago when I remembered what was under a tarp under a load of junk. Shocking what time can do, worst thing a leak of battery acid (no I had not removed it) eaten a hole through the car like that creature in Alien. Oh, sorry yes, get to the point Sparepart!, I Have just gone through the trauma of shaping those thick steel winscreen pillars, so have the windscreen (another construction challenge) in place. I have cut the square bit of SS that has the four demister vents punched into four seperate vents ..... here is the question ... how far away from the base of the windsceen have you fitted yours? and how are they distrubted about the centre line? .. a photo would obviously tell a thousand tales. BTW I did read about using the Capri shocks, I have fitted even shorter ones from a mini. I wish you good luck on your re-test, looking at your photos of the re-build you have done a great job. Back in 1999 we were told that this kit would not get through the "new regs" that were coming, so do it now or never, you are proving them wrong.
-
I am rebuilding an Exmo that I "threw together" before an amnesty from the checks that are done today. It went through a relaxed version of something called an SVA. Seat belt mounting came up as an issue. I needed to buy a pair of triangular plates, long and narrow that make a diagonal from about a quarter of the width of the rear boot edge narrowing all the way to an apex at the fixing point for the bar that runs across behind the seats. It is quite thick SS and has a hole pre-blown for the optional life saving (tee hee) roll over hoop to go through. The rear fixing point for the RH supplied harness was then on the rear boot edge and half way on the base of this triangular bit. Even then I had to take some lovely seat supports out and mount the flimsy two panels of plywood seats directly on the floor (which no one batted and eyelid about) because the height of the rear mounting point was too low when measured from the base of the seat. You probably have these plates ?, in which case I have wasted 10 minutes typing this reply.
-
I would want to fit them in an Exmo. The passenger side is narrow, the absolutely useless seats with the kit are based on two rectangles of 3 ply that are 400 mm wide, I look at the published dimensions of "narrow" seats and very few are that narrow (+ expensive), then I see photos of Exmos with other seats which on paper are too wide. I think it must be a question of just trying to fit some that are billed as narrow. So bottom line is that at £200 a pair I would like to purchase these seats from you, no returns, to try and fit them. I can pick them up in person, cash on collection. Most convenient for me would be sometime on Thursday 17th Oct (this Thursday) as I will be staying in Swindon that night.
-
Hi Dan,
Are these still for sale?, open to offers?
Jan.
-
I have uploaded some snaps and vids to BT Cloud, to help.
The snaps show the cycle wings, and steering wheel mounts, taken when I was stripping down for a rebuild.
The vids are extracts from the tapes that were supplied with the kit, for steering and cycle wings.
Snaps at https://btcloud.bt.com/web/app/share/invite/tLDkYg0ddk
Vids at https://btcloud.bt.com/web/app/share/invite/UulSi0fjPD
Hope this helps.
-
1
-
-
I have built my Exmo with cycle wings. I followed the destructions on the build video. They do not turn with the wheels because they mount to the suspension outrigger at the top and to a bar from the engine bay at the bottom. I have converted the original VHS build tapes to a series of mpgs, I could put these on my BT Cloud for you if you want, the cycle wing construction is on these somewhere. I have seen quite a few EXMOs with cycle wings that turn with the wheels, however you have to be prepared to cut off the ends of the outriggers (and presumably do a bit of welding to strengthen the ends). This needed because otherwise the top of the cycle wing will bash against the end of the outrigger when the spring is compressed by a bump.
-
I guess that a discussion of picture handling software is not what this thread should be about..... however
You could try http://www.irfanview.com Its free. Use the 32bit version. Lots of features, I use "Resize/Rescan"
to reduce pixel count and then save as jpg has option of quality level to reduce size further.
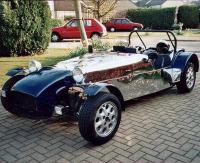
Another Exmo 🥱
in Build Threads
Posted
Thank you for posting the shots of the strut top mods, even better, I see you made a tie bar conversion, something else that I am considering.. any piccies of these, at some stage would be nice, no rush, it's nothing I am going to do imminently... now its getting cold in my garage.