richardm6994
-
Posts
3,568 -
Joined
-
Last visited
-
Days Won
168
Content Type
Profiles
Forums
Events
Store
Community Map
Everything posted by richardm6994
-
she who must be obeyed
-
Saw this on my way home tonight and thought of this post

-
From your spec, you should easily get more than 110bhp...........Just a thought........have you done a compression test? This could highlight a number of possible problems before spending money at a garage.
-
Hi, I'm after a set of 2ltr pinto exhaust flanges in mild steel. I can't find anything on ebay nor GBS website. I'm going to ring GBS tomorrow, but wondered if anyone here could help?
-
Hi CMA, I'm a derbys lad and wondered where you all went for the rolling road tune? I'm just finishing a megajolt conversion on my pinto and as I've never had it rolling roaded.........I thought that this time I would do so to get it set-up properly. I don't know what bhp to expect, however the engine spec is pretty good; 2.1 (2093cc) twin 48's which are choked to 38mm and had all the jets and emulsion tubes spec to the engine megajolt FR32 cam big valves (45mm and 38mm from memory) the head has been on a flow bench and increased it's cfm to around 180cfm Numerous other stuff, but that's the bulk of it!
-
Hi Alan, keeping it simple..........errrmmm.......well you've got to look solely at the blade and blade's surface to explain this (ignore air movement entering / exiting the fan). Basically when a blade is "pushing" a fluid, it is also compressing it (positive blade pressure), however when a blade is "pulling" a fluid, it is streching it (negative blade pressure). These positive / negative pressures are immediate to the blades surface and leading edges and have nothing to do with the air velocities or pressures exiting / entering the fan. The positive blade pressure creates air resistance and thus reduces "pushing" fan's efficiency. This positive pressure also destabilises the blade's "boundry" layer (a thin film of zero velocity are on the blade's surface), which is needed for the fan to work..........but now we're getting way to deep and I'm sure many people reading this have dropped to sleep!
-
Alan, just putting to one side the differences in blade design.........it is a fact that it is more efficient to pull air through a fan than push air through it. You are correct in mentioning the change in blade design.........however this has come about to try and make "push" fans more efficient, however similar design changes (although don't look the same as the fans are opposite principles) have been made to the "pull fans" thus increasing their efficiency..........the nett effect is that both designs of fans have increased in efficiency however the "pull" fan is still better as it was better to begin with.
-
without going into all of the fluid dynamics theories, the same fan in "free air" will work more efficiently (about 10%) when pulling air than pushing air. When you increase the air resistance to / from the fan, such as pushing / pulling it through the radiator....the differences in fan efficiency is even greater (up to 20%+). hth
-
Compression Struts / Tie Bar Installation Help
richardm6994 replied to richardm6994's topic in Mechanics
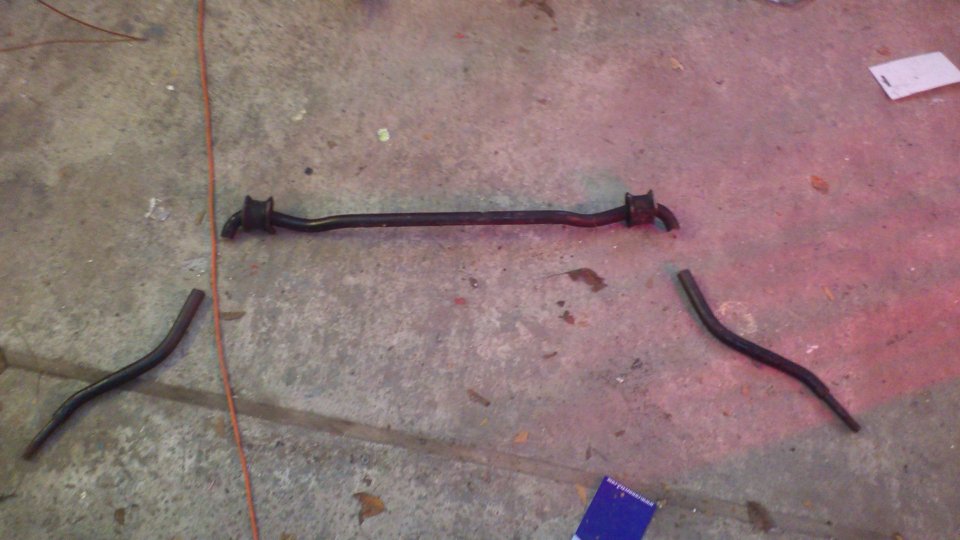
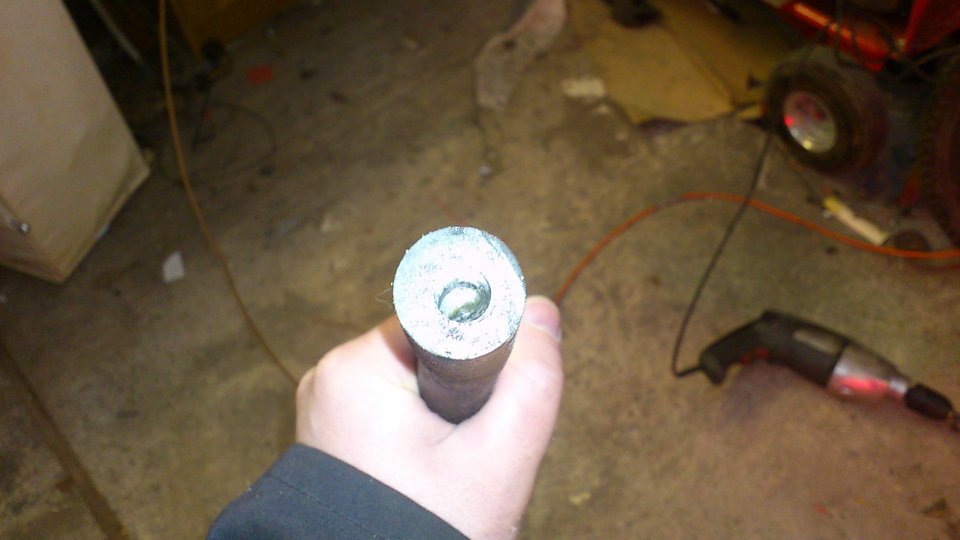
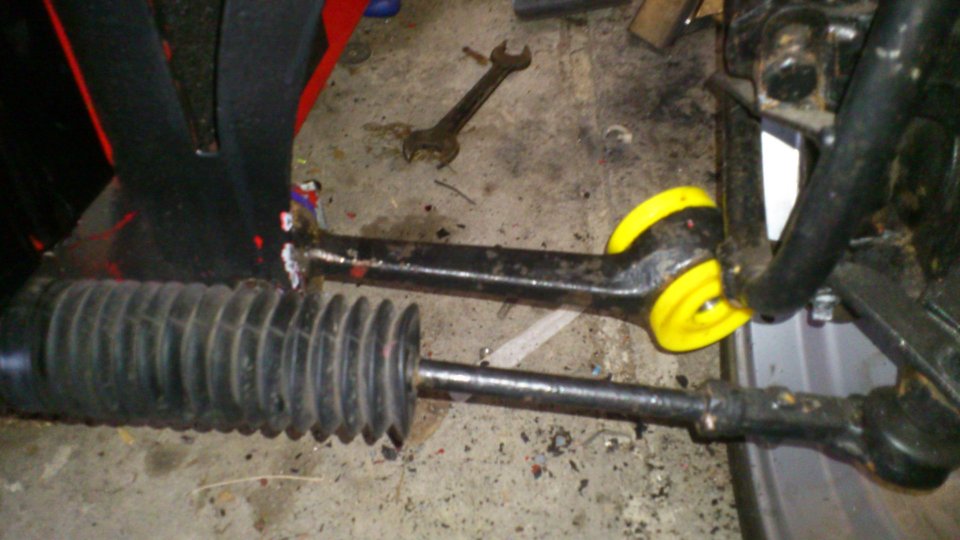
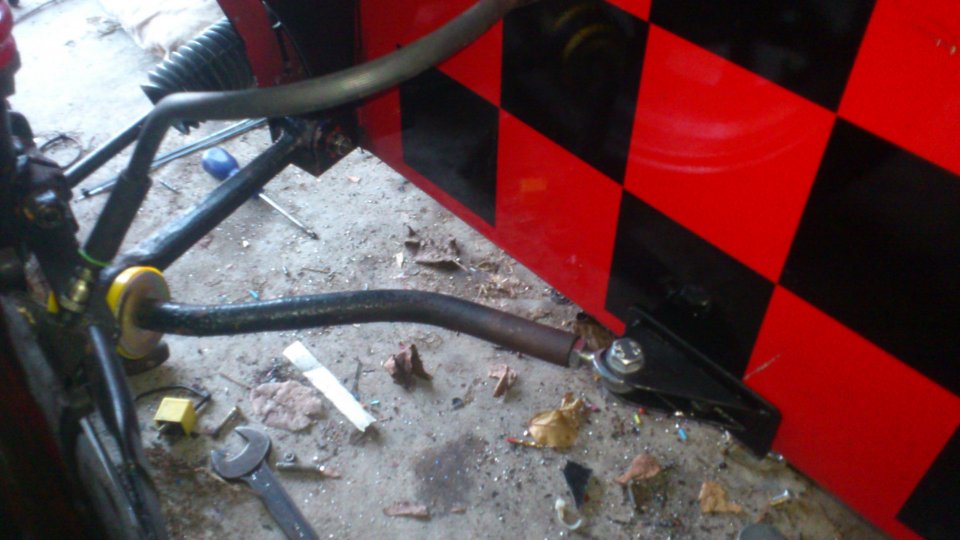
Hi everyone, Anti roll bar conversion to tie bar now complete and photo’s attached. To summarize what I did; 1) Cut the ARB ends off with an angle grinder. This cut the metal without any problems. 2) Drilled and taped the ends of the ARB M12 and approx 50mm deep. NOTE: These ends were hardened (very hard!) and as such needed softening. To soften them, I use propane blow-torch and firebricks and got the end of the bars glowing red/orange hot. I then let them cool very slowly until they were cold enough to handle. This softened them enough for drilling and so I then piloted them 3.5mm, drilled 10.3mm, and tapped M12 (all using a pillar drill). 3) The brackets are made form 25x50 box section and 50x50 RSA. After cutting the box section to shape, I welded them onto the RSA. This is simply for easy of fitment to the car. 4) The brackets are drilled M12 and bolted through the sides (2 bolts) and bottom (2 bolts) of the RSA. The only difficulty here was drilling the holes in the bottom of the car! 5) New Superflex poly bushes fitted, job done. Without the bushes, the whole job cost me about £15 (rose joints and M12 cap head bolts). Now all I need to do is paint the brackets and ARB ends, then finish of the engine and take the car for a spin to see how the front end grip has been improved.
-
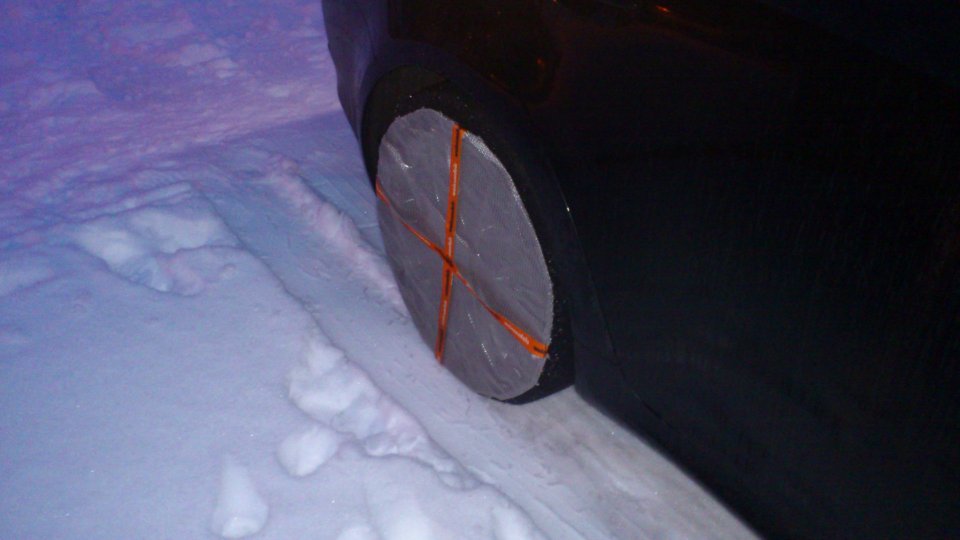
Thought that this might be of interest to people. I drive a Lexus 220d and being a rear wheel drive car…….it is rubbish in the snow! (it gets stuck even in a heavy frost lol) After last year’s big freeze, I decided to buy a pair of tyre socks. These range from £30 per pair to about £80 per pair depending on tyre size and are easy enough to find on ebay. I’ve used them for the first time today and they are fabulous! There was approx an inche of snow on the roads for the first mile of my journey (country roads not cleared) and the car drove as if it was on normal roads! They are easy to put on and even easier to take off (which you have to do once you reach clear roads). Not as good as snow tyres or chains, but in terms of a solution to get you out of trouble, I would recommend them to anyone!
-
Thanks everyone for the responses, I don't think Accuspark try and mis-sell these as they are described as "triple ground" and not "triple spark" or "multi spark" as I've seen others trying to sell them as. It is made clear that you still only get one spark. Other than the well published duribility of these plugs, I've read that one of the advantages (but not sure how much truth there is in it) is basically that the spark is more exposed to the fuel mixture thus creating better detonation?
-
You'd have plenty of change from £200! And it will save loads of time "fault finding" in the future should those notorious gremlins start messing up your electrics! It took me a total of 4 (full) weekends to complete from start to finish. I'm mechanically minded, electrics have never been my cup of tea however I decided to go for it (you'll never learn unless you try is my moto!) and as such I stripped every last peice of wire out of the car (engine bay, dash, rear boot area, headlights .....I mean absolutly everything!) and started from scratch working my way from the ignition key. I'm far from an expert, but from my recent experiences, my tips would be as follows; 1) Every wire joint is to be soldered and then insulated with heat shrink. Don't use insulation tape! 2) Use fully insulated female spade connectors when joining onto gauges etc..... 3) Have two 12-way fuse boxes and power one of them up from the ignition. This serves as a handy 12v fused source to switches, gauges etc..... 4) I used 5 relays in total; a) power-up one of the fuse boxes..... elec fan......c) starter.........d) main beam.........e) dipped beam 5) Root all earth's to the same point on the body. 6) Unless you are really good........don't try and wire up multiple items at one time as this only leads to confusion!
-
I've done a fair bit of spraying, mostly steam engines believe it of not, but I've also done car panels etc.....Aerosols are okay for small parts, but I would say that on large surfaces (bonnets etc....) they are not very good at all as you do not get the even coverage. A compressor and spray-gun is the best route to take if your looking at doing body panels, but you must remeber to use a water trap on your compressor. Other than that.....it's just the age-old saying.........good painting starts with good prep work....and never a truer word spoken There is one last point to think about (he says whilst smiling)...........I'm an exmo owner and love the car to bits. I use and abuse it almost daily throughout the summer and whenever I notice a bit of bad paintwork / scratch etc...............well it just get another sticker stuck over it!!!!
-
that should read 8 quid......not a silly little face blowing bubblegum!
-
Anyone got any reviews regarding the Accuspark triple earth spark plugs? I bought a set (only £ to see for myself, but would love to hear everyone else's experiences............
-
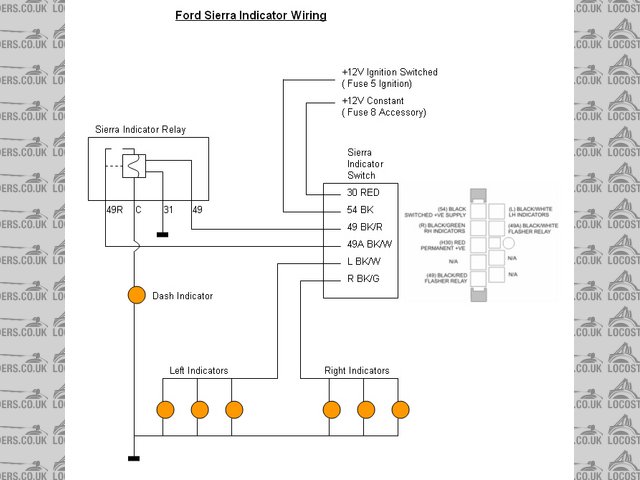
From memory, the flasher unit is mounted on the sierra fuse box. I've just completed (a couple of weekends ago) a total strip-out of all my original wiring (which came from the Sierra) and started from scratch by making my own loom, fusebox & relay box etc...... Believe it or not, this was so much easier than I thought it was going to be and I'm dead please with the results. The indicators caused me no end of problems as I was trying to figure out the connections myself using a multimeter...........after searching the web I came across that diagram...and problem solved striaght away! Good luck
-
I'm probably teaching you to suck eggs.....but starting with the basics....... The best way to tell which are the standard relays and which is the flasher relay is that the flaser will have the numbers 49, 49a, 31 & C at each of the pins whereas a standard relay will have 85, 86, 87 & 31 at each of the pins. Generally the flasher relay is the same shape and size (maybe a bit bigger) than a standard relay Firstly, check that you have 12v at pin 49 on you flasher relay. If you do, the it's not a fuse problem and probably a bust flasher. There is only 1 fuse to the indicators and also the hazards are fed from the same flasher relay. Full indicator wiring diagram; http://www.locostbuilders.co.uk/gallery/a463727-Ford%20Indicator%20Wiring.jpg
-
Hi Spencer, I run a Pinto on twin 48's and I've blocked off the small pipe from the water pump and also blocked off the manifold outlet. Some people may suggest to link the manifold outlet and the small water pump inlet pipe together so that water circulates between the two, however I've been running mine "blocked-off" for years without any problems.
-
After ordering the gasket in November...............it has finally arrived along with the ARP stud kit! I can finally get my head back on and see if my Megajolt works!!!!
-
Compression Struts / Tie Bar Installation Help
richardm6994 replied to richardm6994's topic in Mechanics
Okay..........got all of the bits now and going to make a start this weekend! I'm going to fabricate the mowerman car brackets as per the drawings (got the box section, angle and m12 bolts today), but I am going to use the "modified ARB" method that Miikae has described using m12 rose joints. I've also bought some Superflex bushes for my TCA (may as well do that while I'm messing about down there!) -
Compression Struts / Tie Bar Installation Help
richardm6994 replied to richardm6994's topic in Mechanics
A big thank you to mowerman mick who took time out to come round and give me a load of help and advice with this! It was really nice to meet you mick and i look forward to seeing you again around the shows! -
Compression Struts / Tie Bar Installation Help
richardm6994 replied to richardm6994's topic in Mechanics
Hi Mikae, Looks great! Did you have any problems drilling the end of the ARB? (too hard etc....) -
They are amazin bacon butties tho! It makes a good pit stop on a peak distric run!
-
It all depends what engine / manifold you're putting them on. Have a look on the Burton power website as they have descriptions. The but generally speaking; KK600 (6011) - xflow and BDA KK600 (6021) - pinto KK600 (6131) - zetec E KK600 (6141) - cosworth and CVH KK600 (6006) - blank base plate there are some exceptions on the above due to different manifolds so double check before you buy. If you're still unsure, my next port-of-call would be to give burtons a ring.
-
A blast out would be great! I'll pm you when my car is back together. By the way Shaft....is the photo of you car took at the A6 layby where the bacon van is always parked? If so, I'm there most sundays throughout the summer!!!!