MarkBzero
 RHOCaR Member
-
Posts
2,235 -
Joined
-
Last visited
-
Days Won
49
Content Type
Profiles
Forums
Events
Store
Community Map
Everything posted by MarkBzero
-
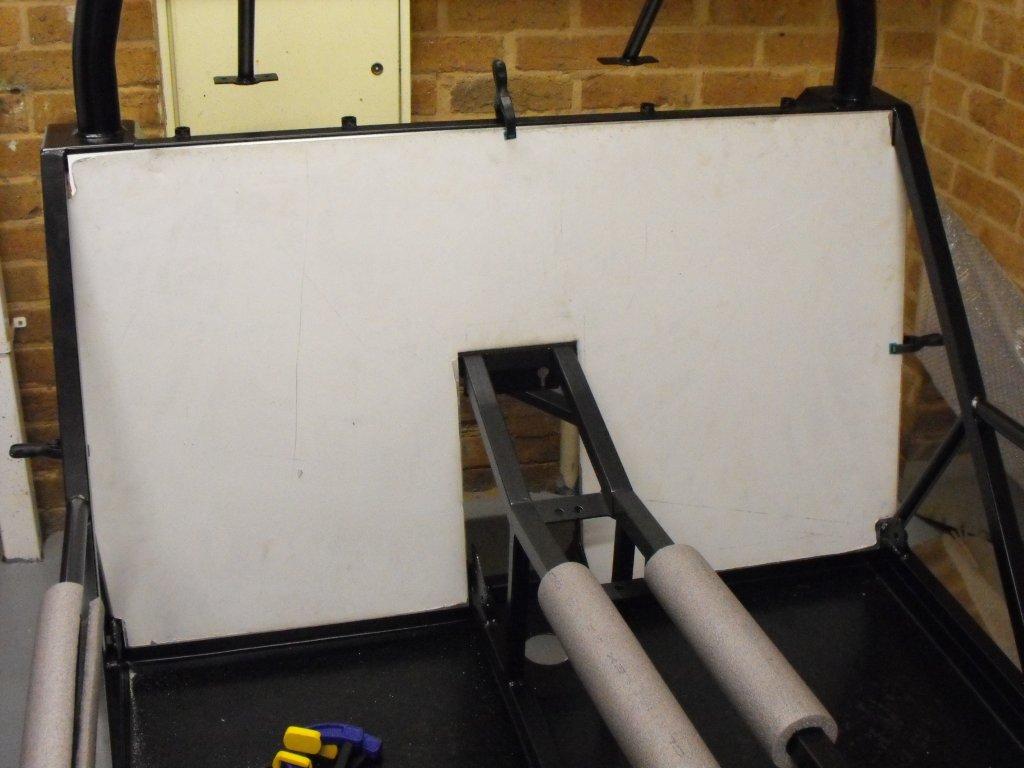
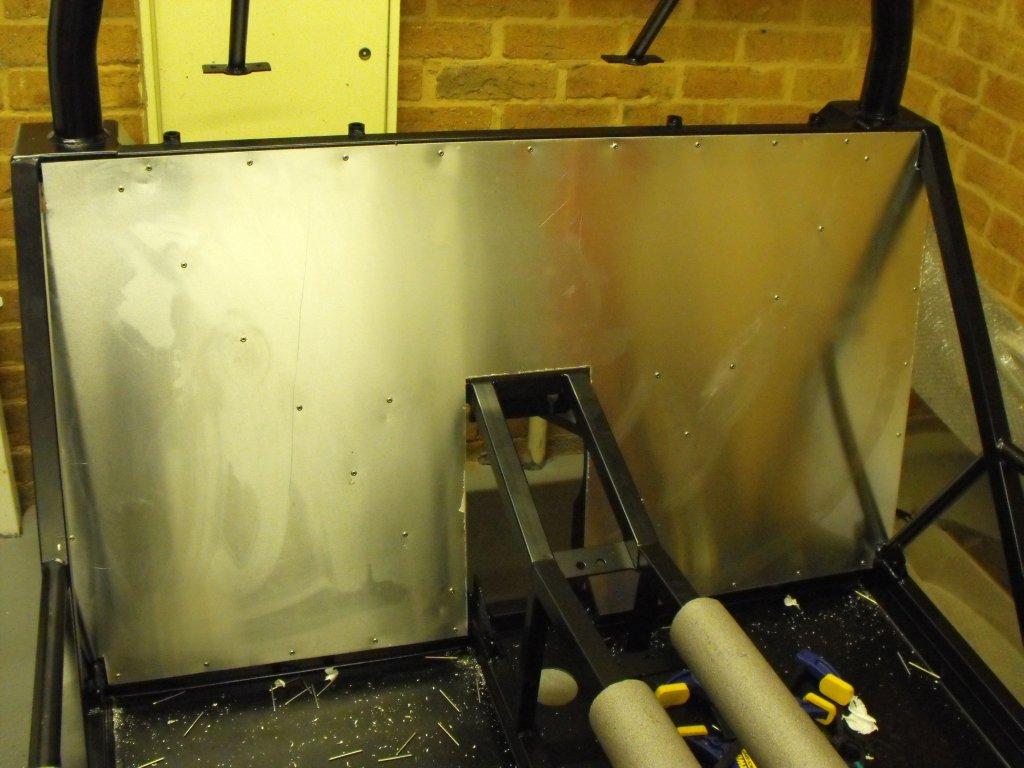
The first task I tackled was the back panel behind the seats. I had to trim some of the edges to fit the car exactly and to miss the welds. Dry fit to ensure there would be no issues when using the drill and CBS polyurethane adhesive/sealant. I marked all the center lines and drilled the holes, before putting into place and marking the chassis. All holes were cleaned and de-burred where necessary. Finally with the aid of cleco tool and panel pins I fitted the panel with stainless steel rivets and adhesive. First job done and happy.

-
Thanks 'theduck' time as always been very precious with this build. Hectic job, fostering and for the last 3 years I have been completing an MSc in night school. It was your build thread that made made me start this one.
-
For those who do not know I live in Telford and work in Basingstoke 2 days a week.
-
Thank you.
-
Looks very promising, is the Caterham gearbox a straight swap for type 9 or do your need extras?
-
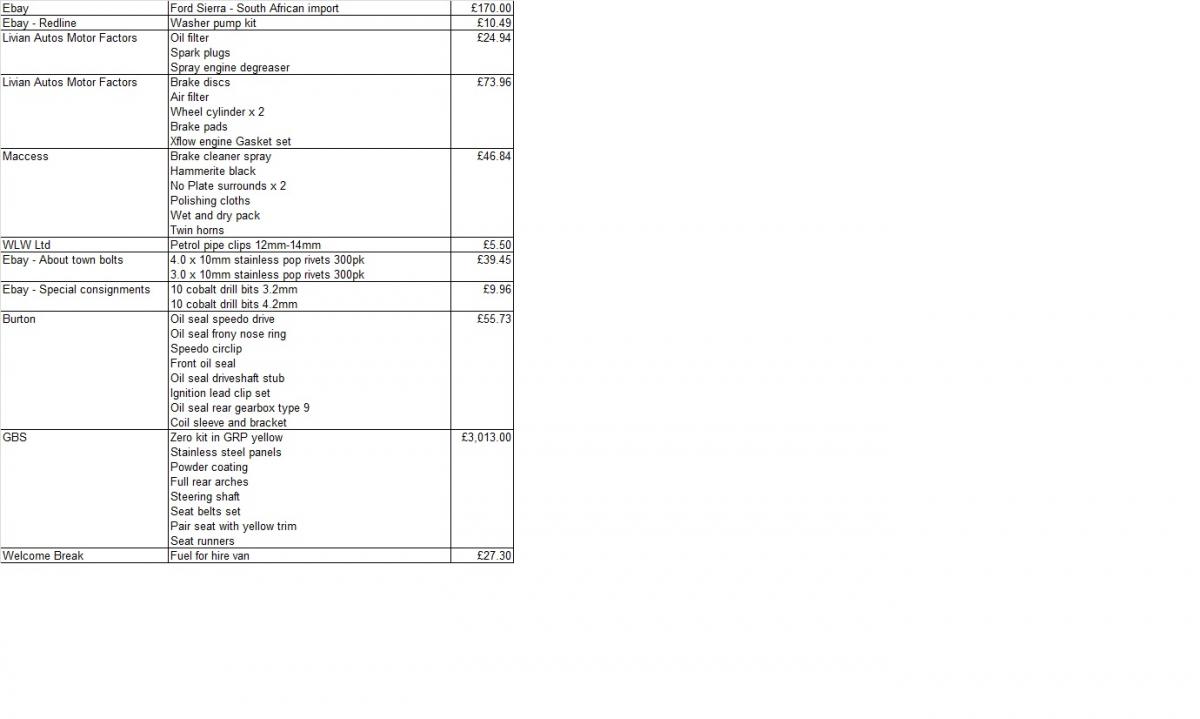
I have over 500 photo's of the build, far too many to load onto the forum. I used most of the normal kit car parts suppliers such as, CBS, Europa and Kit spares. I also used Halfords (trade card), B&Q, Maplins, Burton, Eurocarbs, Ashley Exhuasts, Wheelbase, Accuspark and ETB instruments. However excluding the Zero kit I spent more money on Ebay than any other supplier. So, here goes MarkBzero Zero kit car; Let the build begin! I'll try to keep to some order, but I quickly found out that I had to build, strip and re-built most items 2 to 3 times because; 1. No detailed build manual 2. I had to take something off to fit another part 3. I wasn't happy with the finished product 4. I purchased another upgraded or better part
-
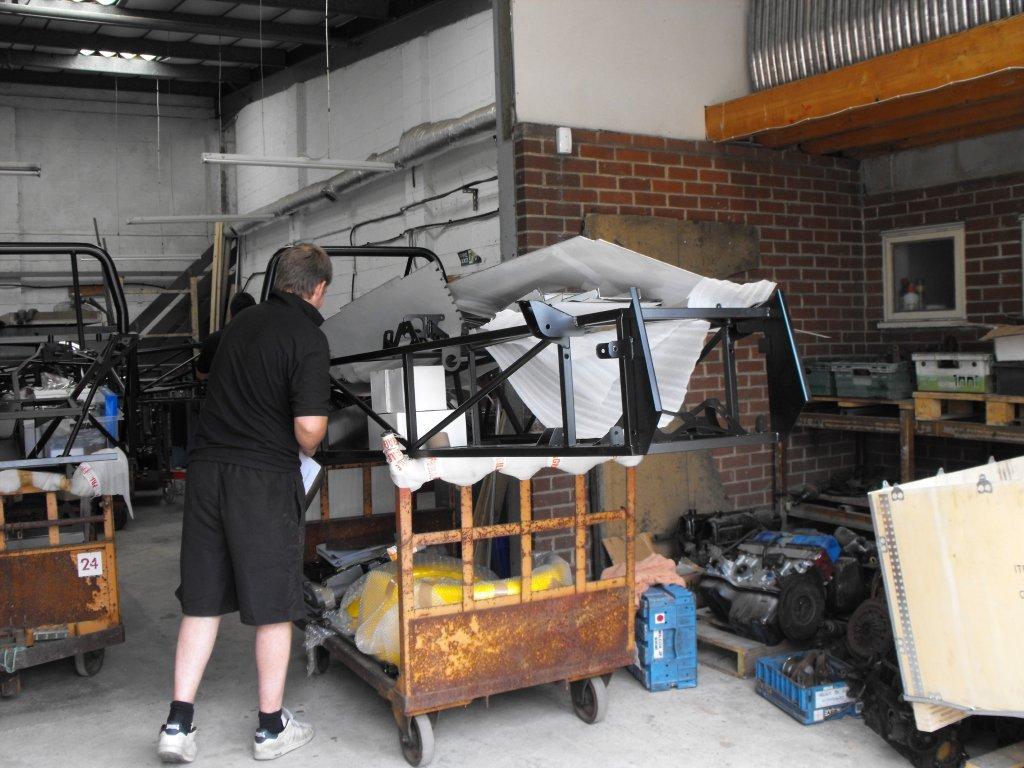
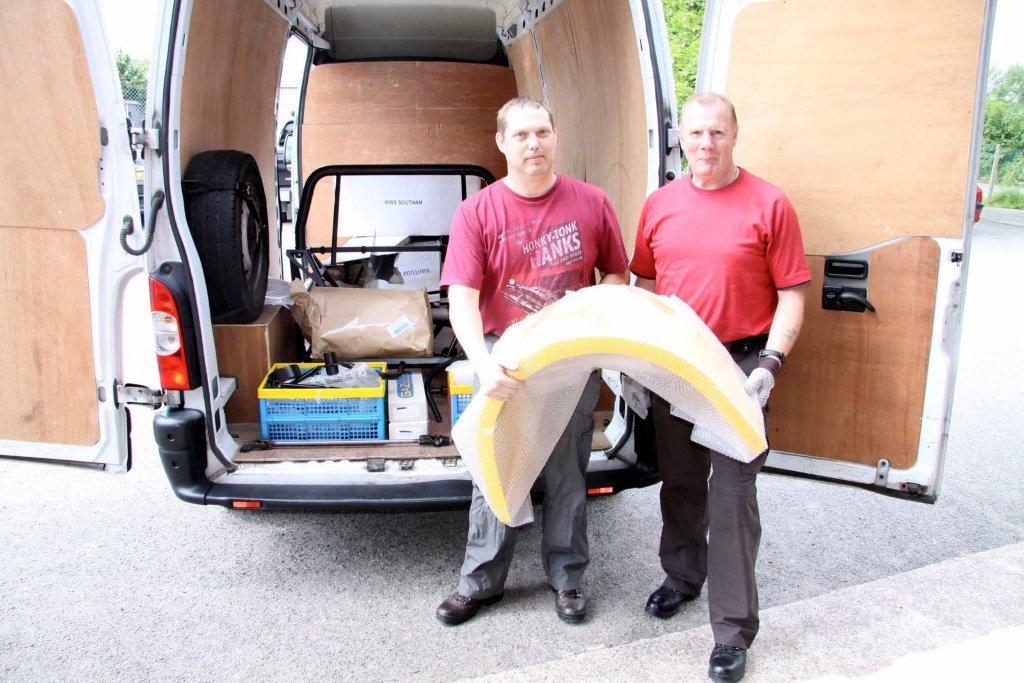
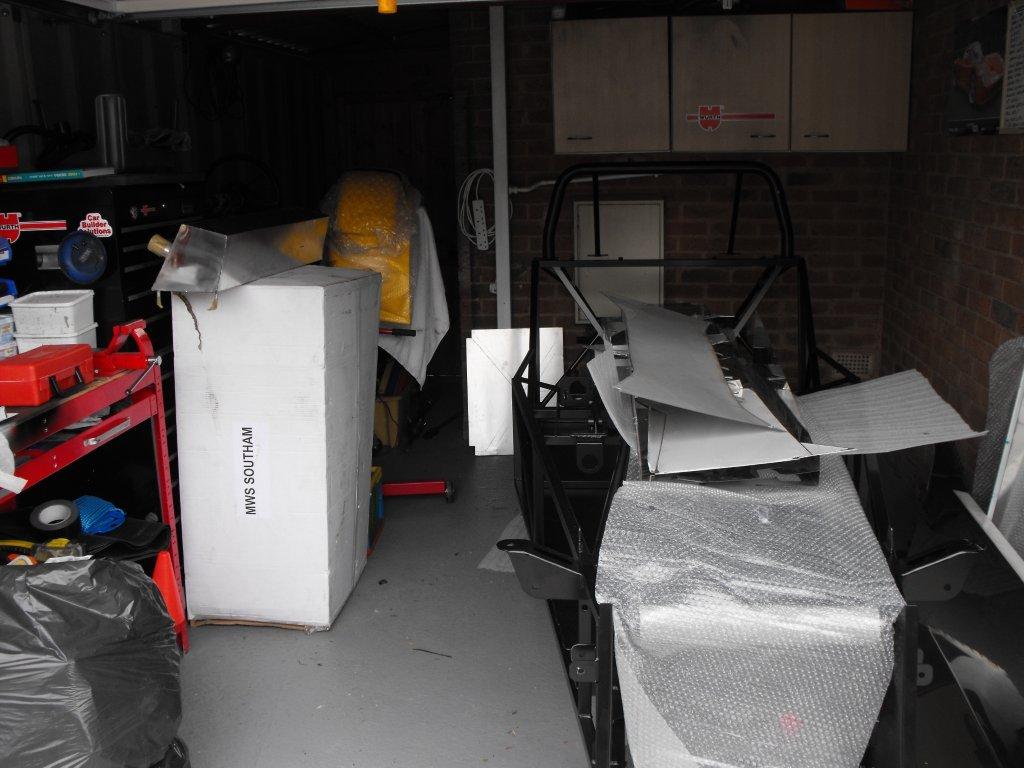
The big day arrived to pick up the kit from the GBS factory, 7th June 2010. My dad wanted to help, so he left Cardiff at 05.00 to travel to Telford. We both traveled to GBS in a long wheel base van, stopping at a real trucker layby for an all day English breakfast (heart attack in the making). When we arrived Richard took us into the factory and workshop, (much more impressive now, with the show room) to show some new mods and future plans for the Zero. He then gave us a check sheet to ensure I was getting what I paid for. I was impressed with the process most of my car was pre-loaded onto a trolley. Part by part we loaded the into the van. This was the picture that GBS used on their blog. It was a long and exhausting day, but we managed to get back in time to unload the kit into the garage and return the van with no extra charges.
-
Should be treated with care and have a warning on the side 'Can cause accidents, self-harm, divorce and large dent in pocket' but worth it! I would do it again, it is addictive.
-
Richard provided a reasonable quote, so I started saving again after paying out for the garage and parts that I didn't need at this stage of the build. I visited two kit cars shows Stoneleigh and Newark, taking lots of photo's, drinking tea at the Rhocar stand and finally ordering the kit car. Cost so far; (This is the last time I show the costs, without wife knowing the true cost of the entire build)
-
December 2009 - I visited GBS and asked Richard for a quote on the spec I want plus a few extra's and deletions from normal kit - if ordered by year the vat would not change. No chance still stripping and cleaning donor ancillaries. January 2010 - I finally joined Rhocar, visited the forum on many occasions before for ideas. At this stage I would like to thank many members for sharing their valuable knowledge and experience.
-
Well spotted, good to know someone is reading the post. I wanted the future owner to use a normal Sierra Haynes manual if/when the electrics need fixing or modifying, so some of the wire did not match the wiring diagrams so I had to order colour specific cables.I have replaced all scotch locks and blocks, I only used them to test circuits before doing a permanent job with solder and heat shrink and the right colour insulation..
-
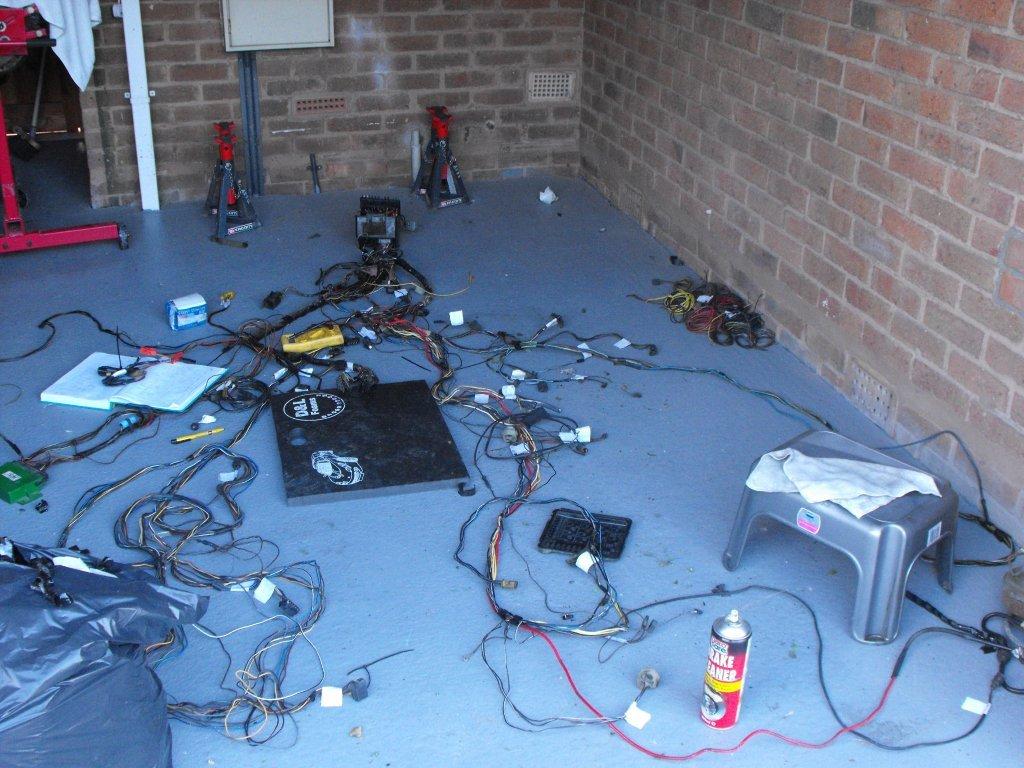
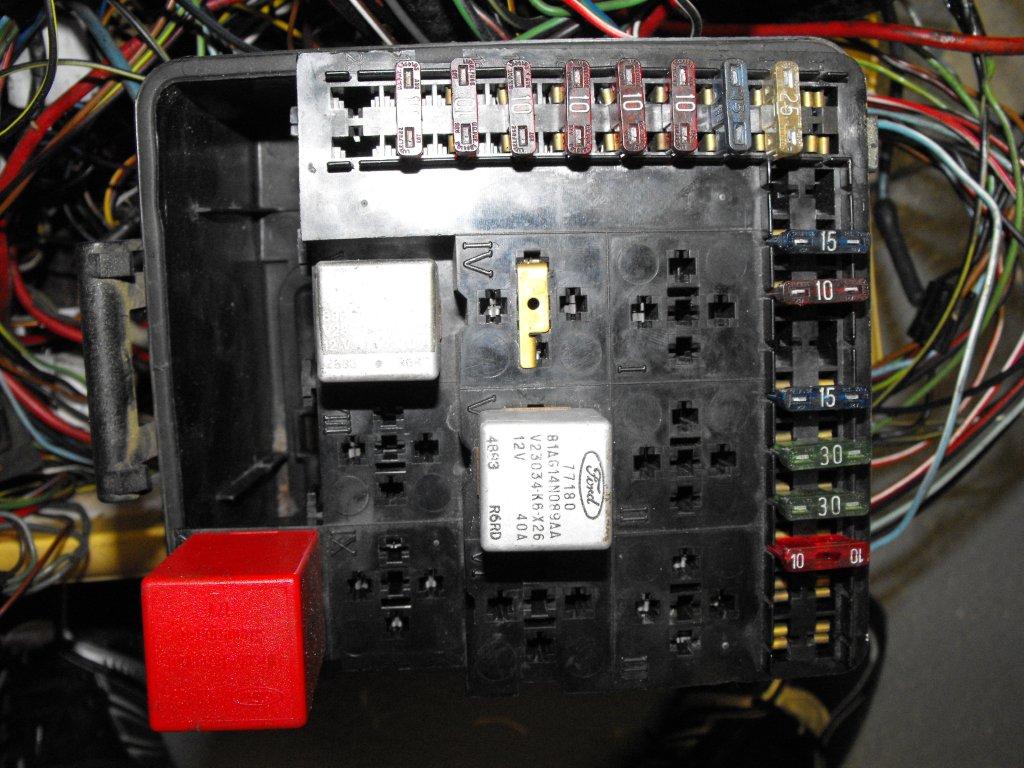
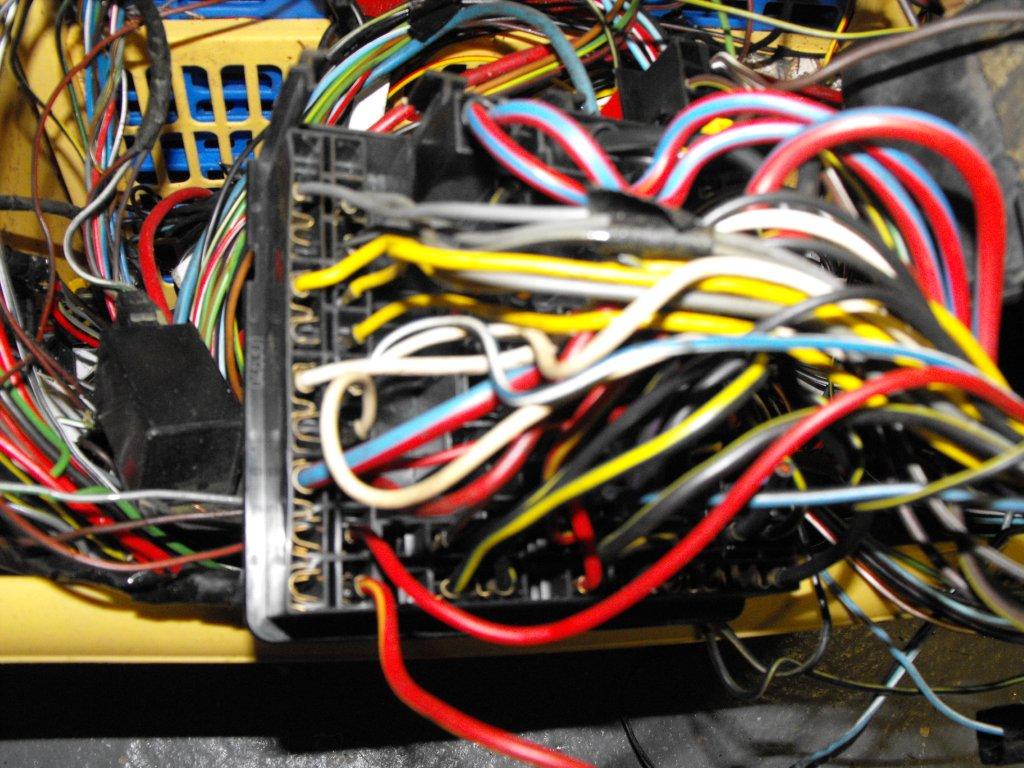
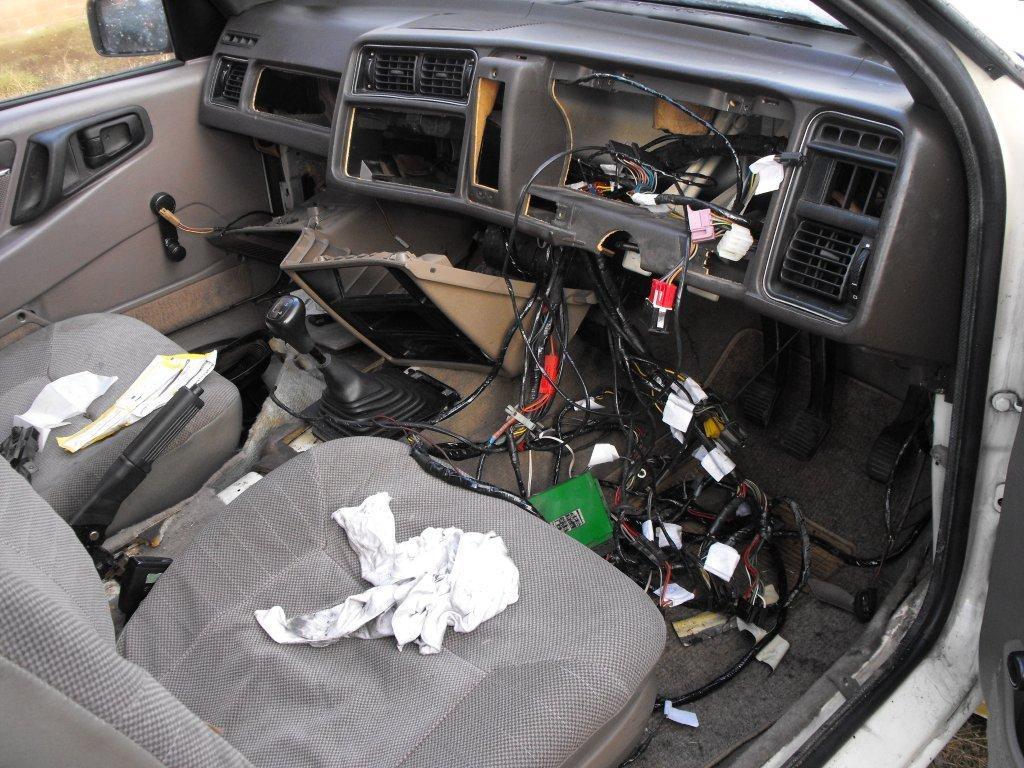
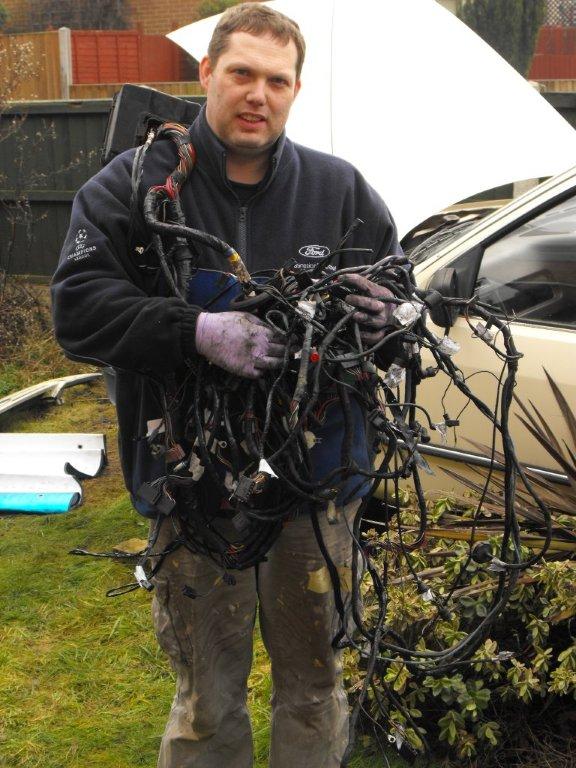
Now the fun starts, electrics! I laid the Sierra loom on the ground and with a powerprobe tested and started to remove circuits which I knew I did not need. I seriously under estimated the time to do this and it was a slow process, for an old Sierra it had every mod con going. I did not want to use the Sierra fuse box because most of it was redundant, so I took some pictures before cutting any wires. I replaced it with two separate fuse housings, which I thought would look good under the bonnet.
-
I have the garage joined to house alarm and fitted a Autolok Stoppa, the only problem you have to open from outside.
-
Fitted mine to the scuttle no issues during IVA. I have measured against another Zero with a screen so the hole will be covered later. This is the best picture I have.
-
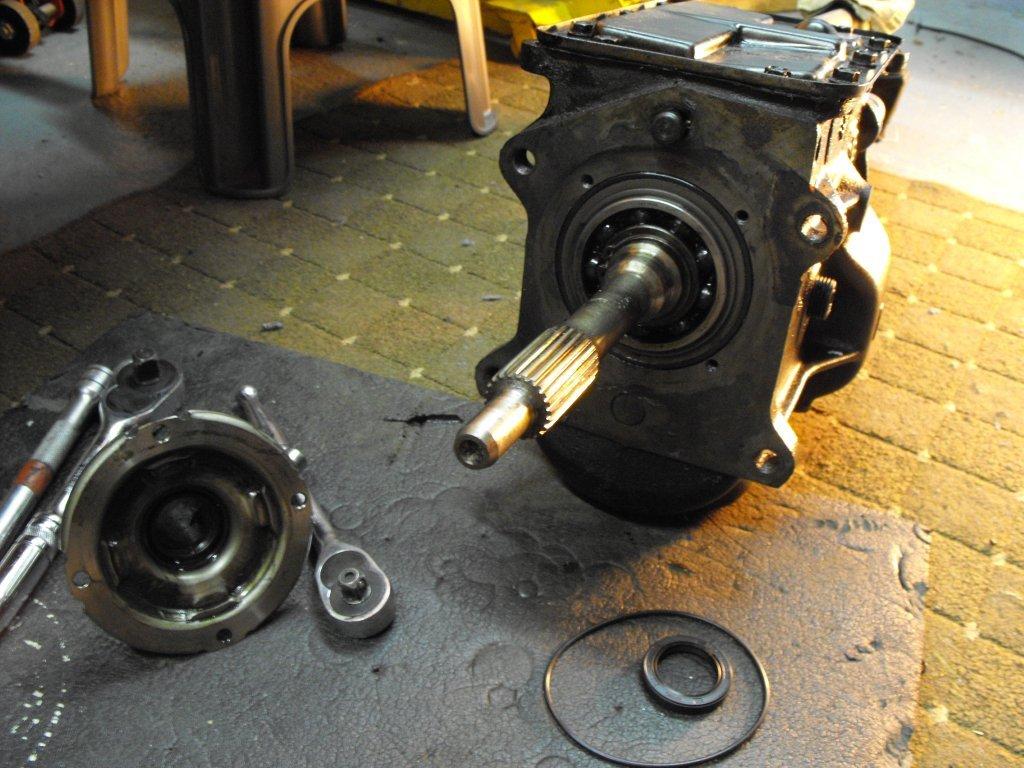
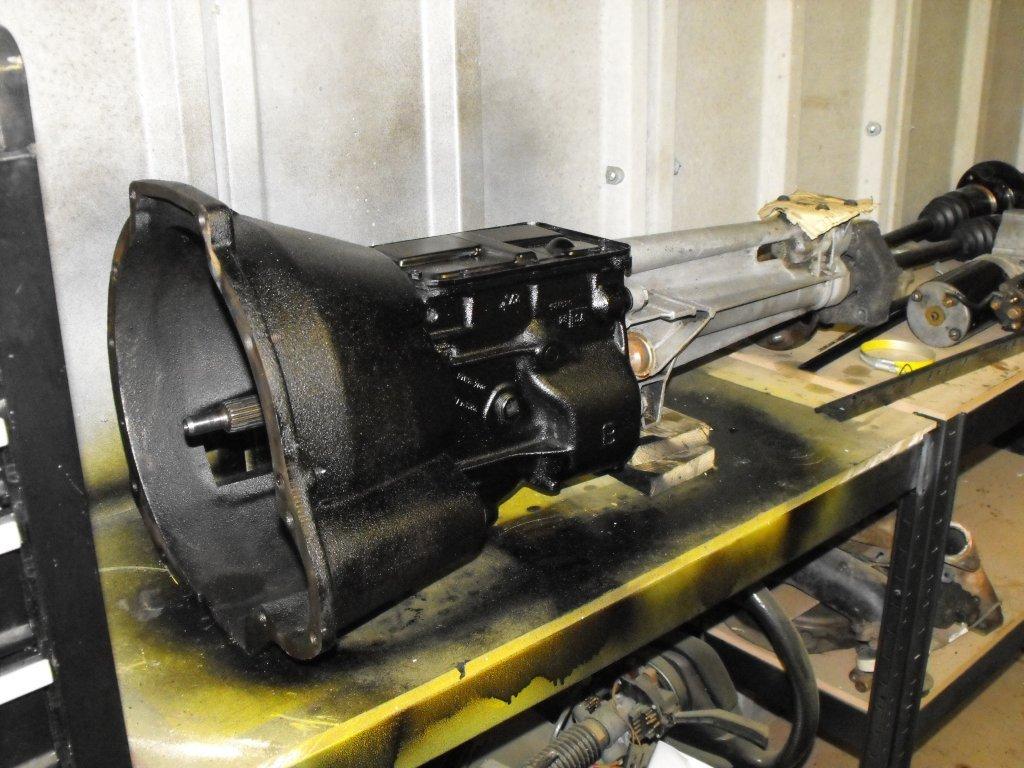
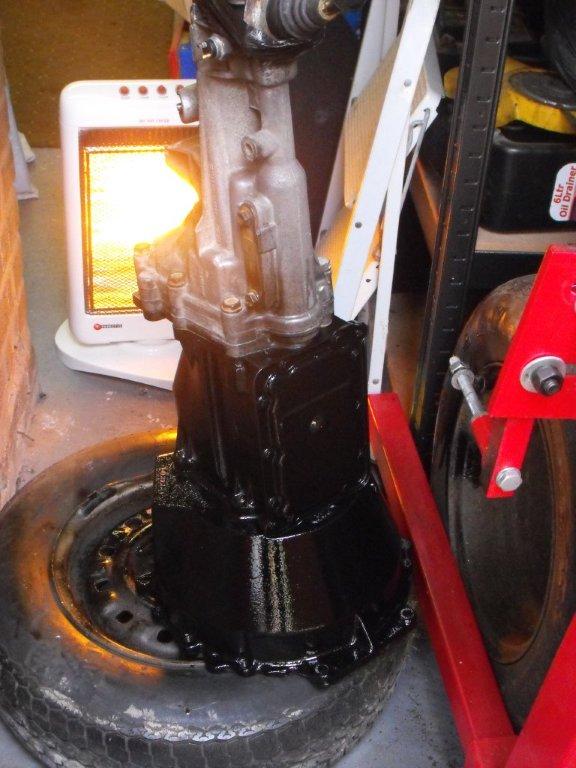
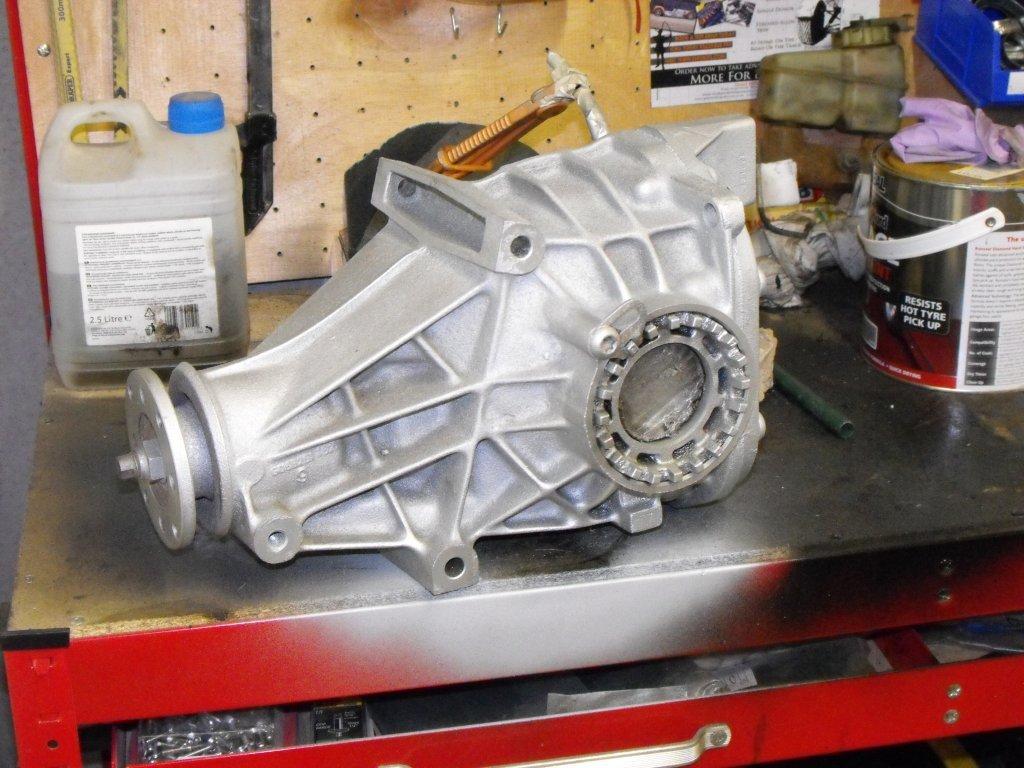
I had the opportunity to drive the car and not experienced any problems with the gearbox, so a straight forward clean and replace seals was needed. Final gearbox (I finally sold this box to another Rhocar member and got a Type 9) The Type 9 had the same treatment.
-
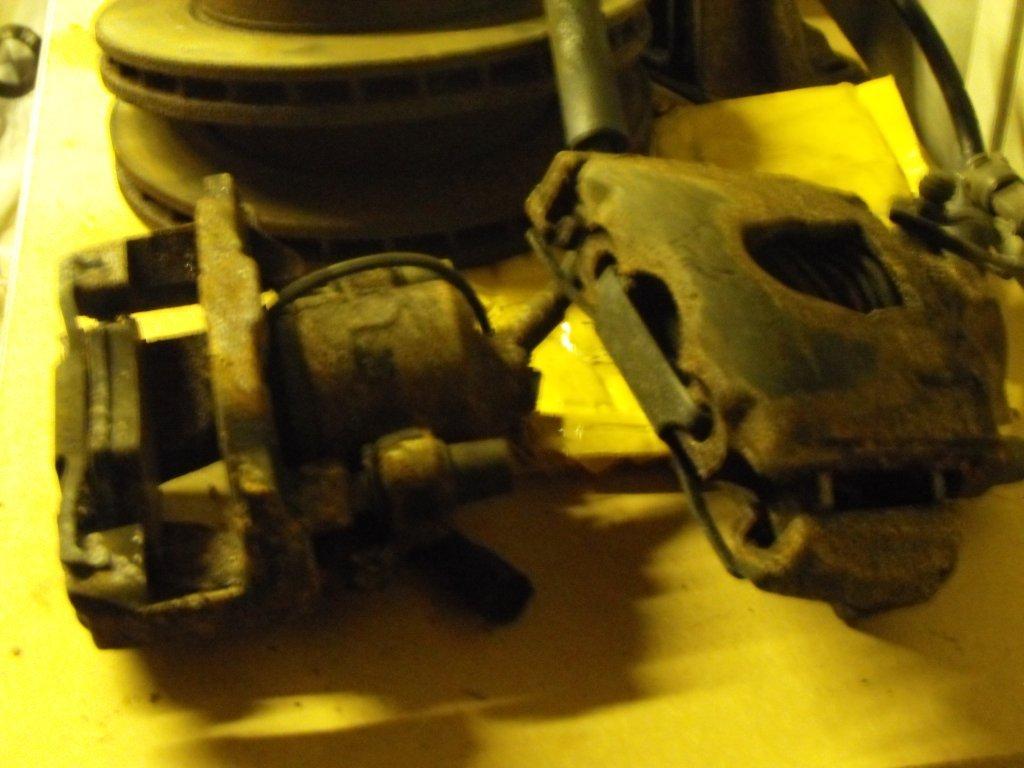
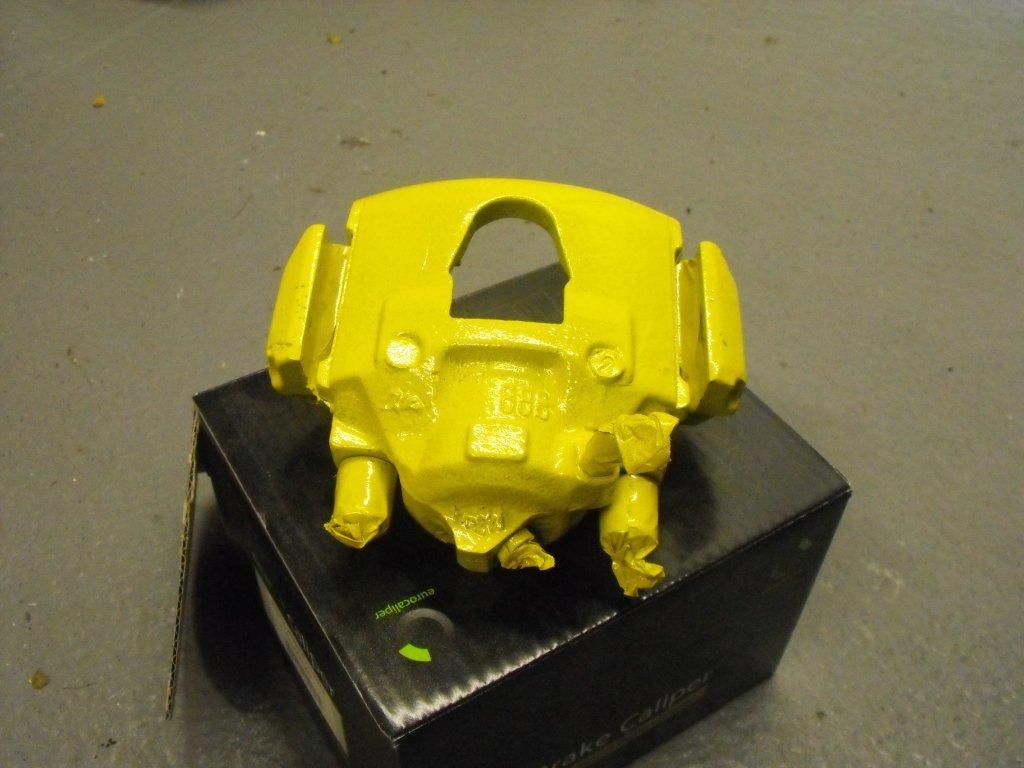
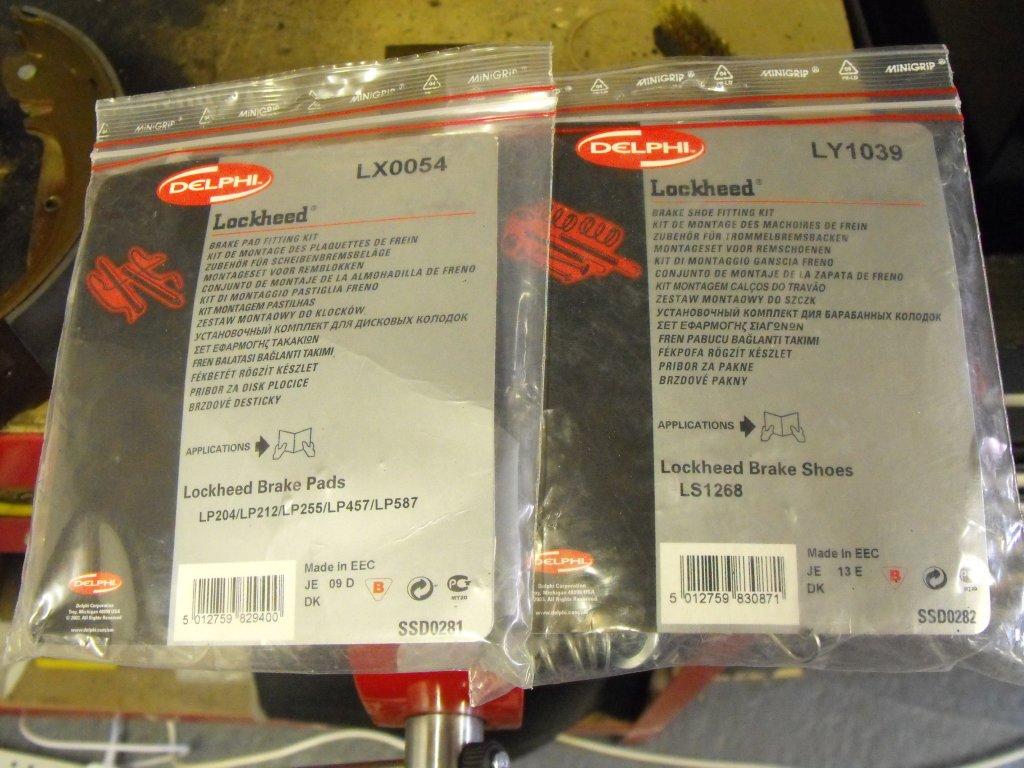
The front brake calipers were in a bad state, so I went to our local parts supplier (we still have a local firm) and asked for new calipers. He looked at the old ones and said he know a company that will clean them and replace all seals for £38. So I used them and they were returned in a week, like new. I painted them yellow, to match the car. Before - After - Again with the rear brakes I got a new fitting kit. I also ordered new shoes, discs and pads.
-
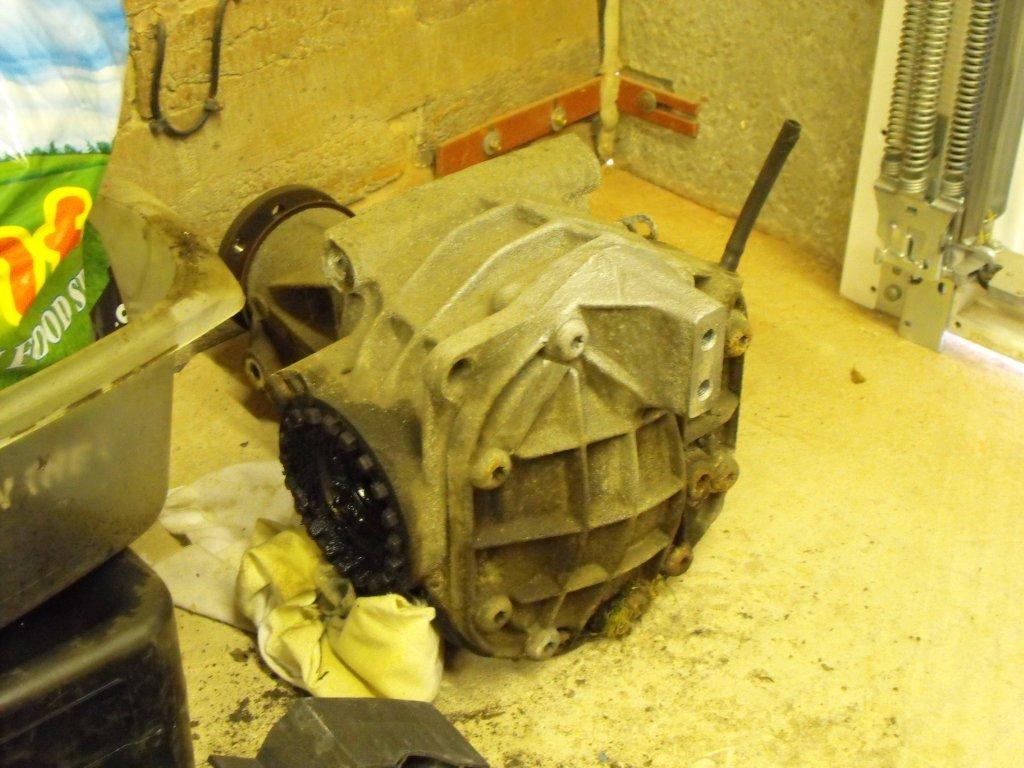
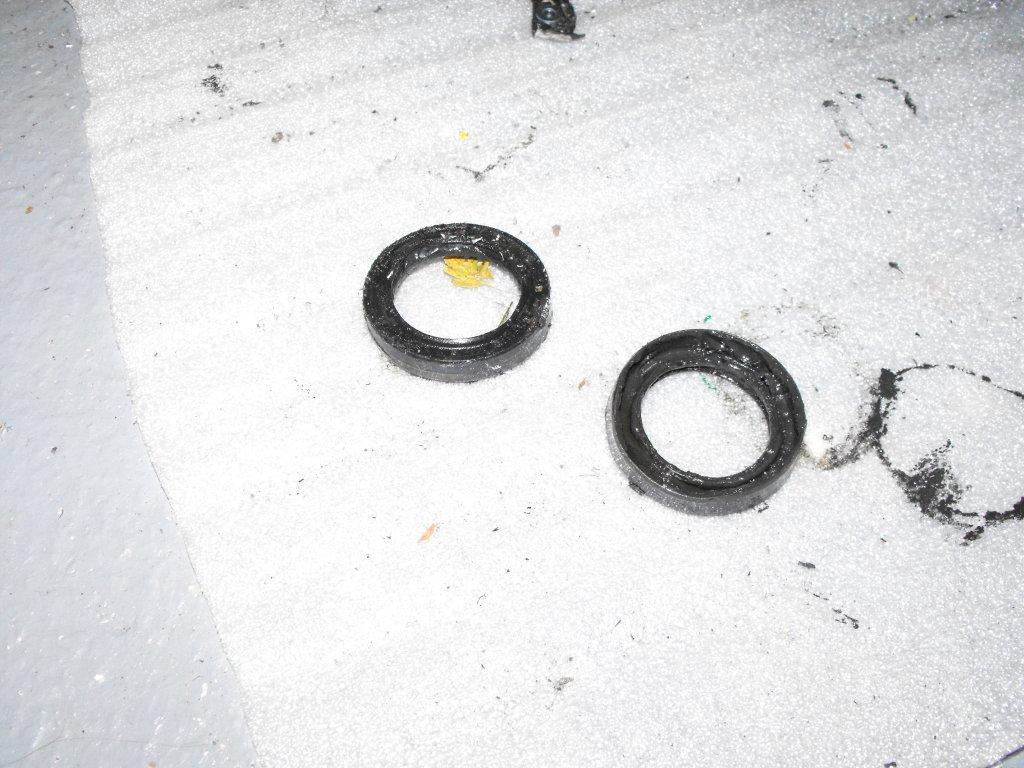
Next task was to clean the diff and replace the oil. The Sierra diff had a small leak from the driveshaft output seal so I replace them. The filler plug was FUBAR'ed so I had persuade it with hammer and chisel,then a quick wirebrush and a coat of silver paint.
-
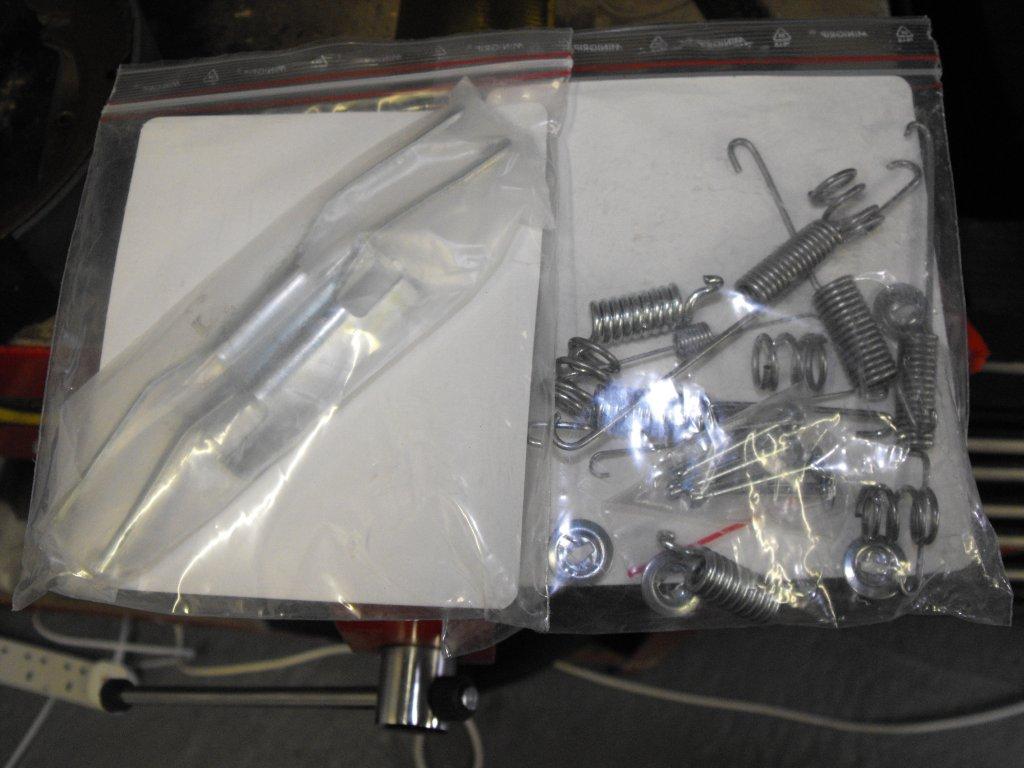
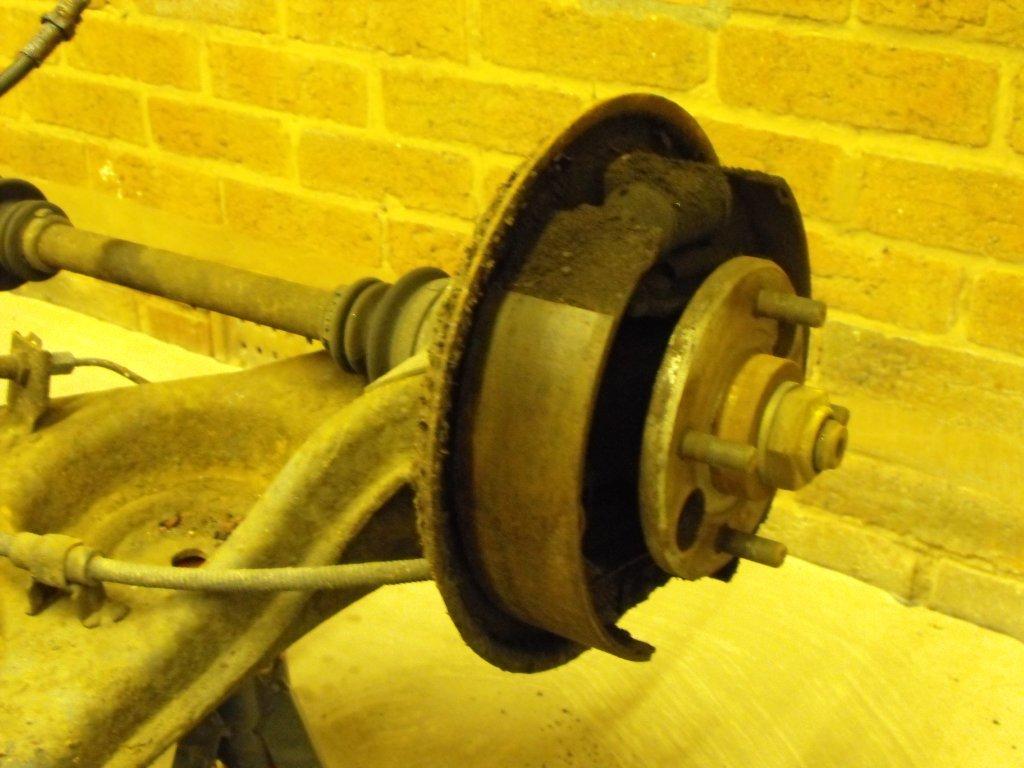
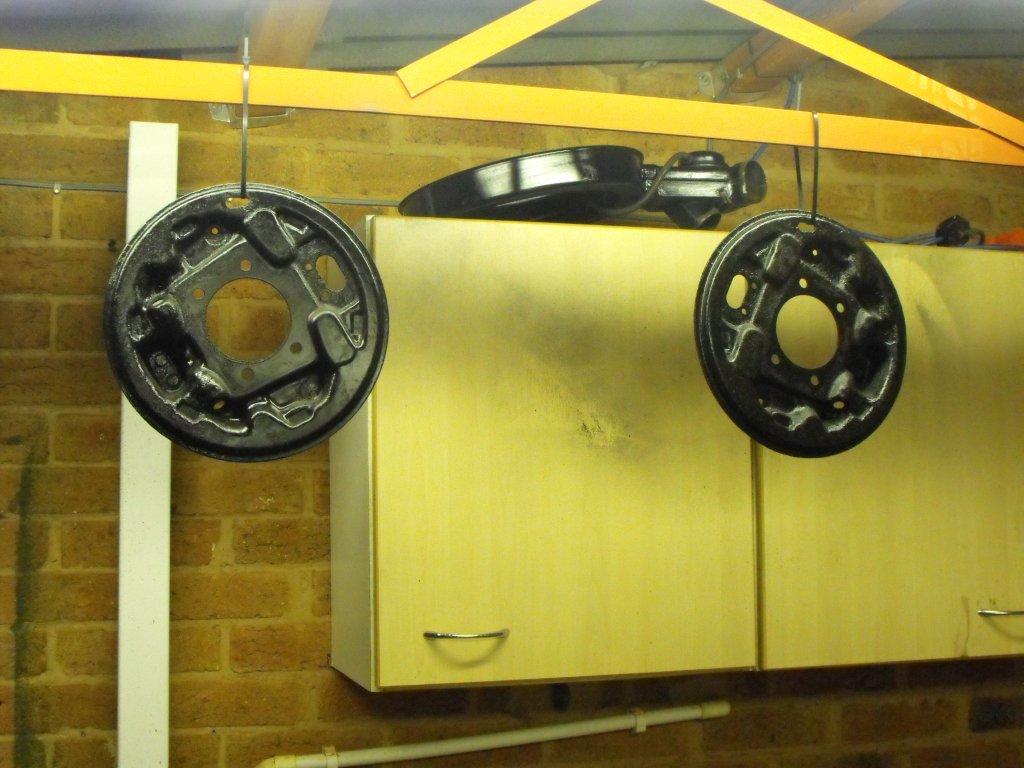
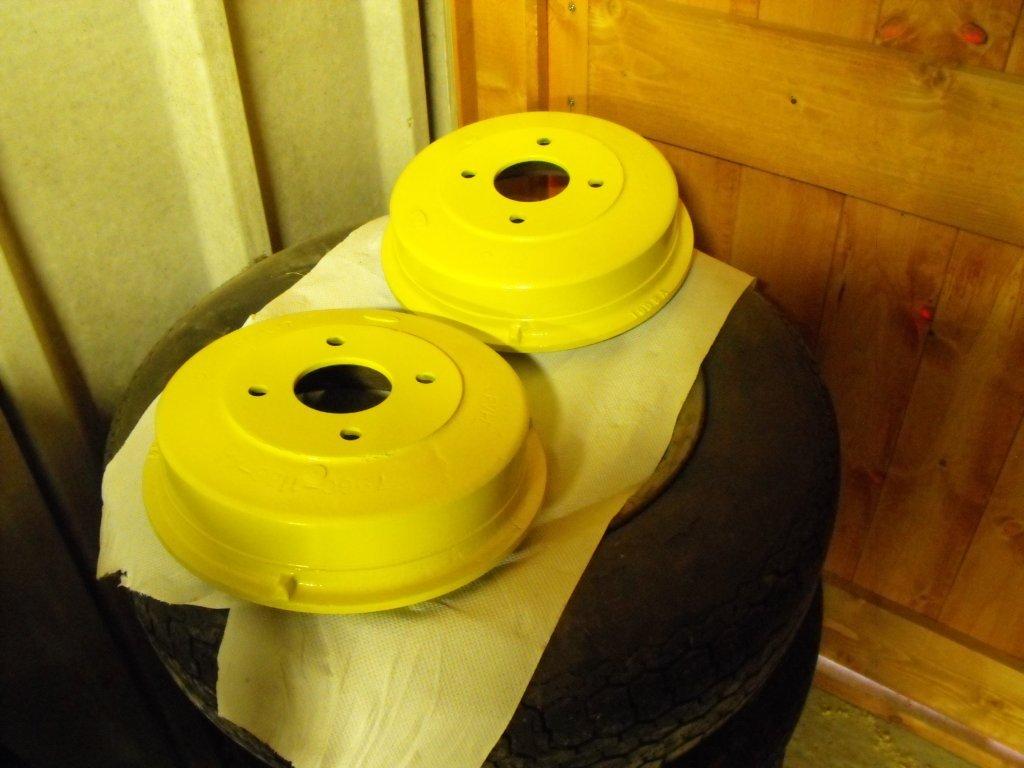
Then I moved onto the rear brake back plates and drums. I did consider upgrading to disc's but from the comments on this forum I decided against it. Wheel cylinder was leaking and I wouldn't want to cut corners when re-building so I ordered new wheel cylinders, shoes and spring kit. Back plate just needed cleaning with wire-brush and painted. Craig, under supervision helped with cleaning the drums (PPE was used). I finally sprayed them with yellow paint, now the car has been driven on the road I wished I used black paint.
-
I remember using a CHARRV (recovery tank) and chains to pull off a damaged hub from a AS90 (artillery System) in the Army, 60 tonnes and 1200hp it didn't work in the end we had to cut it off bit by bit using oxy-acetylene torch. Hard graft but fun!
-
Adrian Flux quote was OK for driving to the test center, might be worth trying and they include 10% discount for being a club member. The operator I spoke to sounded vary familiar to kit car models and makes, gave me a bit of confidence.
-
Cheers Ozz
-
Where is Russ based?
-
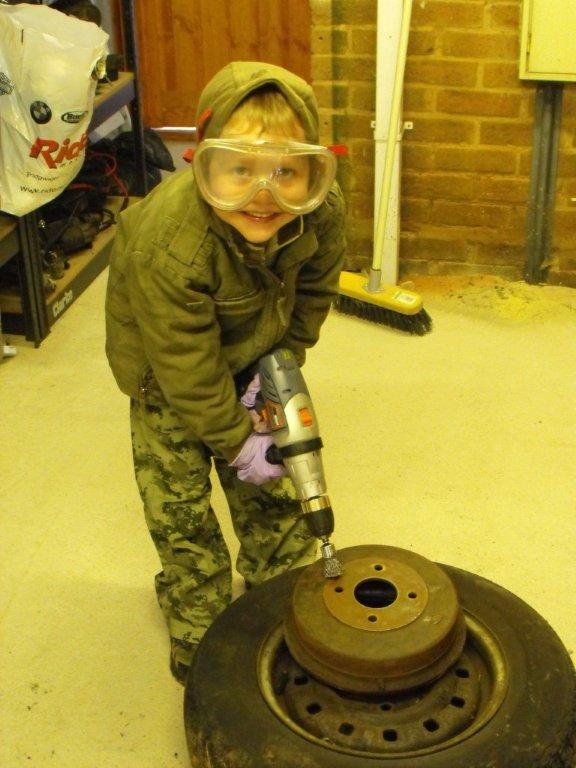
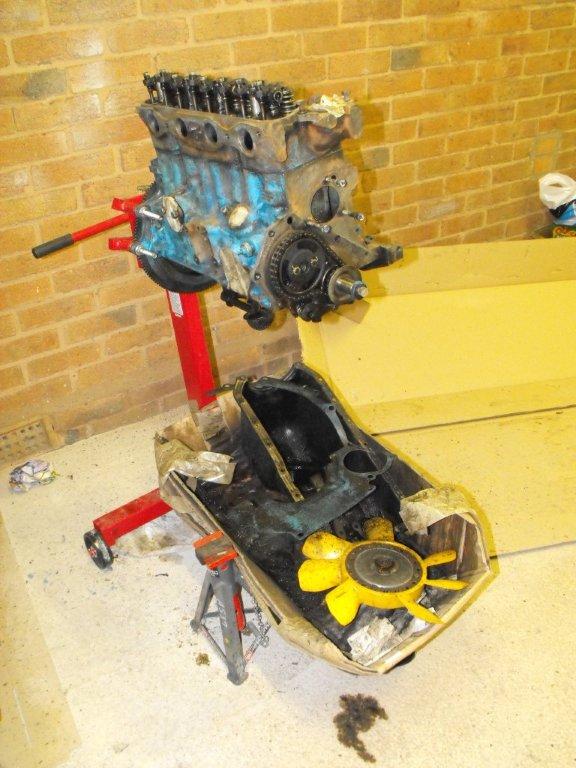
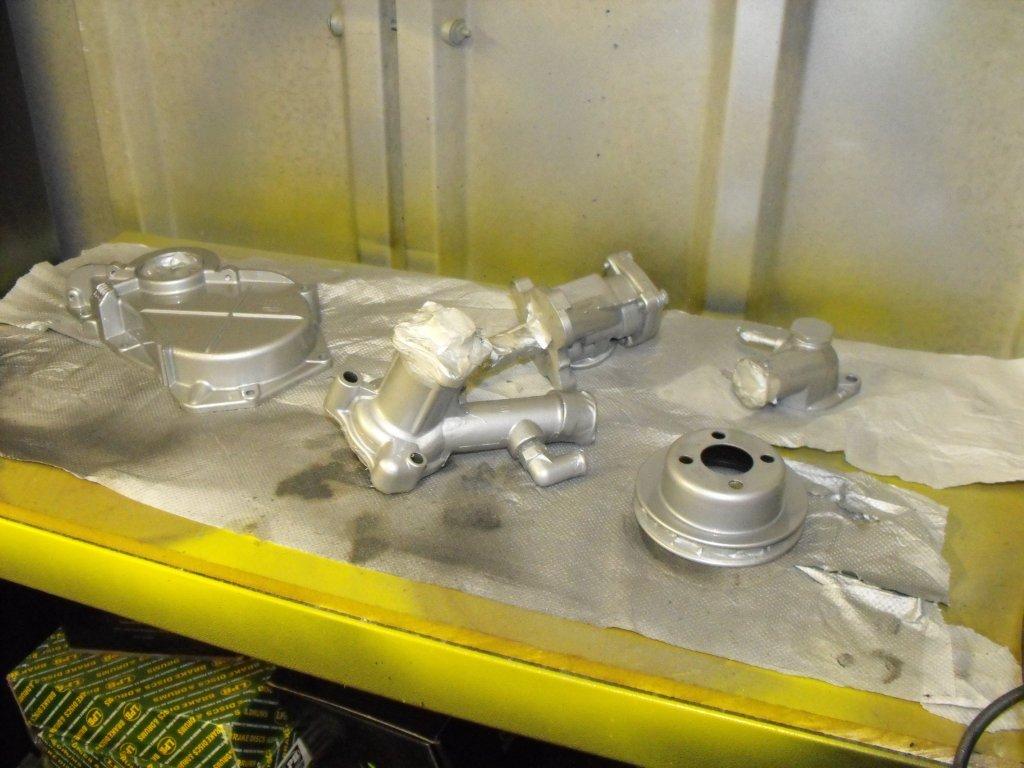
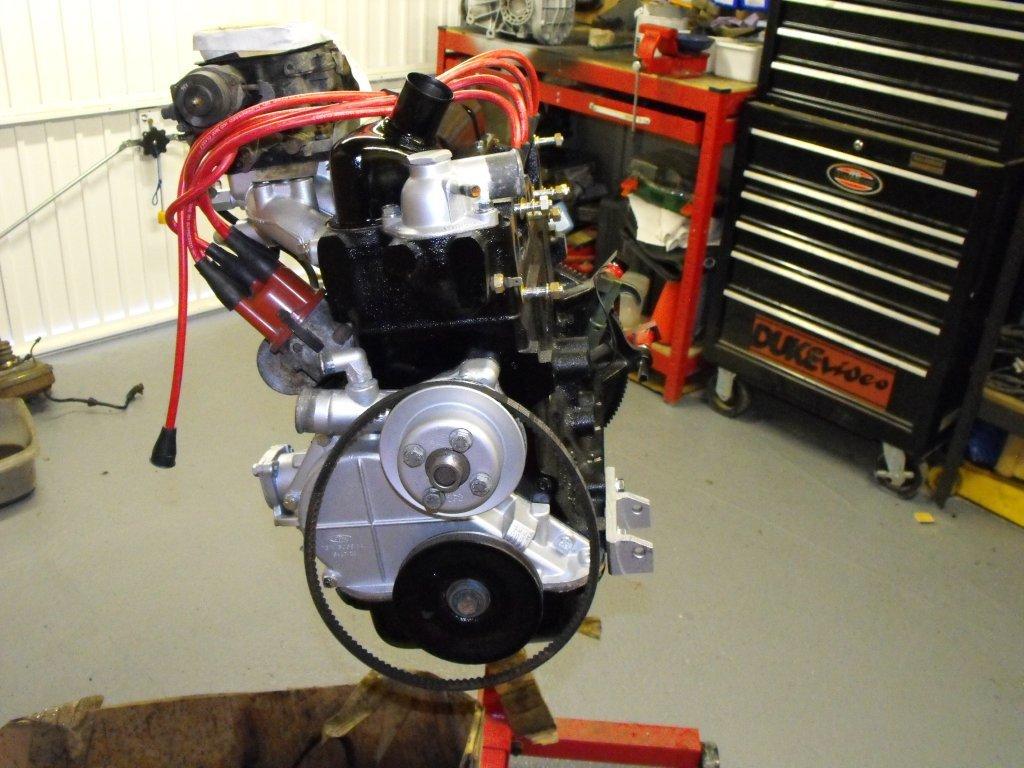
At the start of 2010 I started preparing the donor parts. I started with engine with all intentions to clean and paint because I knew I was going to change the engine at some point in the future after IVA. Well that didn't work, the more stripped the more things needed, oil leaks, and corrosion. I bought a gasket set and bolts/nuts pack, chain tensioner and new timing chain. Took the head off to inspection the valves, because the car was running on unleaded with Redex. No major problems, I cleaned and serviced the engine and then started to paint the engine with black engine paint. All the ancillaries were cleaned and painted silver, why because I got the paint cheap . Don't know what I would do without the engine stand, it is worth every penny. Craig giving me advice on the sump bolt sequence. At this stage I did not know if the sump had to be modified because I could not find anyone with a Zero and using a xflow. Also I wasn't sure on the carb choice, leave as is or replace.
-
At the start I decided to do this build on a budget, a very small budget so if I could save anything I would. I am OK with automotive electrics so I wanted to use the Sierra loom. I really did enjoy removing the old loom, sad I know but fun. I was working inside the car and asked my little helper to tug the loom near fuse box (in engine bay) carefully, must have had his weetabix on this day because he pulled most of the loom through very quickly. On the downside after my detailed labeling exercise I now have a foot-well full of torn labels and no labels on the loom for most interior connections. I had a Haynes manual so it wasn't the end of the world.