wowblaauw
 RHOCaR Member
-
Posts
168 -
Joined
-
Last visited
-
Days Won
1
Content Type
Profiles
Forums
Events
Store
Community Map
Everything posted by wowblaauw
-
To my knowledge this master cylinder like the Sierra has one piston but will have two cups unless I’m mistaken. Having given this some thought I am mindful to bleed the master cylinder 1st and then bleed the callipers which then brings about is own issues as a one man job.
-
It’s a tandem master cylinder with each line going to a separate reservoir. The master cylinder like the Sierra has three outlets; two, one each for the front and a single for the rear brakes being spit at the rear one for each side.
-
Hi All, This is probably a stupid question but I am wanting to convert my Sierra brake master cylinder dual reservoir to a fiat 19mm master cylinder with dual reservoir. Bleeding with the Sierra unit is straight forward but I’m wondering how I bleed the new proposed system using a single person gunson eazi bleed system with the new fiat based master cylinder noting that it will have two separate reservoirs. Also, how would I connect the low fluid and brake test light switch? Any help would be gratefully received. Thanks in advance Craig
-
I have a complete set of Yokohama prarada with a 1,000 miles on them - call it £100 for the set if you like - I replaced them over the winter. I’ll double check the sizing if you’re interested. They can be collected either from Doncaster area or Sheffield or can be posted. Cheers Craig
-
All, I’m replacing my entire fuelling system with new lines filters and pumps. As in the title I’m after a Bosch 044 in-line fuel pump. If any one has one then please let me know. thanks again in advance Craig
-
Thanks very much for input chaps. or, how about I shave some of the bush face to mount point? Is this realistic or am I just creating another issue?
-
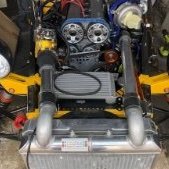
All, I hope this finds you all well. I decided to strip my Zero down over the winter ahead of new engine, gearbox, prop, diff, new front end etc. The rear wishbones have been sand blasted and have been powder coated a nice gloss black. I have taken the powder coat away from the inside of the wishbone mount tubes tubes to allow fitting of the new bushes and crush tubes. All lathered with copper grease etc. However, I am now in a struggle to fit the wishbones back to the chassis. My question is this - I am struggling to get a penny washer to either side of the bush when fitting the wishbones back into the chassis mounts. I suspect I am answering my own question, but is it good practice to take the powder coat off the ends of each wishbone mount point? Just wanted another opinion before I bolt and torque up. As ever, thank you very much in advance of any response/s. Cheers Craig
-
I have two sets of cycle wings from my Zero BRG std cycle wings at 240mm wide Red aero cycle wings at 220mm wide Both sets are grp and were glued on to the cycle stays Please let me know Cheers Craig
-
Might be able to help out - give me a few minutes I’ll get sizes and pictures ready - please pm me you preferred communication for images. Thanks Craig
-
I’ll take them please. thanks Craig
-
Still available?
-
Should have put Quaife ATB innards... The unit is now back together - with a large shout and thank you to the author (Rich I think according to Nelmo) of the last three RHOCAR magazine editions covering this particular subject, was a great help - with i think the correct backlash but will have to wait and see as I'm waiting on DRD racing from my half shafts, uprights, hub carrier, new bearings and wheel flange - going for a complete rear end re-build.
-
If you’re still after the cowling, I found the set on Sunday and then promptly lost the bottom half after a massive clear up. Happily go on the hunt again...
-
Can’t believe it, the mc from GBS had a failed reservoir seal! Bought some M10 x 1 female to M10 x 1.25 male adaptors and am going to fit the fiat 124 MC with remote reservoir - sometimes the original thought process should be followed and not allowing one to be persuaded to go back to the original...
-
Happy days, feels great when you get there. For mine, it was closing the terminals in the fuse box so the relays were tight when fitted. It was purely by accident that I discovered the issue. I had wired the relay to earth directly which cleared the misfire but when it was running I accidentally nudged the relay and the fault replicated. Removed the direct to earth and fiddled, voila! Fixed
-
Hey all, I’m sure this issue has now been sorted but thought it worthwhile to give an over view of my electrical nightmare a couple of years ago. having allowed myself to be talked into buying the GBS plug and play loom to give the Zero better electrical reliability, I stripped the car and ran my newly acquired GBS loom to replace my home made jobbie complete with emerald and engine bay loom. First thing, bad earths, my fault, in my xenophobic attitude to be a beautifully clean job, I’d forgotten to earth properly. Second thing, I had what Daniel had, a flipping misfire - mine was under load. At first, brilliant but then the misfire started and became worse to the point of refusing to start. Like Daniel, I replaced the entire HT circuit, coil pack, plugs, leads, crank sensor with new. At this stage the car was 3 years old and had covered 1100 miles... after 7 months!! Yup, 7 months right up to July if that year, I found the issue more by chance than anything. Having gone through pretty much point for point as Daniel, mine was found to be the ignition relay losing connection under load. Cranking the engine, I had spark, fuel, in fact everything was perfect. Plug in the coil pack and it failed. One quick twist of a screw driver and fault fixed - I could not believe it at first as the relief was overwhelming. Just goes to show that when the manufacturer says that these things are fully tested, I believe them that they are right and in this case they were, but under load... Thirdly, I replaced my fuel lines and changed the fuel filters. And, yup, I started to get a misfire around 30 miles later. Actually it was after a car and coffee meet at GBS a couple of years ago. Got there ok but on way home started running badly and I mean it would just stop, symptom slightly different in so much that the misfire was definitely fuel starvation or so it seemed at the time. Turned out that the fuel filter - new sytec had an incorrect filter and starved the engine of fuel. happily, once one gets over the initial Fix and gets some mileage, those woes eventually disappear. Good luck with it all Daniel, sounds like finally you have a resolve, keep believing. Cheers and for my next tome... turbo!
-
Well, I did order a Fiat 124 and then realised that I’d have to change the fittings from 10 x 1 to 1.25! Any how, bought a new Sierra mc from GBS in the mean time while I make some new lines with the correct fiat fittings.
-
Great stuff and thanks - will have to wait until the weekend now. Thanks to all responders, I’ll update in due course. New fluid on way for take 4 Thanks again chaps Craig
-
Thanks, that’s a great idea, thanks, I’ll give a try next time.
-
So, my trusty Sierra MC had corroded and had a score to the primary end of the MC. So out with the old and in with a new collected from GBS. Now bleeding with Gunsons ezibleed! while I realise that it is best to bleed the MC on the bench, I decided due to space and not wanting brake fluid every where that I install and bleed in the car. Well I’ve now put a litre through, lots of air out and have a peddle which goes all the way to the floor. While I know there is a marmite attitude to these one man bleed systems I don’t have a choice - it has to be a one man job. As such is there a specific way in which this should be approached? I’m bleeding off side rear, near side rear, near side front and lastly offside front. As mentioned I put a litre through it yesterday and had clear fluid no bubbles.L but peddle all the way to the floor. in light of above, just wondered if there was anything I was doing wrong. Cheers Craig
-
...and it’s off. Now for the interesting bit and that’s building the diff back with new quaife Lsd innards.
-
Thanks very much for suggestions. Seems that the map should work, trigger wheel requires the crank sensor alignment tool to properly set up timing. Anyone have access to this or how to obtain one, would be gratefully appreciated. Cheers Craig
-
Hello and thank you to all responders. I’ll get back into the garage tonight to see what’s occurring. Thank you so much for your suggestions, gratefully received. MC was not stripped as only 1028 miles from new. That said, I’m not ruling it out for replacement. Im fairly sure I have a return spring on the peddle but can’t quite remember - it’s an age thing... It’s what the happy people at hispec said about the bottom screws, many thanks for the clarification though - experience tells me that it’s a bit of pot luck with getting the correct information out of them - thanks I’ll check and come back with findings. Cheers Craig
-
Interestingly having just spoken with Hispec, they tell me that the standard fitting is a banjo as I have. However, the chap did say that it wouldn't matter if I had a standard 10 x 1mm fitting either so a bit miffed you could say. So, when bleeding the brakes I use the Gunson kit and put 20 lbs of pressure through the system to check for leaks. I have no leaks. I bleed all four corners, the fronts from the inside out and the rears tops and then bottoms although the chap from Hispec says only the tops need bleeding. Any one have any ideas as to why I have no brake pedal despite having new 4 pot fronts and new 2 pot rears with new flexi hoses front and back with no leaks? Currently I have put 1.5 litres through the system to flush out all of the old fluid. Following each bleed of all four corners I try the peddle which feels good. After several pumps, the brake pedal just sticks all the way and does not return giving me no pedal. Cheers Craig