Jump to content

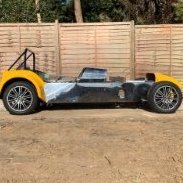
The fun starts here - anyone know this car?


Chris Scott

Recommended Posts

This week’s focus has been on starting to investigate the rear end - having never even removed the rear wheels until now.

After removing the fuel tank (and 20 years of attached grime) I started my investigation.

I was aware of a diff leak, but also found the need for a pair of new wheel cylinders, new CV boots, new brake hoses and a rear wheel bearing. Nothing major, but more money and time 😂

The parts have been ordered, just need the time over the next few weeks to get it all done. 

  • Like 1
Link to comment
Share on other sites

3 hours ago, tractor said:

why get rid of the bike carbs to put webbers on thats a massive step backwards  

Oddly I’ve actually put the bike carbs back on this week! I want a known quantity for when I redo the electrics. It was running on bike carbs when I bought it 

However, long term webers is the goal, I have a number of friends that race engines with Webers so getting them set up should be a doddle.

Link to comment
Share on other sites

Like all best laid plans things always change in the world of kit cars…

Whilst trying to remove the diff it became apparent that everything was seized and corroded solid! 
 

As a result I’ve decided that there is no point doing things by halves…the subframe and diff are coming out together for a full refresh. 
 

Currently it’s all unbolted…however it’s still not coming away from chassis so tomorrow’s plans are now sorted 😂

Link to comment
Share on other sites

The outer swinging arm bush bolts probably have to be removed to release the subframe.

They go through a reinforcing plate attached to the floor under the seats.

I also have a bolt vertically up hidden by the rubber bush used to mount the subframe to the car body on the sierra as recommended by richard stewart in his build videos.

Edited by IanS
Link to comment
Share on other sites

7 hours ago, IanS said:

The outer swinging arm bush bolts probably have to be removed to release the subframe.

They go through a reinforcing plate attached to the floor under the seats.

I also have a bolt vertically up hidden by the rubber bush used to mount the subframe to the car body on the sierra as recommended by richard stewart in his build videos.

Thanks Ian, this is very helpful. So far I’ve managed to take the big bolts out that go through the bush, a slightly smaller bolt that is next to it that goes through the subframe and yet it’s still not moving 😂

Tonight I need to grind some bolts away and see whats holding it still 

Link to comment
Share on other sites

if you're going for a full refresh (I did the same this year), get the nuts on the end of the axles loose before you undo brakes and remove the subframe from the car. They are tightened to ~300Nm, so you'll need to stop the subframe and axles rotating as you undo them.

Link to comment
Share on other sites

3 hours ago, Grim said:

if you're going for a full refresh (I did the same this year), get the nuts on the end of the axles loose before you undo brakes and remove the subframe from the car. They are tightened to ~300Nm, so you'll need to stop the subframe and axles rotating as you undo them.

Thanks, luckily that part of it is all sorted. I'm currently stuck removing the sub frame through the monocoque! Where the nut, bolt and bracket is seized I can't get it through the hole but also can't get a grinder in there! What fun :)

Link to comment
Share on other sites

9 hours ago, IanS said:

Seats out, carpet out and attack from on top.

Just an idea fitted mine in 1996 and not been touched since so memory might be a bit misty!

Interior was thrown in the skip about 6 months ago 😂 attack is the word though - Sunday it’s man vs car! 

Link to comment
Share on other sites

So you can probably see the bolt head from the top. What I have done in the past is to mark the center of the bolt by scribing lines from opposing apexes of the hex, then carefully marking with a punch, then starting with a small drill, say just 3mm, make a larger and larger hole just to the depth of the head until you get to a 10 mm drill ( If it is an M10 bolt). Now the head will just twist off because there is not much left attaching it.

Link to comment
Share on other sites

2 hours ago, Sparepart said:

So you can probably see the bolt head from the top. What I have done in the past is to mark the center of the bolt by scribing lines from opposing apexes of the hex, then carefully marking with a punch, then starting with a small drill, say just 3mm, make a larger and larger hole just to the depth of the head until you get to a 10 mm drill ( If it is an M10 bolt). Now the head will just twist off because there is not much left attaching it.

Thanks - subframe is now out thank god! Issue I have is both trailing arms have a bolt seized in the bush and the diff has one bolt seized solid too! 
 

I think I’m defeated, will give it to my dad to see if heat will help it free off 

30E6840C-B706-4BF1-B2B7-CC537C589C43.jpeg

Link to comment
Share on other sites

You must have noticed the crack in the alloy of the diff casing where the long bolt goes through, when I rebuilt, it took me ages of gentle persuasion and WD40 to free these long bolts, the steel corrodes to the alloy, almost reduced me to tears. Also do I see a spacer on the pinion flange, I don't have a spacer there, perhaps you had a slightly shorter prop shaft or the engine/gearbox is mounted a bit more forward ?

Link to comment
Share on other sites

7 hours ago, Sparepart said:

You must have noticed the crack in the alloy of the diff casing where the long bolt goes through, when I rebuilt, it took me ages of gentle persuasion and WD40 to free these long bolts, the steel corrodes to the alloy, almost reduced me to tears. Also do I see a spacer on the pinion flange, I don't have a spacer there, perhaps you had a slightly shorter prop shaft or the engine/gearbox is mounted a bit more forward ?

Yes, the crack is a concern but looking at the corrosion it’s is both superficial and old…hoping once bolt is out this is still the case 😳

There is certainly a spacer, but not sure why as the gearbox is as far back as it can go so assume it must be the prop that’s modified.


Link to comment
Share on other sites

  • 1 month later...

So…after a couple of months of forum inactivity I thought I would update the community on my progress…as there has been some! 
 

The diff has been freed from its prison of corrosion, cleaned, resealed  and refitted into a refurbished subframe. New stainless bolts and poly bushes have seen that looking so much better!

The backing plates and drums have been cleaned and painted and are now back on the car.

I have replaced the mounting plates for the subframe for thicker galvanised versions as well as patched the rear bulkhead.

The drivers seat is now fitted to new runners.

Finally, a friend has machined me a lovely ally plate to mount the new quick release for my steering wheel.

Next job will be mounting the steering column.


CB986FC9-C516-486E-95CE-92F58EC1D9A7.jpeg

CB943A4E-58D4-4957-87A1-BA949C84BF1D.jpeg

CF6B10A0-3B5A-422E-95EA-F0E763B8729C.jpeg

00780A6D-67D6-4576-AB34-FD1F7CEDE0C6.jpeg

E08B88D9-6DA3-479A-BDF8-1D36B47038B2.jpeg

7C50B453-F9F8-477A-AD17-A185FA910BF8.jpeg

5F37106F-15E7-4A3F-90F7-C63E6DDD602F.jpeg

21843884-125D-4EF9-A0A5-2FBE1470F9B8.jpeg

Link to comment
Share on other sites

  • Recently Browsing   0 members

    • No registered users viewing this page.
×
×
  • Create New...