Search the Community
Showing results for 'stalk wiring'.
-
Personally I think the MX5 engine is a far better engine than the Ford boat anchor, as to fitting it in the S7 can't help really help you. Again only my thoughts would be to buy a whole car rather then just a 'kit' that way you have everything you need, just in case it didn't come with the 'kit' you buy. As for wiring I'd rip the whole lot out & replace with the MX5 wiring harness, if you buy a later 2.5 version then you won't need to run a fuel return as it's built into the fuel pump, assuming you can run that pump, if you can't then you'll have to run a return from the front, or there is a Vauxhall (I think) fuel filter with a pressure regulator built in. Big things you will have to consider & I'm sure you have, is engine mounting, but that should be fairly straight forward possibly modifying the MX5 ones, but the fore/aft positioning might be more interesting to get the gearstick in the right place. if it's too far back as it's a long gearbox there is a way to shorten them but no idea how. I spoke to a guy with one in a Moggy Thou van & he'd taken 5" off it's length. You'll obviously need a rear gearbox mount but again can't see that being too difficult, then of course a custom propshaft, MX5 gearbox out to Ford whatever in, then there is the diff ratio to consider, unless it's the Sierra rear & you can swap that for the MX5, but then you're looking at custom driveshafts.
-
IanS very insightful as always, I too have the same issues as well as reading full when empty and empty when full ! You mention "dampened gauge" I have done some research after reading this as it was a new term to me and it is becoming apparent that putting a capacitor in the wire from sender to gauge makes it less reactive meaning fuel sloshing is less noticeable on the gauge reading, but this opens up even more queries ! 1) what capacitor is right ? is there a simple wiring diagram/method ? any ideas on gauge reading in reverse I presume 2 wires the wrong way round on back of gauge but which 2 ?
-
Afternoon all, I am in the process of converting from dizi to megajolt on Ford Pinto, but have come up against a problem when wiring the TPS. There are 3 pins to wire from the sensor, my understanding is that they should be identified as 1 = signal. 2 = ground. 3 = 5v. Can someone tell me how to test these to find out what is what? So far, I have connected a multimeter set to ohms x1k, one lead connected to centre pin (purple), the other connected to one of the other pins (grey or black). I am getting a high resistance between purple and black and a low resistance between purple and grey. If I connect grey & black the resistance isn't constant. Not sure if the above testing is the correct way to do it? Also, if I turn the throttle when the leads are connected, the resistance isn't changing, this is the same when measuring between any of the pins. I've tried taking the TPS off and turning by hand and get the same result. Any help on this would be much appreciated. For info, this is a Mikuni TPS fitted to ZX6R carbs.
-
I'm afraid this is all electrics and almost every kit car is unique in that respect. You need to get a multimeter out and test the wiring from switch to motor, test the action of the switch with the multimeter etc. Sadly, there are rarely quick fixes when it comes to electrics....
-
Just to close this one off the issue was insufficient power to the pump I found a fuel pump relay wiring harness on E bay ordered and installed works perfect now many thanks for everyone's help and advise greatly appreciated as always !
-
Hi guys my car runs a facet fuel pump, (cylinder type) when I got the car the pump was brand new, but since owning the car the fuse kept blowing every couple of miles, ive currently got the car in bits (completely stripped) and all wiring ripped out, so what gauge wire are you guys using and what size fuse, the car would stay running with a 25amp inline fuse, anything lower and it would just blow, I'm sure I've asked on here before but can't find the post for some reason, also is it right that the fuel pump isn't earthed? I'm sure someone on here mentioned it should be a 5amp fuse, so im guessing it's the gauge wire,
-
Would not be the first faulty component I have come across and then spent futile hours chaseing other posible causes. If it is the only thing on that fuse it is faulty. OR the wire downstream of the fuse has an intermittant short that is masked at 25A by thin wire upstream not passing the current. Try running a test wire from the battery fitted with a 5 A fuse direct from the battery to the pump. If the fuse does not blow then you have a wiring fault, if it does blow the pump is faulty.
-
Hi all, First post on here. Aquired a 2019 Zero with 2.0 Zetec.. car hardly used since IVA. less than 1k. drove car home, 5hr journey, All good.Used car for a few runs before weather turned. One of my gripes was poor gauges. Couldn’t see or read oil, water or amp gauge so swapped for Little Devil gauges and added oil temp. Since this had engine misfire/popping and reluctant to pick up. Running K6 emerald ECU with wide and lambda. Have swapped obvious, plug leads etc but no better. Checked wiring but can’t see anything obvious. Did disconnect ECU wiring to tidy up. any help appreciated Jeremy
-
As the title suggests I'm looking at getting a new loom for the SuperSpec to get rid of the birds nest under the dash and sort out some electrical gremlins. What do people think of these 2 and which would be the best or easiest to fit in.
-
Currently checking wiring, have put a busbar for earths under dash. Wiring is/ was a bit of a bodge in places, mainly the wide band lambda , but gauge reads ok .?
-
Yes, definitely sounds like something related to your recent changes. The ECU needs a minimum voltage to work (11V or something like that?) - maybe your system is now sometimes providing less and the ECU is literally shutting down then switching on continually? In the Emerald software, there is a datalogger function - connect a PC up, start the software and drive the car, monitoring the various options - look for obvious spikes or see if you just keep losing the connection as the ECU turns off? I had a misfire issue and it was the wiring to my TPS but I worked it out from the datalogger - details in my blog post about it here.
-
If it ran well for 5 hrs before being modified, I would suggest you look at the things you have changed rather than looking for a new problem. It sounds like it could a bad/ intermittent earth somewhere, perhaps on the ECU wiring.
-
I have purchased new indicators and they have just a single black wire, how do connect these to my current loom for prev lights with 2 wires?

-
Hi All I have recently purchased a robin hood 2b and the wiring is a lot to be desired but on the up side I was given a complete loom with all fuse boxes and relays attached made by rapid fit looms and was just wandering if anyone has an idots guide on how to fit it any help would be much appreciated
-
my sentiments entirely! I certainly hope that it is all that's missing! the line are there and the servo, the car is pretty much built otherwise, wiring looks all to be there but sadly I'm going in a bit blind so I expect to have a few headaches with it!. ill post pictures as soon as I have the car. only other thing I'm curious about is the whole pedal box seems really high are modifications meant to be made to this?
-
That old chestnut...if no MC, are there brake lines? Is there wiring for the dashboard? Took me months to do the dashboard and wiring for it (although I was pretty slow) Pics are needed - good luck!
-
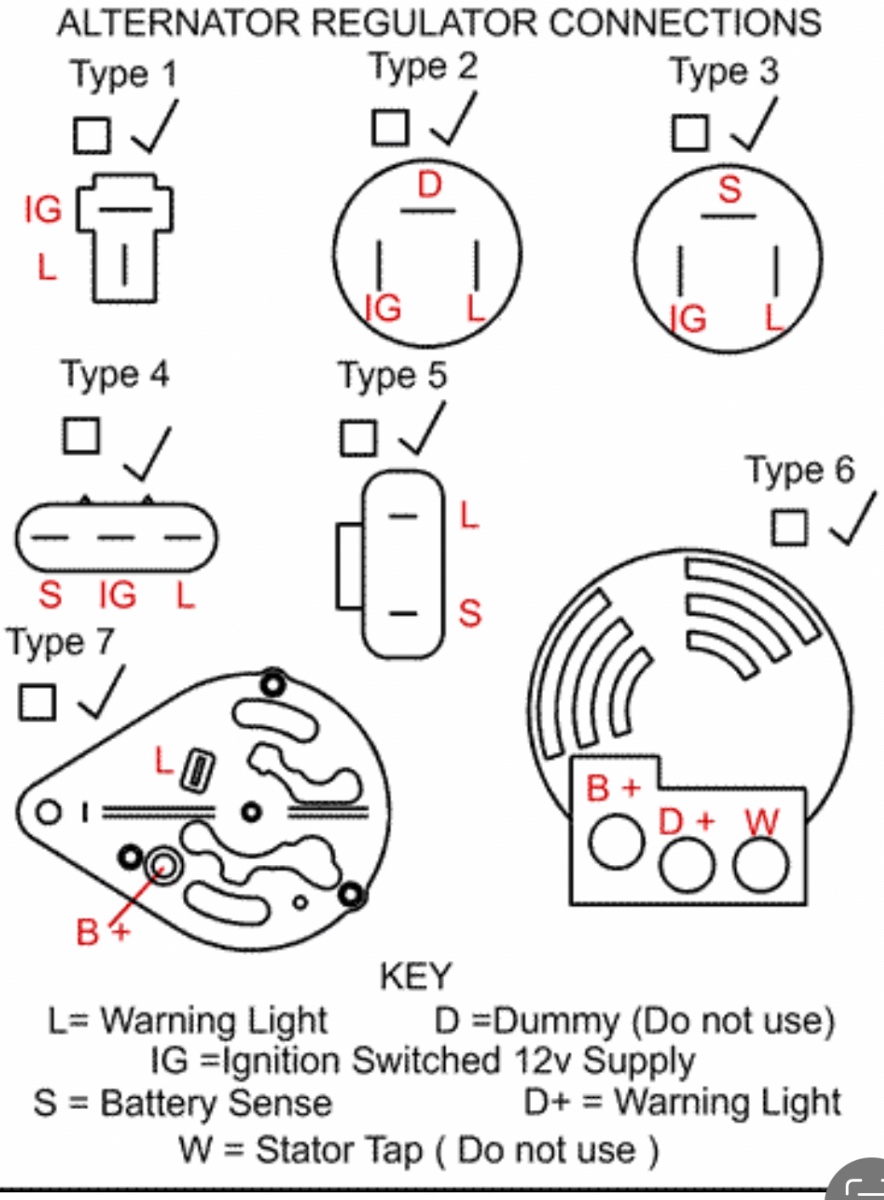
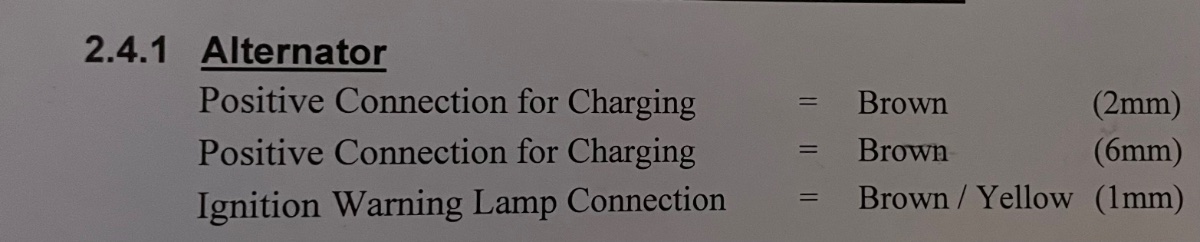
Hi all, I need some help! Car now runs, however the alternator is not charging the battery - I have no idea if it worked before tear down, so fighting blind…especially as I’ve rewired the car too. The wiring loom has two positive wires to the alternator, a 6mm (main charge) and a 2mm called ‘positive connection for charging’. Currently I have them both to the +ve post on the alternator but it’s not charging. Have I wired it right or wrong? Could the 2mm be a “battery sense” wire and need to go to the regulator? Could that be why it’s not charging? It’s a Zetec Silvertop. I’ve included the wiring guide and a diagram of the alternator plug (type 2 or 3)
-
Hi everyone, sorry if I’ve stupidly missed a post that answers my question. can anyone recommend where to get an engine loom from? cheers ben
-
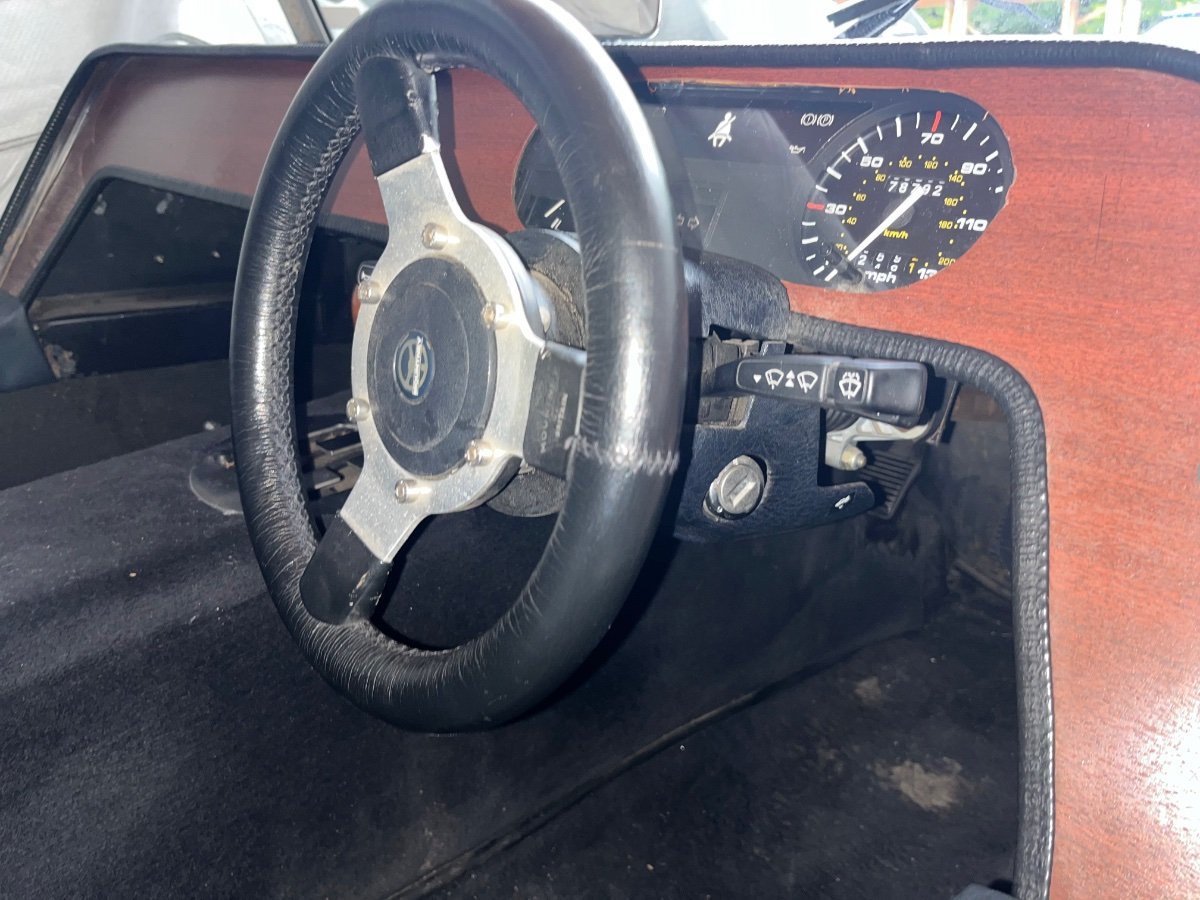
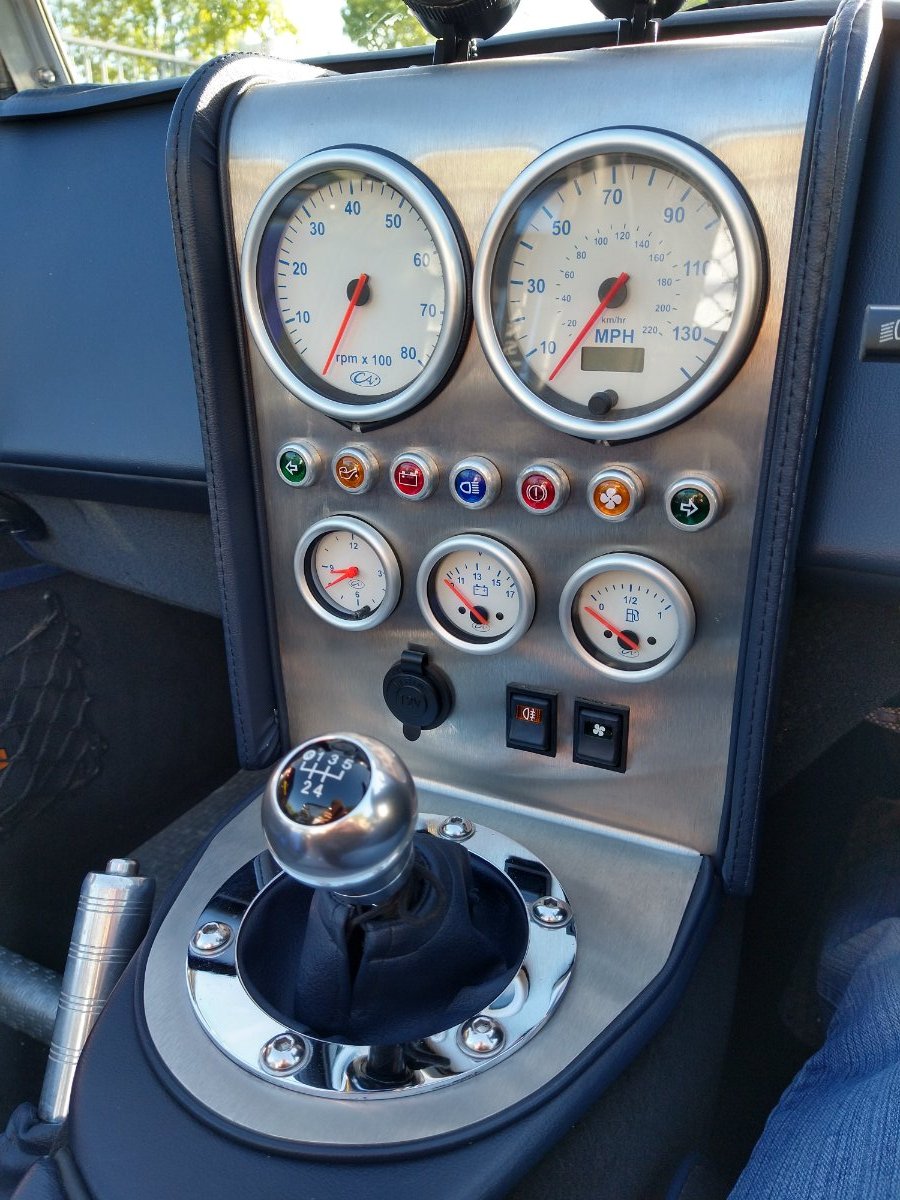
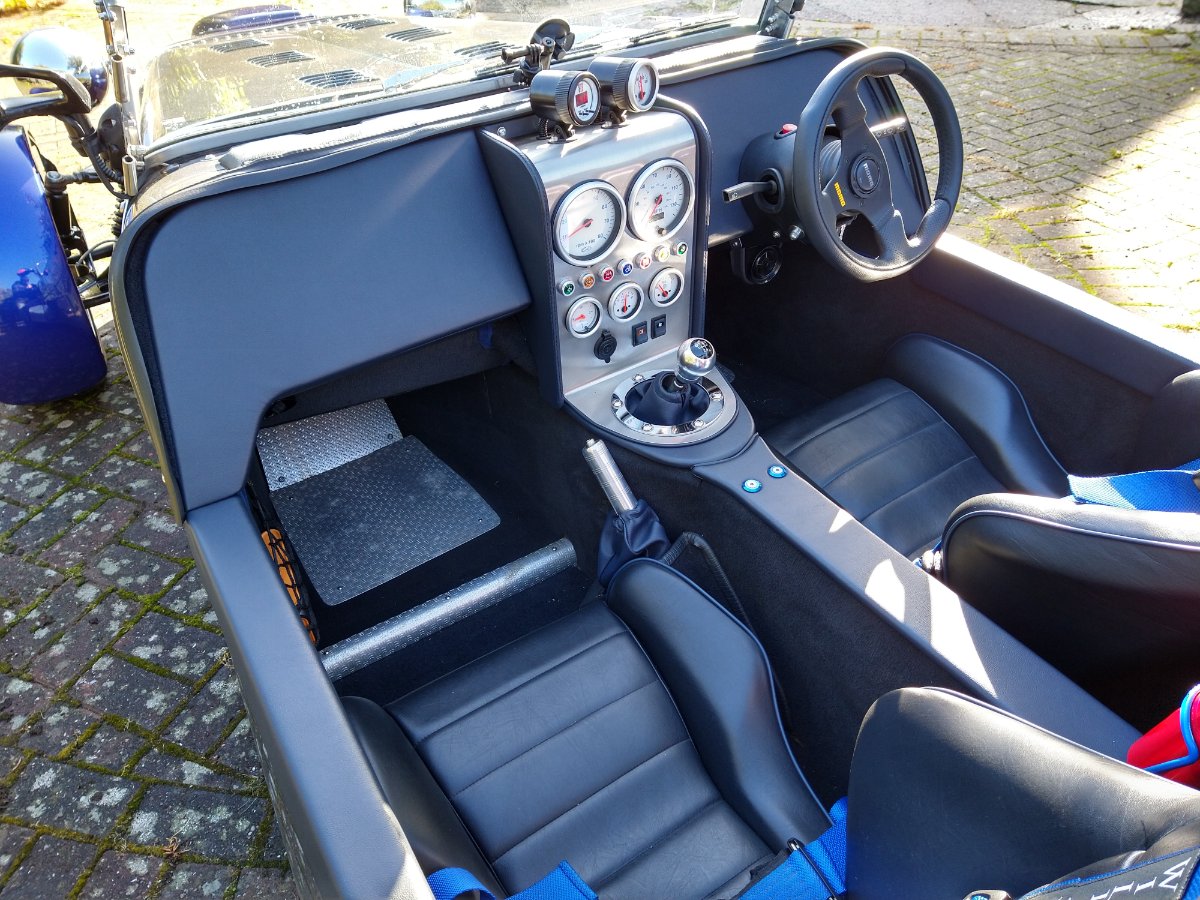
Hi Guys, I want to redo the dash as the one I inherited is pretty naff. Where‘s the best place to pick up some reasonably priced instruments? Didn’t really want to spend £700 if I can help it. Copies of Smiths gauges would also be ok. Saw some on eBay but not sure if they are up to much. any advice as well when fitting? No oil pressure or voltmeter at the moment. Also planning to do away with the original stalk and replace with toggle switches. Cheers for any advice Craig
-
Tried to get the car running today and found my old sender unit had failed and now has a hole in the pipe as a weld had broken. I have a replacement sender unit but the wiring connection is different. My old type had a three pin plug, but the new type only has earth & stud for level sensor (same type you can but from kit spares). One of the three pins on the old type was a positive feed, which I assume is no longer needed, the other two I assume are level sensor and low fuel warning light? I have tried connecting the sender new unit to earth and on the main sensor stud I have connected each of the two wires in turn from the old wiring but no joy. I have 12v feed to my gauge, and don't really want to run a new wire from this to the sender unit...can anyone advise what I need to do here?
-
Hi all, the build wiring diagram and the loom I have don’t have corresponding colours, is there a variant of model that is different, I’m using a 1989 Sierra sapphire donor and a 2B plus kit. Anyone know a auto electrician near Manchester?
-
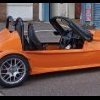
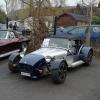
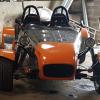
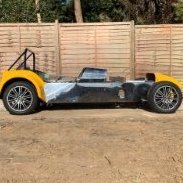
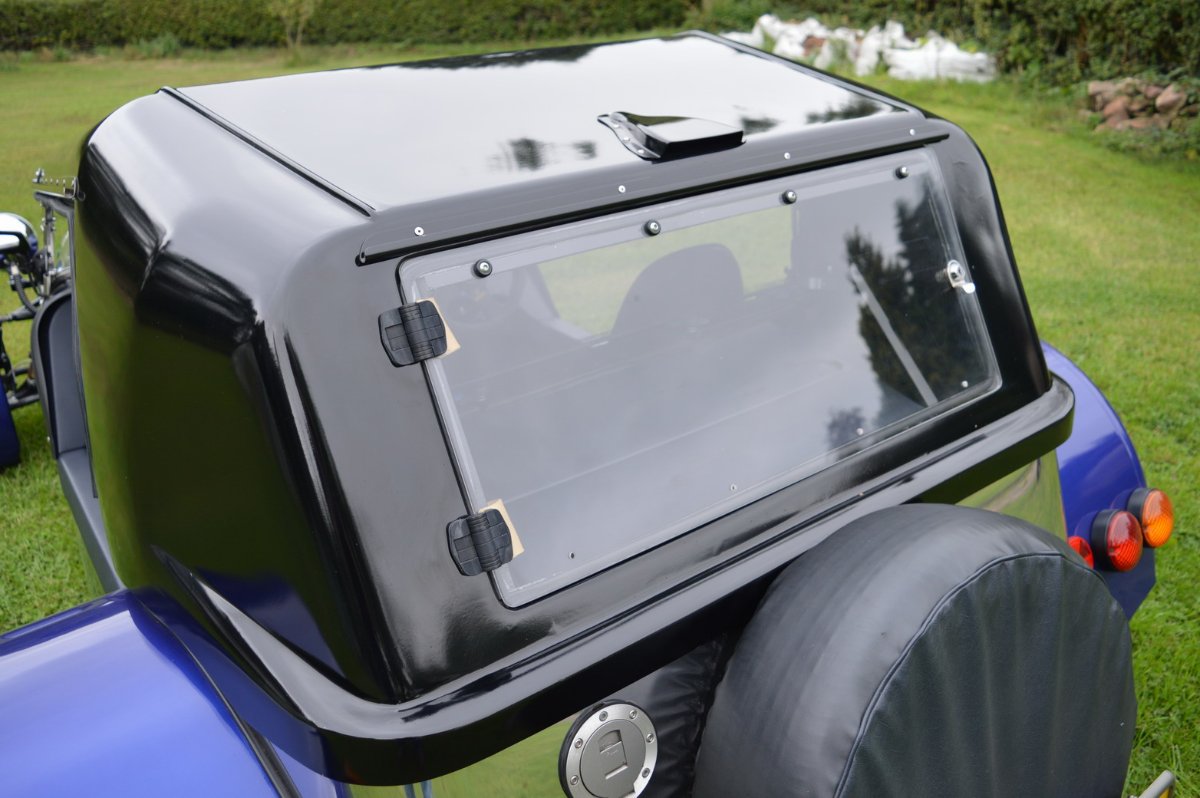
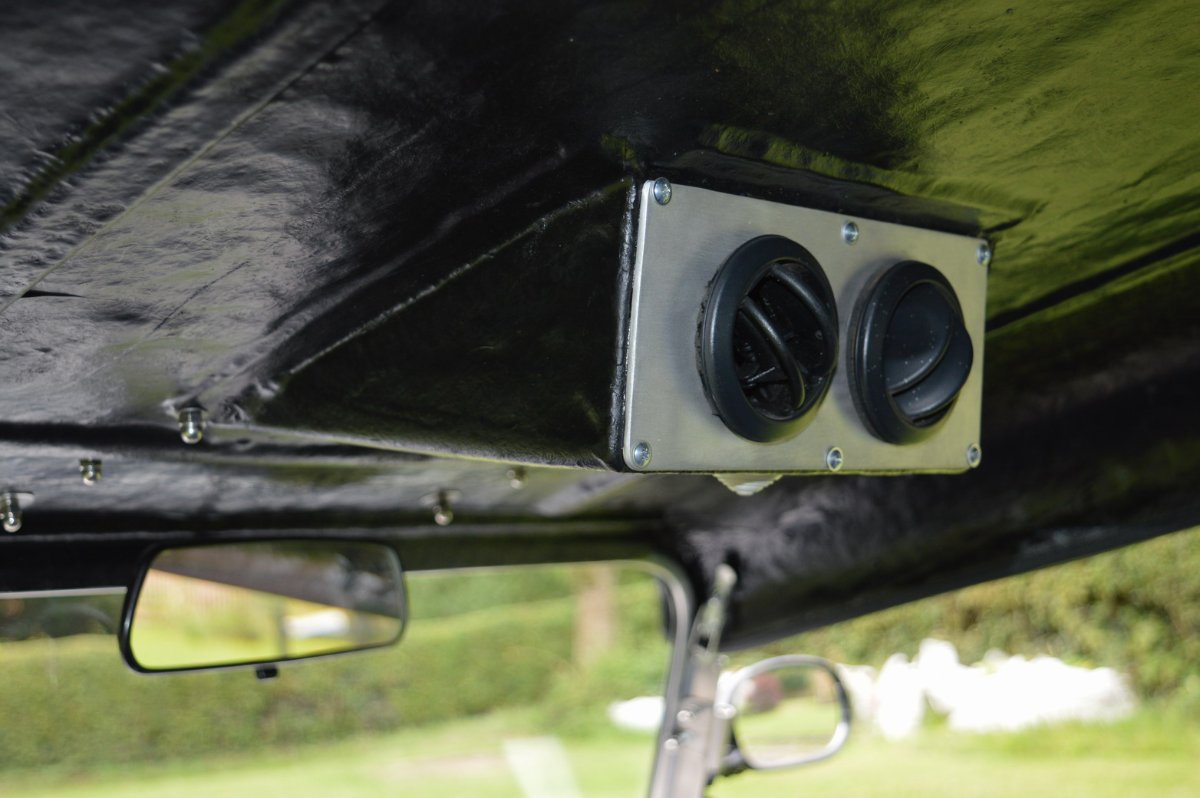
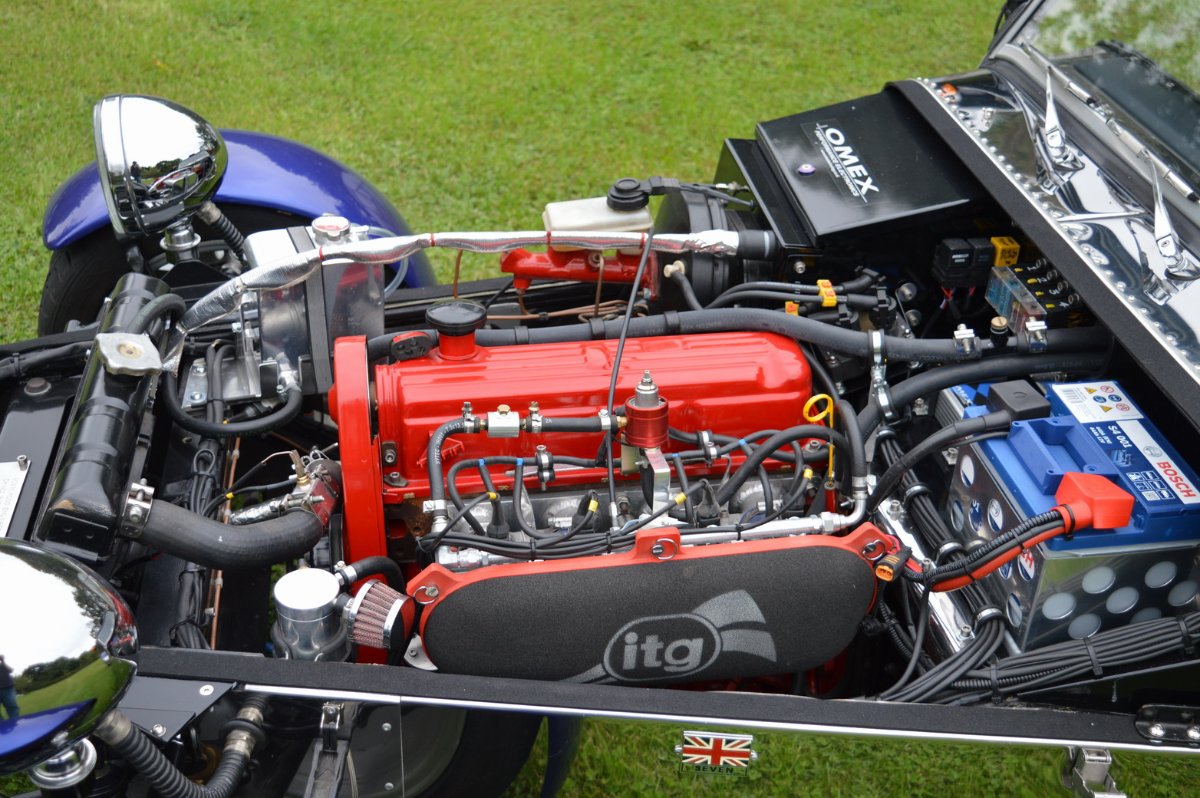
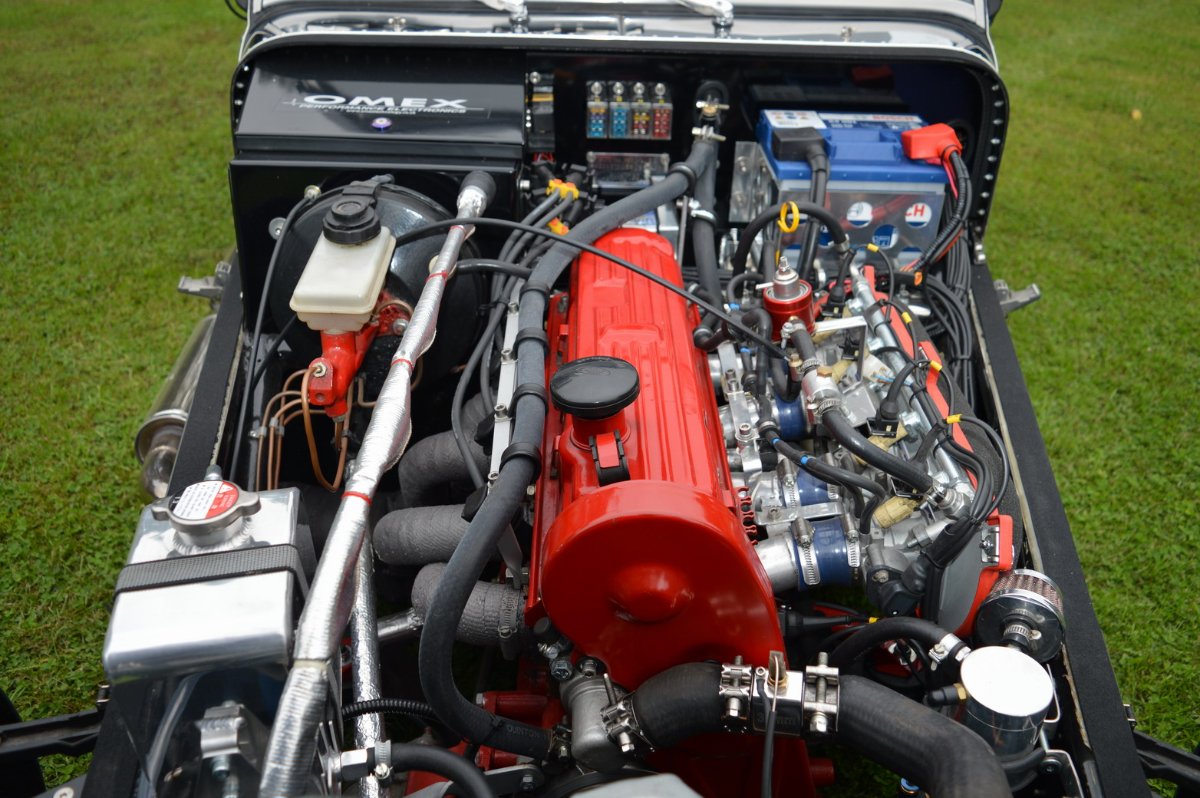
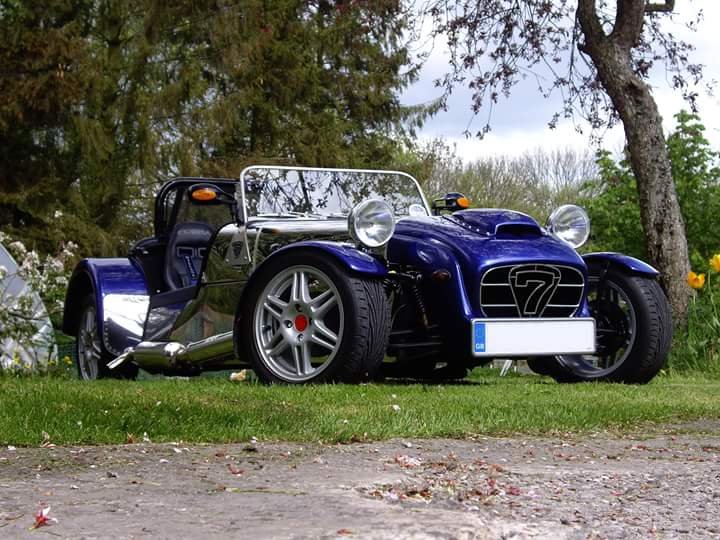
Reluctant sale of my stunning and highly individual Robin Hood 2B. I'm the original owner/builder. It's all correctly tested and registered on an age related plate, and with 'Robin Hood 2B' on the V5. Currently has 12 months MOT, and just 5500 miles on the clock. Never raced or abused, and always garage stored. It's in immaculate condition throughout, and always draws a lot of attention and compliments. Meticulously detailed with many unique and custom features - There's really very little you could describe as "standard", and I think it's reasonable to describe it was one of the most unique and immaculately presented examples built. The base kit-spec is a mild steel chassis with stainless panels, front wishbones, and wide rear arch kit. The donor was a 1986 Ford Sierra 2.0GL Although it isn't used much, I've kept it taxed and MOT'd, and looked after and serviced accordingly. For example, over the past few years I've done work on the brakes, suspension, and a new exhaust. After 20 years of ownership though, life moves on and it seemed like right time for a new owner to enjoy it. £6750 ono FULL DETAILED SPEC as follows... Chassis and Bodywork Mild Steel chassis etch primed and finished in 2K gloss black GRP and wide rear arches finished in Ford Imperial Blue Pearl DAX cycle wings with custom brackets Modified Headlamp Brackets Fixed scuttle and forward tilting bonnet (unrestricted engine access) Custom nose cone skirt and air intake scoop with recessed '7' enamel badge Marine style stainless steel engine bay vents Stainless Steel '7' Windscreen pillars, Chromed '7' Grille Dedicated Jacking points, with jack included Steering and Suspension Adjustable GAZ Coilovers all round Upgraded front wishbones (OldTimbo kit), improving suspension geometry and adjustable for camber/rake/trail, etc Camber adjustment sleeve has been upgraded to the stronger steel version Tie rod ends replaced 2018 Bottom ball joint dust covers replaced 2022 Track rod ends replaced 2018 Rear camber correction wedges fitted Refurbished Speedline alloys with new Toyo Proxes T1R tyres (approx 4000 miles wear) Locking wheel nuts Spare wheel Electical & Lighting Premier Wiring Systems Loom Halogen Headlamp bulb upgrade High level rear brake light (roll bar) Individual rear lights Mini Wiper motor, with stainless wiper arms Side Indicators incorporated into wing mirrors and nose cone Engine, Mechanical & Brakes Ford Pinto Engine - originally carb, now running aftermarket fuel injection OMEX 600 ECU - rolling road setup at Steve Walford Motorsport Honda CBR Throttle Bodies on a custom DANST Engineering inlet manifold, ITG Filter Adjustable fuel pressure regulator (with removeable guage) Focus injectors Weber 36-1 Crank Position Kit Coil Pack 205 block completely refurbished and rebuilt to 2.1 spec, new pistons, etc Vulcan Engineering cylinder head, unleaded valve seats FR32 Cam, Vernier Pulley Lightened & balanced flywheel Shortened sump New CBS 7" Stainless exhaust fitted 2021, with 4-1 manifold kit STACK Lambda Sensor* (Not currently fitted) New Clutch fitted during engine rebuild Type 9 5-speed gearbox with quick-shift kit Vibra-Technics Gearbox mount Kenlowe Electric 'sucker' fan, with adjustable thermostat Aluminium Oil catch and water expansion tanks Braided Stainless Steel brake hose kit fitted New front discs fitted during build Greenstuff pads fitted 2021 New Rear drums, slave cylinders and service kit fitted 2021 Custom Alifab fuel tank (approx 40+ litres), baffled and swirl pot New SYTEC Fuel Pump Interior and Boot Cobra 7 seats in black vinyl with blue piping Willans 4-point harnesses in Blue Drivers seat on sliding runner Momo Team leather steering wheel Fully carpetted and upholstered cabin, in black carpet and blue/black vinyl Custom dashboard, featuring brushed stainless central console, and top-mounted instrument pods Caerbont individual guages - Aluminium bezel, white face. Featuring Speed, Tacho, Fuel, Water temp, Voltage, Clock and STACK Air/Fuel ratio. Rocker Switches for 2-speed cabin/demist fan and fog light 12v auxillary port Aluminium bezel warning lights Aluminium Gear knob and handbrake lever Chrome bezel Gear lever ring with vinyl gaitor Netting storage compartments Aluminium chequerplate foot plates Fire Extinguisher 2-Speed Cabin Heater/Demister Roll bar flyscreen/wind deflector Fully upholstered lockable bootlid Large fully uphostered boot, with built in tool compartment Upholstered spare wheel cover Weather Protection Custom made removeable hardtop, with opening rear screen (boot access) and built-in cabin ventialtion Removeable, lockable doors for hardtop* Need some rebuilding) Upholstered side-screen/doors Frame work and bracketry for soft top Soft indoor garage cover
-
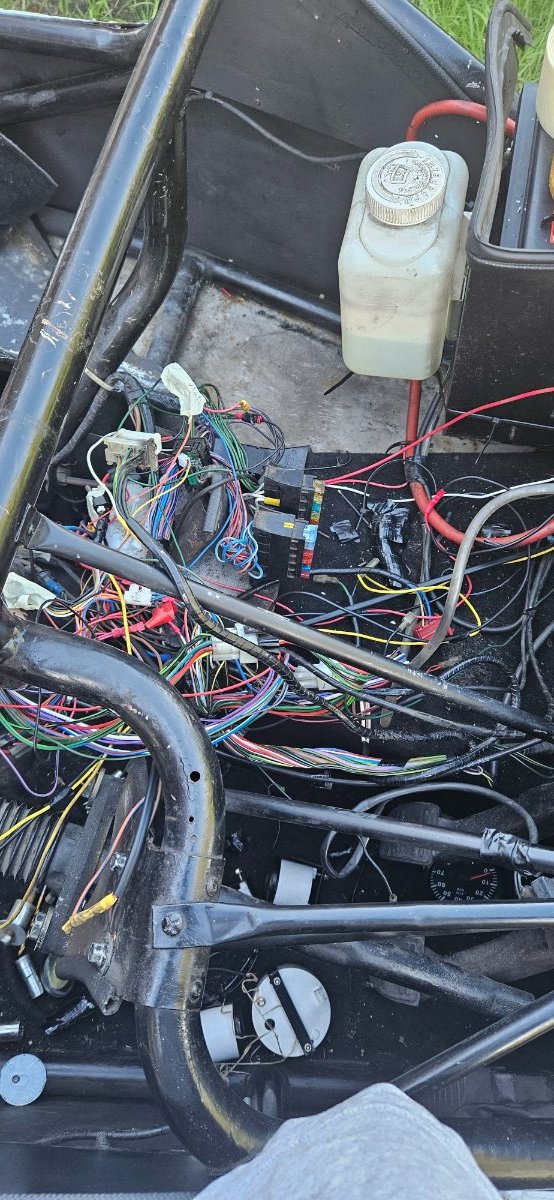
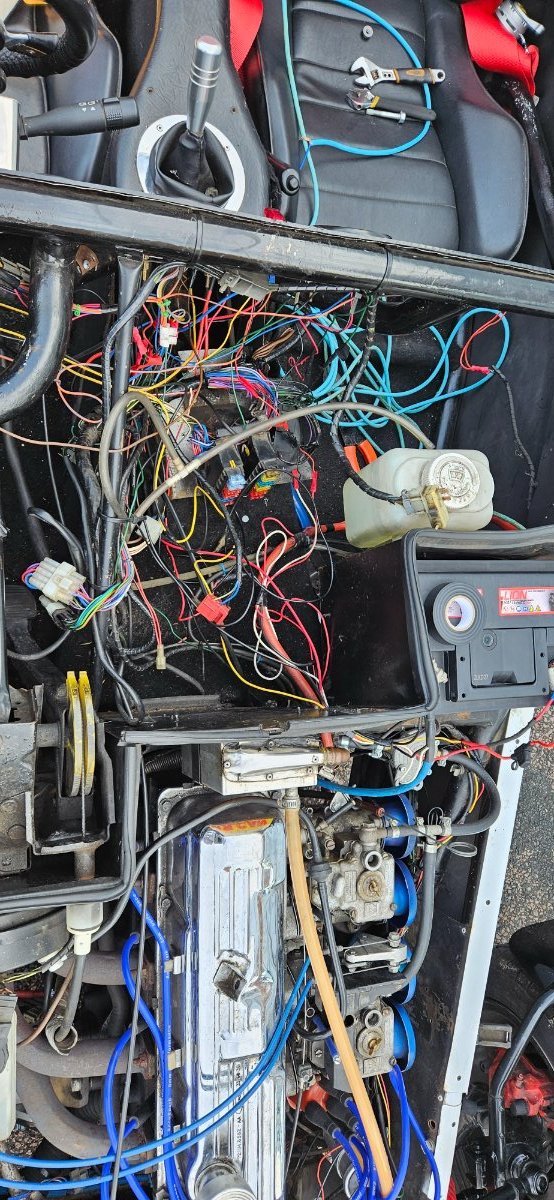
So I thought I would tackle the wiring today (properly this time) I had to sort a few bits the other day as had starting issues, but decided as the weather's nice I would make a start, I'll post updates as I go but for starters here's what I'm dealing with
-
Cheers guys, I've given up, everything is up and running but the wiring looks rubbish, ive got a whole new loom ordered so I'll just start the whole thing again, the diagrams above will come in handy though so thank you
-
How are you guys wiring your ignition coils? Mine Is pre wired to the dizzy, but the live and earth used to be earth to chassis and live to ignition (push button swith) there was nothing in between on the live (which surprises me) I'm sure there should be a ballast resistor or wire, but it worked before and since stripping the wiring and re doing it, it just won't spark, it did started once but revved right up, backfired then died, should I be taking a live from the starter motor to the ignition coil rather than the start button?