

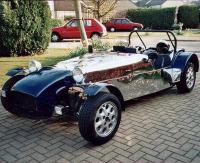
Sparepart
 RHOCaR Member
-
Posts
351 -
Joined
-
Last visited
-
Days Won
14
Content Type
Profiles
Forums
Events
Store
Community Map
Everything posted by Sparepart
-
So basically you have also drilled a seperate hole on the plate, except instead of a gromit the welded nut accepts the threaded tube of the adjuster on the universal cable and presumably a lock nut on the outside of the pedal box plate. Yes I can imagine that is a neat setup, as you did not want/need to use the standard cable fitments at the carb end. Thanks.
-
Sorry, can't help with trackers, however if you are going to splash some cash, perhaps you could install a security camera that shows your garden, then you can see if the Landy is still there from anywhere in the world using your smartphone, but you have probably already considered this sort of thing. Also I couldnt help chuckling when I read your description, just a perverse sense of pernickity humour, I never heard of a Landrover that could catch fish and had done 10 million miles before.
-
I'm rebuilding using the same old springs, but have made brackets so that the long Sierra shocks at 45 degrees are replaced by much shorter vertical classic mini rear shocks. I think others have done this. There are loads of adjustable shocks for the rear of a classic mini, standard non adjustable are dead cheap, in keeping with the Exmo ethos.
-
Thanks Ian, pictures are worth a thousand words. One is left wondering why RHE blew the hole so low ?, just add that question to many vast imponderables regarding the build of their cars.
-
The rebuild has reached the pedal box. The brake and clutch mechanism has cleaned up and is in good shape and fits well. However I was in a rush on the original build, and just "shoe horned" the throttle pedal in. The pedal and pivot mount are unmodified Sierra and bolt to a vertical flap that is cut and bent up from the base of the bulkhead. It's simple to fit so I concentrated on getting a good pedal position. Things were going swimmingly until I fitted the thick steel plate that the servo and pedal box bolts to. RHE had kindly precut a hole of sorts, with a plasma cutter, for the throttle cable to pass through and large enough to fit the nice rubber grommit that is already on the Sierra cable. The problem was/is that the position of this hole is well below top of the throttle pedal, where the cable attaches. Dropping the pedal until the cable is level with the hole means the bottom of the pedal almost touches the floor. At the time I returned the pedal to a comfortable position, and had the cable clamped at a steep downward angle (like 45 deg) as it passed through the hole in the thick plate, the grommit looked pretty distorted and I had to keep it in by clamping the inner part with a jubilee clip. All this mash up is/was invisible when the pedal box cover is bolted on, however the bend in the cable and the angle at which the inner cable gets pulled is/was far from ideal. It worked, but for how long?... every time I pushed on the throttle an image of what was going on under the cover flashed into my mind. Now I have the time to fix this. I assume that every Exmo and S7 build must have faced a similar issue?, so what did people do?. I could drill another hole in the steel plate, higher up. I could alter the length of the pedal, but that will change the "sensitivity" of the throttle response, or make my own pedal. I am just wondering what others have done. I couldn't find anything relevent in the archives, and I think the build video is suitably vague in this area.
-
The fun starts here - anyone know this car?
Sparepart replied to Chris Scott's topic in Build Threads
You must have noticed the crack in the alloy of the diff casing where the long bolt goes through, when I rebuilt, it took me ages of gentle persuasion and WD40 to free these long bolts, the steel corrodes to the alloy, almost reduced me to tears. Also do I see a spacer on the pinion flange, I don't have a spacer there, perhaps you had a slightly shorter prop shaft or the engine/gearbox is mounted a bit more forward ? -
The fun starts here - anyone know this car?
Sparepart replied to Chris Scott's topic in Build Threads
So you can probably see the bolt head from the top. What I have done in the past is to mark the center of the bolt by scribing lines from opposing apexes of the hex, then carefully marking with a punch, then starting with a small drill, say just 3mm, make a larger and larger hole just to the depth of the head until you get to a 10 mm drill ( If it is an M10 bolt). Now the head will just twist off because there is not much left attaching it. -
The Hazard warning feed to all the indicator bulbs should be battery fed also. When you have finished your loom don't forget to top up with loom smoke, mine has escaped on several occasions from my home made loom.
-
On a normally aspirated standard sierra there is a "Fuel vapour seperator" in the pipeline from the tank to the pump, mounted not far from the pump in the engine bay. I think its there because the mechanical pump is sucking fuel out of the tank at the other end of the car, so the pulsing drops in pressure between the pump and the tank can lead to small pockets of vapour to be created, especially in hot climates. The seperator "vents" any pockets back to the fuel tank. Home central heating systems can have something similar to automatically bleed air the builds up, the "return" pipe runs back up to the header tank. Anyway, I digress, on my car I did away with the vapour seperator and the return pipe. I did connect a hose to the connector that was used by the return pipe on the top of the tank, next to the pick up pipe. The hose just runs up to a level as high as the top of the fuel filter and vents to air, Like Alan Richy I should put a non return valve in here in case the car rolls.
-
For your delight and edification I have uploaded an extract from an EXMO build video (cf offer from Brumster). In this extract, the godfather of RHE demonstrates, in his own inimitable style, how to remove scratches and blemishes from GRP. Eleven minutes of bliss ?. https://btcloud.bt.com/web/app/share/invite/YKl962yF9V
-
Like Richyb66 says the manual says to cut open the driveshaft joint cover and peel it back with pliers, Figure 7.6. DONT DO THIS because you cant get replacement covers. I have fitted the stretchy boots that use a strong plastic cone to open them up enough to slip over the joint cover, I have some photos of this somewhere if youd like to see them. As instructed, I used lots of washing up liquid to lubricate the process, and at first I couldn't believe that the boot would stretch enough to slide down the cone and snap back around the shaft on the other side of the joint, it looked impossible, but with a lot of effort and a few swear words it worked. Care is needed to end up with the boots on the right way around. I seem to remember that one of the pair needs to be turned inside out to get it on the cone in such a way that it snaps over and turns the right way round after. I sat there for a while rehearsing the process for each boot before doing it for real, because I couldn't see any way apart from cutting to get the boots off once fitted.
-
Chris, it looks like you could do with a look at the Sierra Service and Repair manual which covers changing the diff oil seals. When you get to the pinion seal you will need a good spanner and lots of leverage to loosen the nut (at least that what I found), anyway here is a link (just tested) to a site that has a pdf of the manual and also one for the type 9 gearbox, I would download and save it now in case it dissapears. https://musse67.mbnet.fi/Taunus/Korjausoppaat/
-
Dave, I agree, one needs to be highly scientific. Now you have posted these photos (great), I realise that if the original anti roll bar is still in use then adjustable TCAs are not a good idea as the anti roll bar will "fight" any change in distance between it's ends. In highly scientific terms it would be a pig's ear. Also, since your tie bars are not adjustable a change in camber will make a change to castor, not much, I know, I will come up with the equation any moment now, it involves Pi.
-
Take care, do not be too vigorous if you use a steel wire brush (say on a drill) to clean up any dull stainless steel, I found that some of the steel from the brush can get deposited in the microscopic scratches and eventually a brown haze of rust can appear that is problematic to shift.
-
Dave, I am interested in this, especially as you have them fitted, with a bit of negative camber the top of the wheel is going to move closer to the outrigger, has this been a problem ?, also has the self centering been affected ? also there must be a change in the angle at which the bearing at the top of the spring is loaded and some sideways pressure on the shock absorber shaft ?. I would be interested in your observations/experience and hear of what benefits this modification has realised.
-
I just have to comment to add agreement with what the others are saying. As an Exmo builder and owner I would say that only a masocist would try to put one together today and get it through approval. There are parts of the kit that would be saleable, GRP, front shocks and springs, and there might be a reconditioned steering rack, and even a windscreen could be wanted. However you might end up just disposing of the bodyshell. If it's a stainless shell you might find an Exmo owner with a zinc plated steel shell that wants to swap over as a project. Not sure if that would be legal ? The donor Sierra could be worth something, I read "Practical Classics" magazine, they have cars of that age in their free ads pages ... who know? Whatever, I wish you luck, it can't be easy given the circumstance of the disposal.
-
Windscreen Wiper Fuse Blowing - tracing intermittent fault?
Sparepart replied to CherryTreeFW's topic in Electrics
Googling what fuse ratings are used on a "classic" mini, gives this link:- https://www.theminiforum.co.uk/forums/topic/251403-fuses-by-location-circuits-covered-data/ You will note that on later models the WW fuse is 15 amps, what you are now using. -
One small piece of information - You will need to measure the thickness of the anti roll bar, there are three dimensions, 24mm, 26mm and 28mm, obviously the two bushes that hold the anti roll bar in place need to be for the thickness of yours. Maybe I should use the word "diameter" not "thickness".
-
Try this link. It's a picture from a manual, supposed to be Transit 92+. http://www.ok.eclipse.co.uk/pictures/transit/92onlightschem.jpg
-
The DVLA website does cover this, you need to write a letter and ask them for a VIN. See this link: https://www.gov.uk/vehicle-approval/individual-vehicle-approval You write to: K and R DVLA Swansea SA99 1ZZ
-
Try these links on eBay. https://www.ebay.co.uk/itm/151286890101 https://www.ebay.co.uk/itm/153525812726
-
Automotive electrics - best source material/place to learn?
Sparepart replied to Martin Kol's topic in Electrics
You ask "how do people learn this". IMO we don't normally act pro-actively as you are seeking to do. We tend to "learn" by fixing our own problems when they arise or as part of implementing a "project" like building a whole car or making an upgrade to an existing one. Much depends on your background knowledge of electricity in general, did you study Physics in school, do you understand the basics of simple circuits, OHMs law, relays, electromagnets etc.... if not then why not pay around £50 for a kids educational kit on "Electricity and Magnetism". Have fun as you put together basic circuits, understand how electricity behaves. Then get your hands on the circuit diagrams for the various parts of a cars electrical systems, youll find these on line, in loads of places, concentrate on a bit at a time, for example, how is the ignition spark generated ?, how does a light flash, why does a fuse melt ?. Then, when, in the real world, you face a real problem, like the rather general question "The guages don't work" you will instinctively know how to go about looking in more detail at the various wires and sensors that might be involved. This is just my advice for what it is worth. -
Oh! you just posted the fact it was fixed while I was writing this ..... so no need to read it. (post deleted)
-
Is it possible to remove the main motor from the housing and see if there is a bolt or fixture that is hidden, i.e. goes into the solenoid from within the housing. I guess if there is then a special spanner might be needed ...just a thought.
-
You want thoughts or comments, well, before you get involved with a Robin Hood sevenesque vehicle you will have to forget about "conformity", each car has been assembled from a kit of parts that required a great deal of fettling by the builder. These cars were not bolted together over a few weekends from carefully crafted parts that were guaranteed to fit with each other, like you might expect from Westfield or Caterham, but then they did not cost anywhere as much as a "top end" kit either. Even in your old days with Minis, the design, and fit of bits and pieces was guaranteed off the shelf and there was a Haynes manual for reference. With a Robin Hood you will enter a new world of engineering challenges. At least by buying an already assembled example which has an MOT etc you will save much toil. This is balanced by little knowledge of how well the builder managed to overcome the assembly challeges. So my thought is, think about this before you invest hard earned cash, owning a Robin Hood is a challenge that many find very rewarding, including myself, I also like Marmite.
