maca
-
Posts
379 -
Joined
-
Last visited
-
Days Won
15
Content Type
Profiles
Forums
Events
Store
Community Map
Everything posted by maca
-
Welcome to the club Tom. The 2B is one of the strongest chasses kit cars. A lot heavery than the GBS Zero. It all depends how much you want to spend to put the 2B in a good state to get through the IVA. I would think that it would be a lot less than buying a Zero chasses base kit. £3000 + If you have the Reg No. from the donor vehicle you maybe able to get a V5 for it from DVLA. We can all talk you through what needs to be done to get it on the road. So lets see some pictures and then explane what needs attention. Regards Martin
-
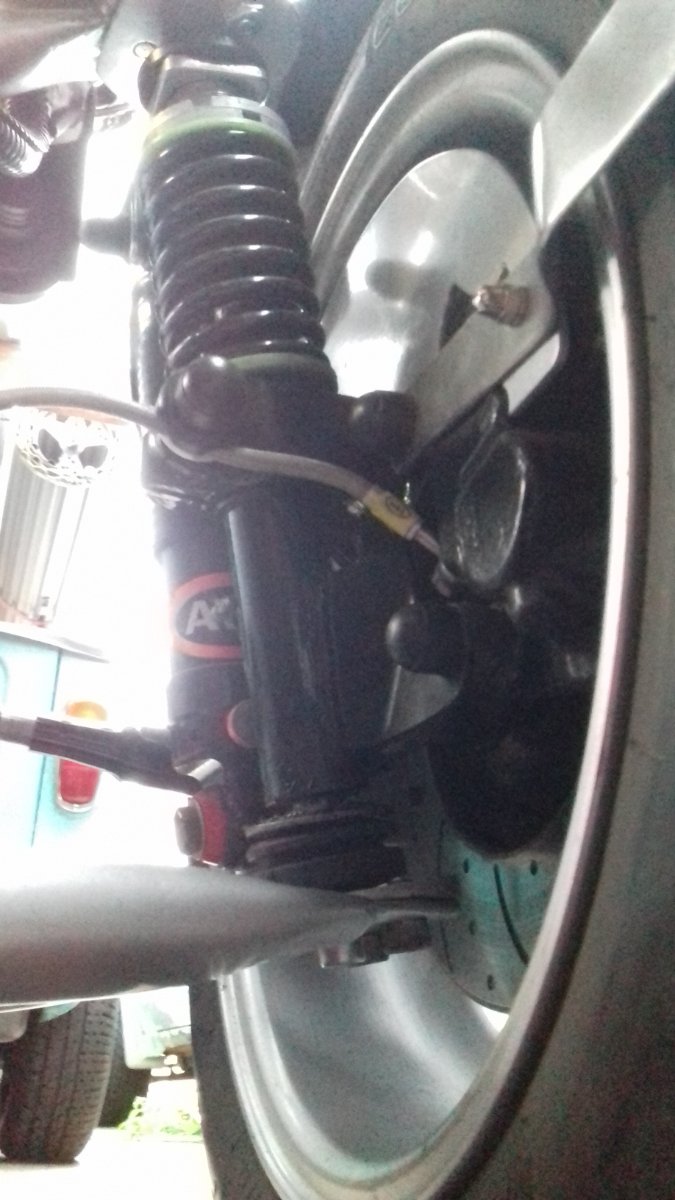
Sorry to say but it looks like you have not got a 2B. My car is a 2B with modified sliding pillar. https://nw.rhocar.org/identification.htm Cortina subframe S7 (Monocoque tub with ugly Cortina front suspension actually works quite well. The rear suspension can "knock" with the diff rotating slightly under load, and requires a torsion bar fitting to stop this. Again the cockpit is narrow with the usual seat problems)

-
Build vidieo 5
-
Check that your relays are working correct and not sticking on???
-
Hi Mick, Sorry I was getting a bit ahead of myself you can change Valve guides by pressing or tapping them out. Then fit new guides in the same way, but you may have to cut the valve seat to re-align to the new guide. Then lap in the valves in the normal way. Have a look on you tube. Unless they are very worn and the engine is burning lots of oil then leave them or fit new valve seals. Regards Martin
-
I believe it is the valve seats not the valve guides, so unless you have machining use then I would say no. Engines made before 1989 may need modifying to run on unleaded fuel. The process involves the machining the old exhaust valve seats in the cylinder head out. New hardened inserts are then pressed into these pockets having an interference fit. It is also normal to retard the ignition timing. Unless you are building a high performance engine then put good fuel in the tank and enjoy your driving the cost out weights the work involved and will last for many years before it needs attention.
-
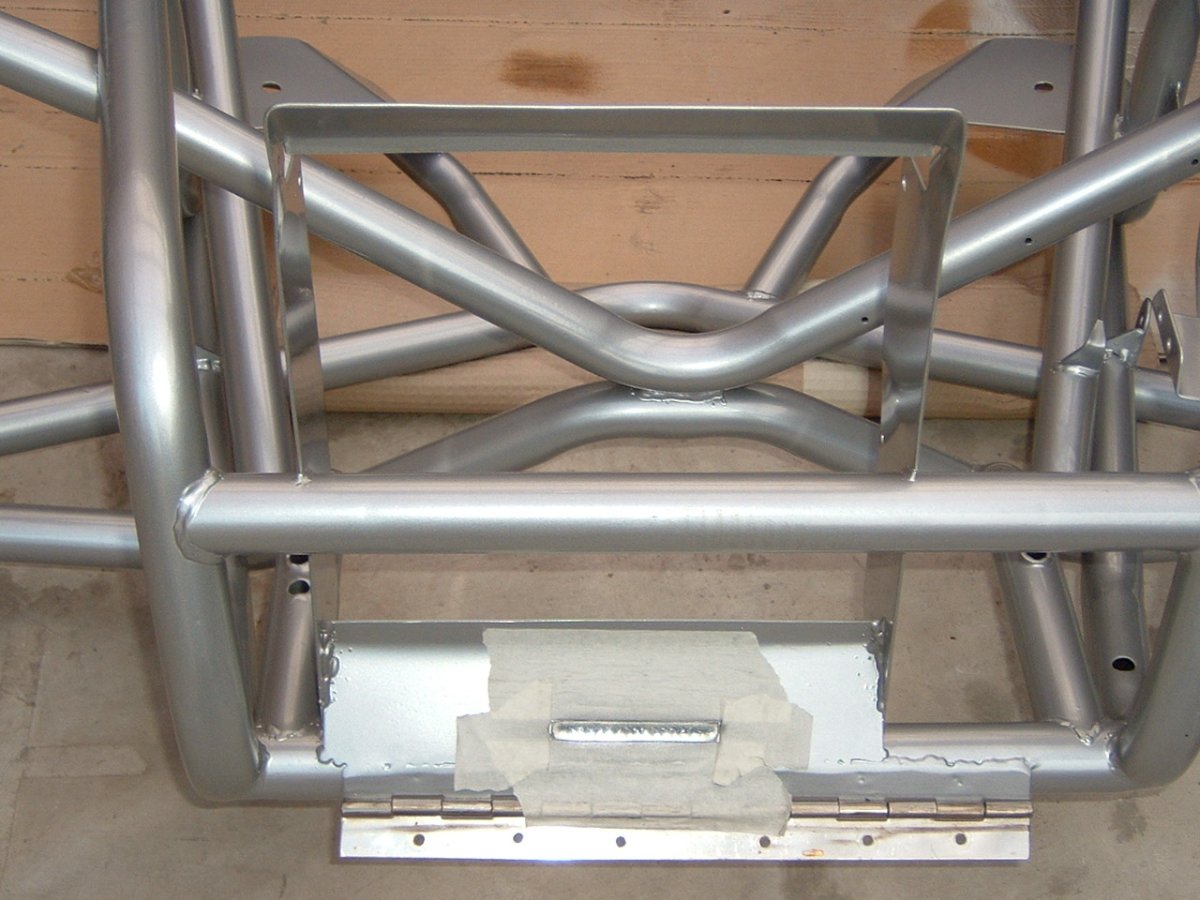
Form IVA-1C Question 3b. Position of stamped VIN on vehicle. On all vehicles other than North American vehicles, the VIN should be stamped into the chassis frame or body. Please state where this number is stamped into the vehicle e.g. under bonnet L/H side (viewed from the driver’s seat) or front chassis leg L/H side. As Stated mine was stamped (FRONT CHASSIS CROSS MEMBER) As long as you state the position of the VIN then it can be anywhere.
-
Hi Harry sorry to state this but as a Community user Under the rules you are not allowed to sell items. So unless you become a paid up member why ask members what ideas on prices? You just don’t want to put the nose and wings on for £20 and they are worth £100 or vice versa.... I understand that you are not selling at this moment but it appears a way around the fact in asking for prices.
-
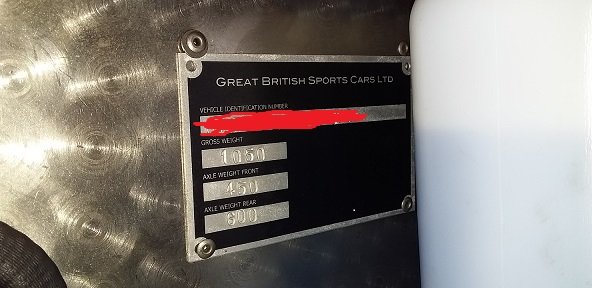
Ref. to IVA section 18 -Statutory Plates Also Note 2 The details I stamped on my plate where correct for a 2B I did not read Note 2 when I prepaired my car for IVA and passed 1st time.
-
Details as below. Gross Weight 1050 Axle Weight Front 450 Axle Weight Rear 600
-
If the horn push is NEG then connected to 86 on the relay then 85 needs a POS connection. I did have mine connected for spaced sound and together it used to sound great. I also had the changeover switch from standard horn to Air horn. The good old days of Pander Police Cars
-
I purchased a set of triple horns some 50+years ago. The best way to explan the wiring is that the compressor has a feed terminal top and bottom. If you wish to just have all horns to sound together then supply the bottom feed of the compressor from the relay pin 87 If you wish to have open sound of the horns then install the link switch at the dash board between bottom and top terminals on the compressor, this will give spaced sound when closed. ( This could be against the Law ) to have spaced sound horns. The relay is feed at pin 30 from battery poss. via fuse. 30 Amp 85 or 86 to earth the other side to horn push. The compressor needs a good earth.
-
Hope this may help when I went about registering my car after IVA. I phoned DVLA and was told that it needed an MOT so had one and sent it in with all the paperwork attached. (Pinto 1993cc) Engine Cost of Tax as below. Regards Martin Vehicle tax reminder.pdf
-
DCOE Carburetors Low Speed Circuit Tuning It is most important to verify all linkage and levers are installed without binding and the linkage opens to full throttle and is allowed to close to the Idle Speed Screw. This is the number one and two reasons for tuning errors, improper linkage installations and over tightened linkage nut, causing binding in the linkage assembly. The Individual Runner carbs, DCOE, have individual Idle jets and mixture screws for each barrel. They also have an additional air bleed screws and lock nuts. This is not used for idle adjustment or idle quality. The settings for these screws should be closed. Standard DCOE Settings: Speed screw ¼ to ½ turn in after contact with lever maximum. Mixture Screw 1 turn out from lightly seated. “Lean Best Idle” Procedures After confirming the linkage allows the throttle lever to seat against the Idle Speed Screw. Back off the Idle Speed Screw, then turn the screw in until it contacts the throttle lever and turn it in ½ turn. Turn in the Mixture Screw in until it “LIGHTLY” seats, then back it out 1 full turn. Loosen the 8mm wrench size nuts on the “air bleed” screws, turn in the air screws until it seats then tighten the nut. a. Start the engine, it will run slow and like a tractor. As long as it will stay running, the idle speed is not important at this point. b. First, turn in the mixture screw until the engine runs worse, then back out the screw ¼ turn at a time. The engine should start to smooth out. Continue to back the screw out ¼ turn at a time until the screw does nothing or runs worse. Then turn it back in to the point where it ran best. You want to tune the engine by sound. Adjust each mixture screw to the best, fastest and smoothest running point. Do this procedure with each mixture screw. c. Now you may adjust the Idle Speed Screw. It should be sensitive and only require ¼ turn in or out to achieve the idle speed you like. d. These carbs are commonly used in pairs, this makes the synchronization important, be sure to bring the high flowing carb down to the low flow carb. Then bring them both up to “proper” Idle speed. The Idle Speed Screws are not opened more than ½ turn in. e. After synchronizing multiple carbs, reconfirm steps b. c. & d. “Simple Rules for Calibration” If your mixture screw is out more than one turn like 11/2 turns then your idle jet is too lean, go up one half size on the Idle jet. If you mixture screw is not out one full turn, something like only 1/2 turn out from seated then your Idle jet is too rich, go down one half size on the idle jet. This is all based on the important fact that your speed screws are not open more than ½ turn if they are then that is also an indication that you have a lean Idle circuit. You are cheating by opening the throttle plates and exposing additional progression holes in the transition. Pump By-pass Valve: The pump by-pass valve is designed to allow fuel into the pump circuit and when depressed, by-pass a percentage (hole on the side of the valve) of the fuel delivered to the accelerator pump nozzle/jets. We have included the zero by-pass valve in our jet kit. This will deliver all of the available fuel to the engine and not by-pass fuel back to the fuel bowl. This will increase the duration and volume of the pump shot with the original pump jets. To decrease the duration and increase the fuel volume we have included in our jet kit the larger 55 pump nozzle/jets. This is for maximum fuel delivery from the accelerator pump circuit. The accelerator pump by-pass valve is located in the bottom of the fuel bowl, one is required per carburetor. DCOE Adjustment controls Tuning & Adjustment 1. Critical! Be sure for initial carburetor set up all air by-pass screws should be in closed position. These are not commonly used in standard carburetor adjustment. 2. Set the idle speed screw at ¼ to ½ turn in after contact with throttle lever. When doing multiple carburetors all linkage should be disconnected. All carbs should be bench adjusted to same setting. 3. Set the idle mixture screw to one turn out form lightly seated. When checking the seated position to make only light contact with seat, aggressive seating will damage needle and seat of carburetor, 4. Start engine as long as engine starts and runs do not set up idle speed first. First adjustment if possible should be to find smoothest idle with each mixture screw on all carburetors. Some prefer to do one barrel of each carburetor then come back and do the second barrel 5. After preliminary lean best setting of idle. Check carburetors for synchronization. Commonly done by checking lead or front barrel of each carburetor. 6. You will always want to bring high flow carburetor down to match the low flow carburetor. If this cannot be done you will need to recheck bench assembly for binding throttle in high flow carb. Once you have matched both carburetors you will need to set the idle to the desired idle speed setting. This will be done by adjusting both carbs up or down the same amount and re checking for synchronization. 7. Make one last check of lean best (smoothest running position) idle on all mixture screws one last time. 8. Best idle should end up with the mixture screws at or near one turn off seat. Check rule of thumb for idle jet selection in Weber basic idle adjustment instruction. REDLINE 1225 W. Imperial Hwy Brea, CA 92821 1-877-405-4345 REDLINE is a division of WORLDPAC The REDLINE Difference www.REDLINEWEBER.com e-mail redline@redlineweber.com Home
-
Thank's so much a lovely Read!!!
-
Hammer Price:4,250 GBP
-
Checked on https://www.i-bidder.com/en-gb https://www.i-bidder.com/en-gb/auction-catalogues/mathewsons/catalogue-id-matthe10012?archiveSearch=False&page=2 Lot 69 Sorry to late to find the price it sold for somewhere between £4250-£6000 is all that I can find out now. Regards Martin
-
LOT 136. Sold £4650
-
Found another @ £24.99 eBay item number: 264171044143
-
eBay item number: 154199029062 This is the one with the push on terminals.
-
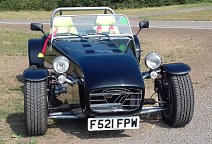
Well done Neal or should I say "Nick" Nick Hammond completed his Caterham Seven after two years, sneaking into his garage for a couple of hours in the evening after work and some extra time at the weekend. I was lead to believe that you built a GBS Zero. How wrong could he have been? Only hope he can get the facts right if he writes another artical and tell him to at least get your name correct and car make!
-
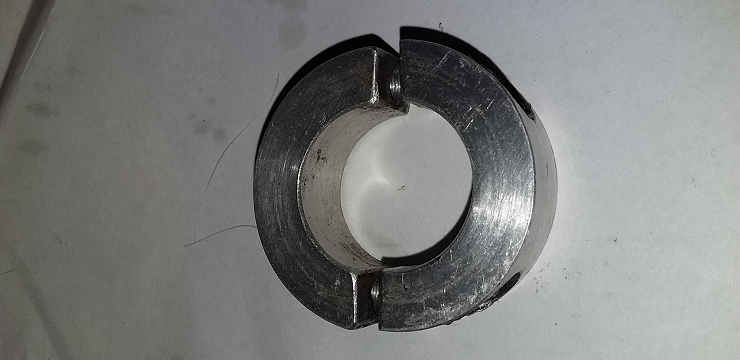
Hi Lee Have some rack clamps made to stop the rack before the end of travel. Approx sizes 38mm O/D 22mm I/D 13mm wide.
-
Few Questions Did the machine shop have the pistons at the time to bore to? Have you asked the machine shop to change the rings supplied? It maybe that the ring need gapping to the finished bore. Pistons are normaly supplied complete with rings.
-
Hi you will find that prices have gone up since I did mine in 2017. Well done on the IVA Pass. Martin